This is for the Service desk to complete user offboardings.
Please CC Maria Brar and Santosh on all comms.
Nura Bio – User Offboarding WI
There are two stages of a Nura Bio offboard
Stage 1: Initial Access cut (Completed as soon as user is terminated. Completed at 5pm by default)
Stage 2: Remainder of offboard (This part is scheduled later)
Table of Contents:
Stage One:
Cut M365 User Access: Steps 1 – 13
Box: Steps 14 – 16
Zoom: Steps 17 – 19
NAS Access: Steps 20 – 23
Stage Two:
Sharepoint / OneDrive / M365: Steps 25 – 43
Nura Bio – User Offboarding WI
There are two stages of a Nura Bio offboard
Stage 1: Initial Access cut (Completed as soon as user is terminated)
Stage 2: Remainder of offboard (This part is scheduled later)
Stage One:
1. In an incognito tab, log onto portal.office.com with the Office 365 Admin account (registration@nurabio.com) credentials provided in PWState.
2. Navigate to the Admin portal.
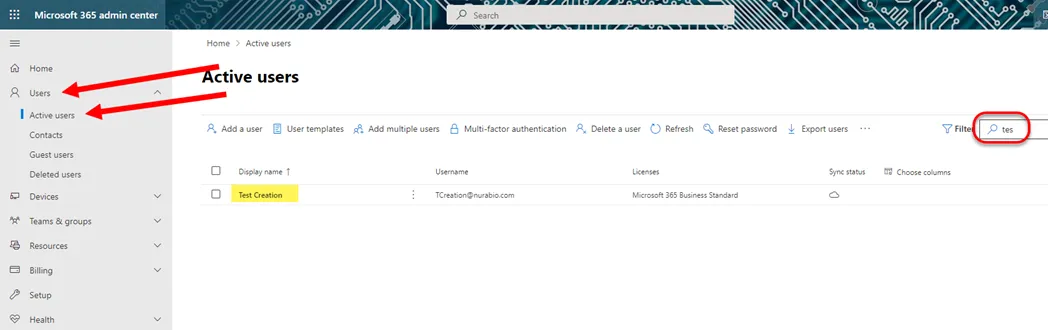
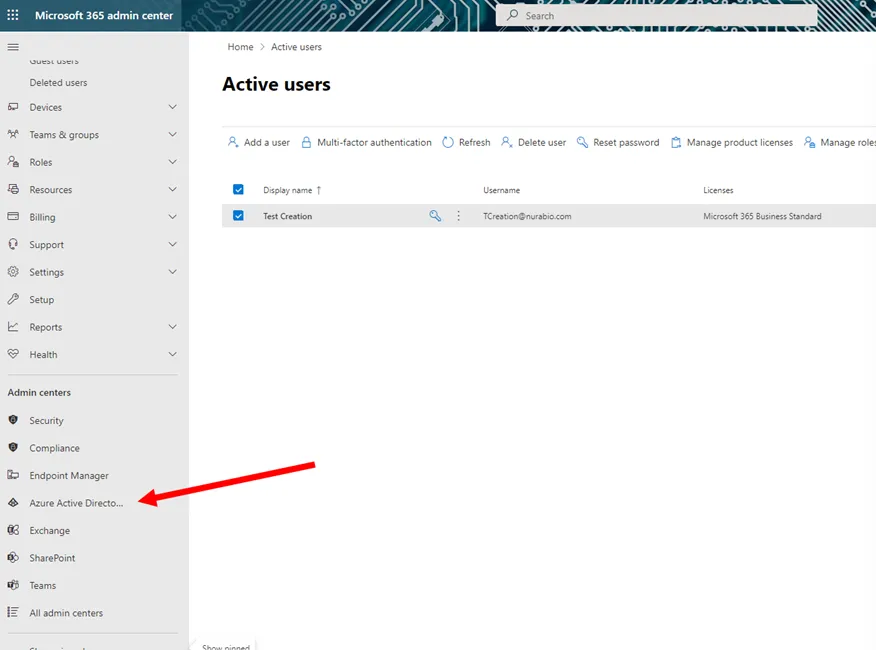
3. On the left-hand side, select Users > Active Users. Then search for the requested terminated user.
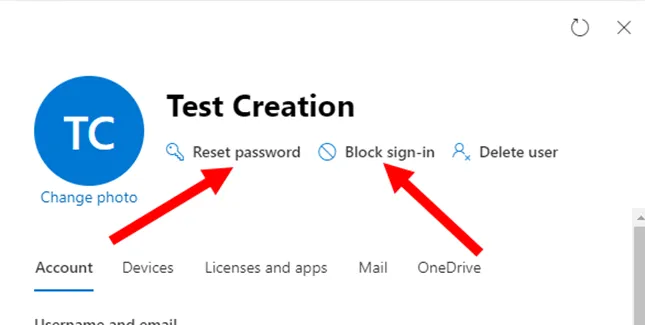
4. Reset the user’s password to: T3rm!n@tedUser4$ . Then select Block Sign-in.
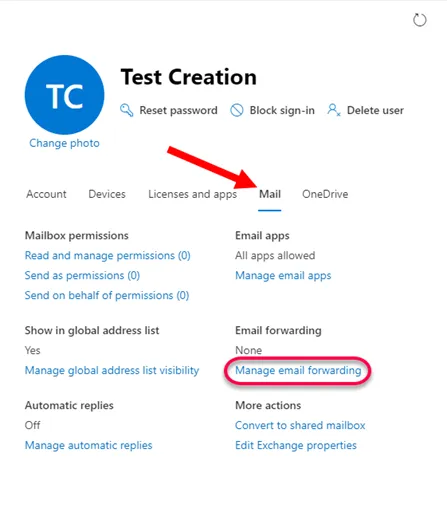
5. If an email forward is requested. Select the Mail tab, then Manage Email Forwarding.
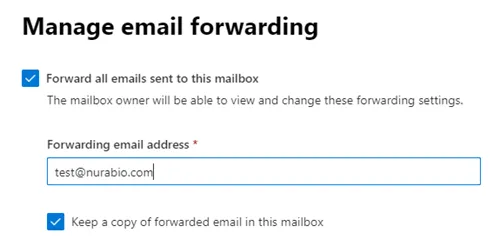
6. Update the forwarding address to the requested in the offboarding form/ticket. Ensure that “Keep a copy […]” is selected. Hit Save.
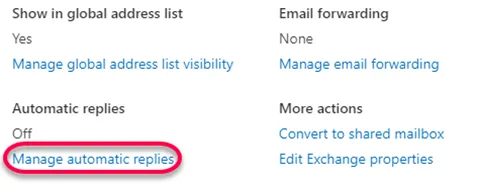
7. Back on the terminated user’s profile, Select Automatic Replies. Update it with the following. Ensure to update reply in both fields, then hit save changes.
Hello,
I am no longer with Nura Bio as of [DATE] and unfortunately, cannot answer your message. Please direct all future inquiries to [MANGER NAME], [MANAGER EMAIL]. They will be happy to assist you.
8. Navigate to the Azure Portal on the left-hand side of the page.
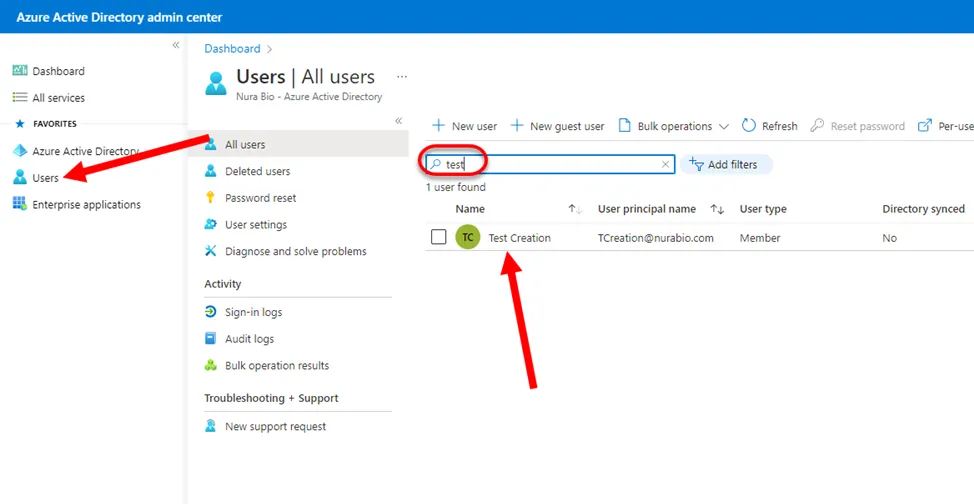
9. Select Users on the left-hand side. Then search for the requested terminated user.
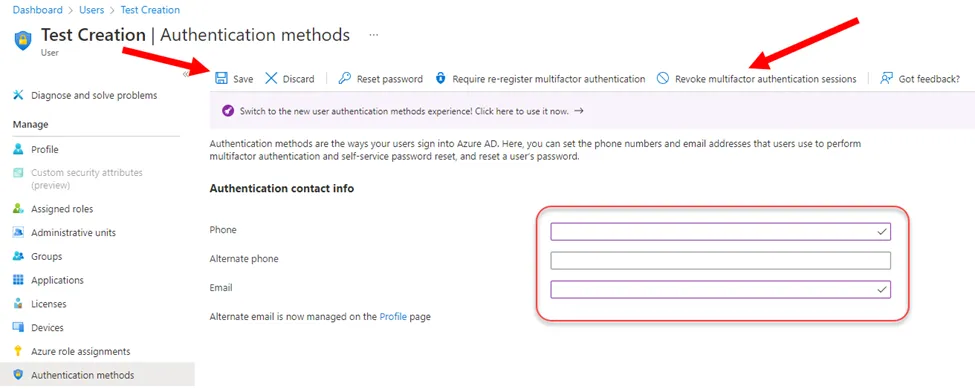
10. From the User’s Profile, select Authentication Methods.
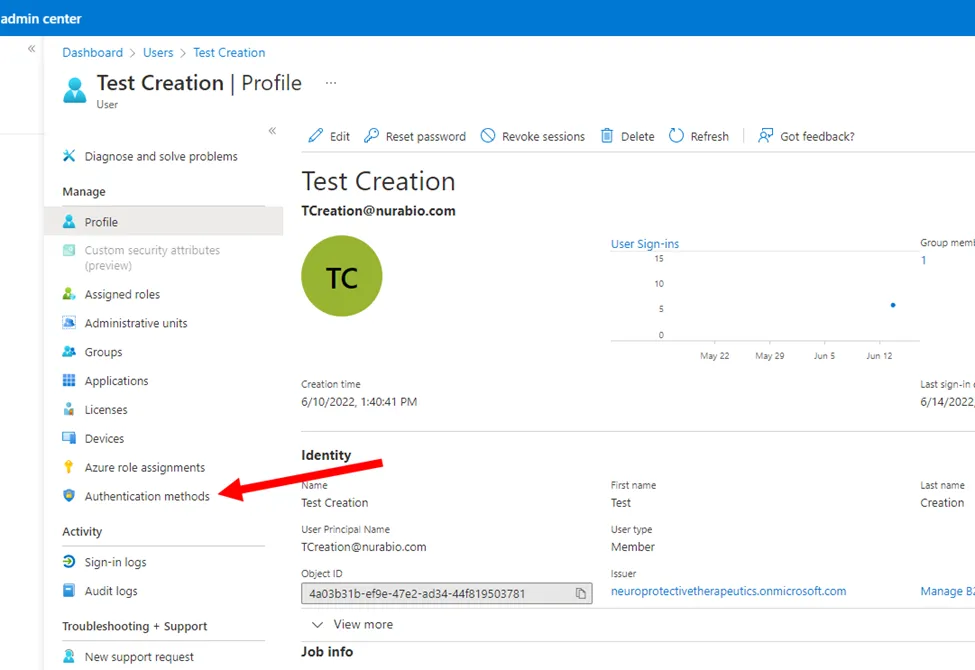
11. Remove the information in all fields, hit Save, then select Revoke multifactor authentication sessions.
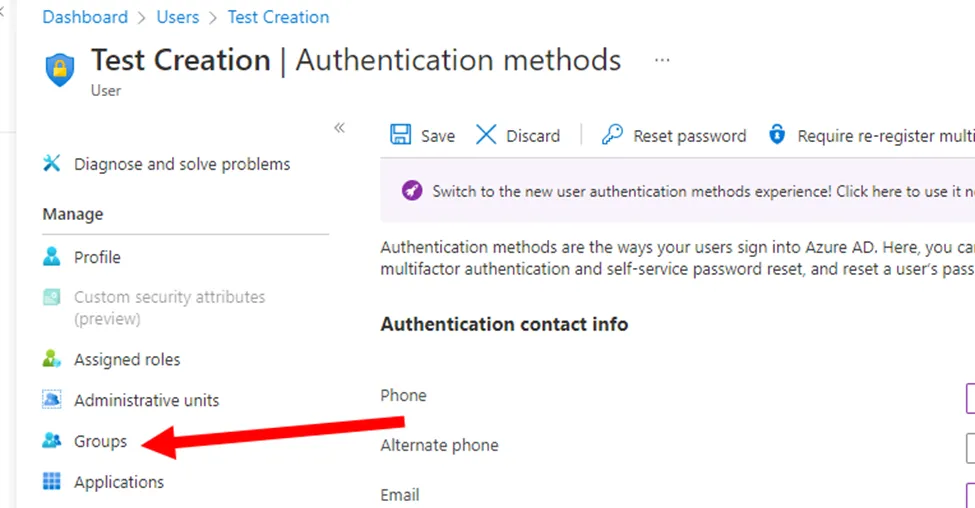
12. Once revoked, select Groups on the left-hand side.
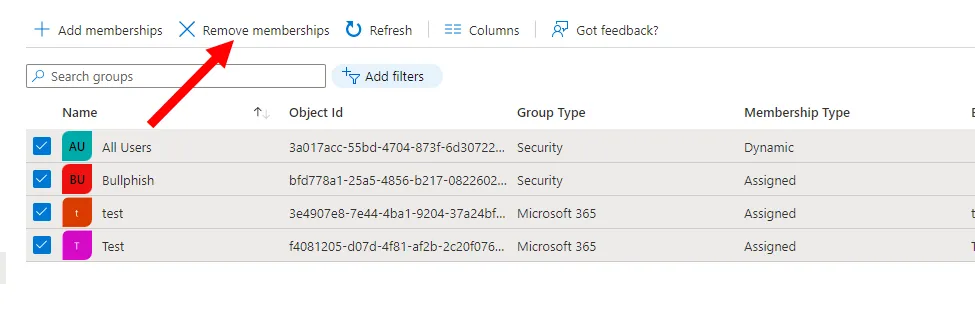
13. Select all groups, then Remove Memberships. (Note removed groups in ticket)
14. **Unless requested otherwise, always transfer to manager** Navigate to https://account.box.com/login and log in with the provided credentials in PWState (registration@proneurotech.com). Select Admin Console on the left-hand side.

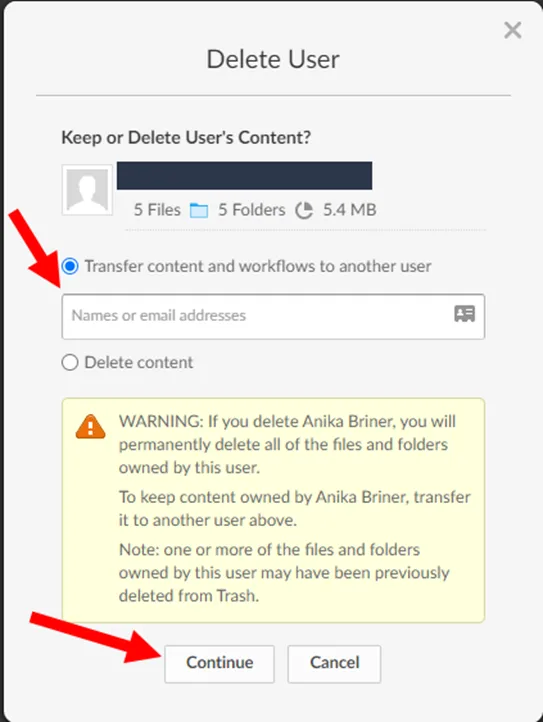
15. Select Users & Groups, search for the terminated user, then click on the three dots. From here select Delete.
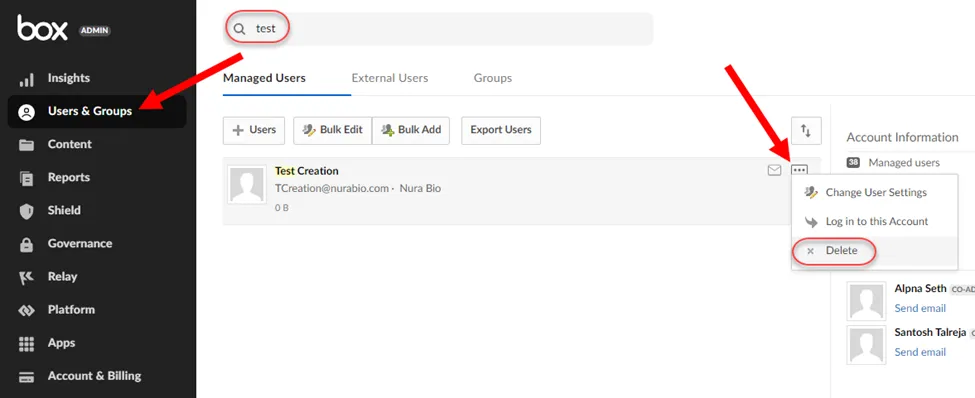
16. Input the terminated user’s manager’s email address into the “Transfer content” field. Hit continue once complete. IF there is noone available to transfer the deleted account’s data to, please disable the account, not delete.
17. With Box completed, navigate to https://zoom.us/signin and log in with the provided credentials in PWState. (centrexit@nurabio.com)
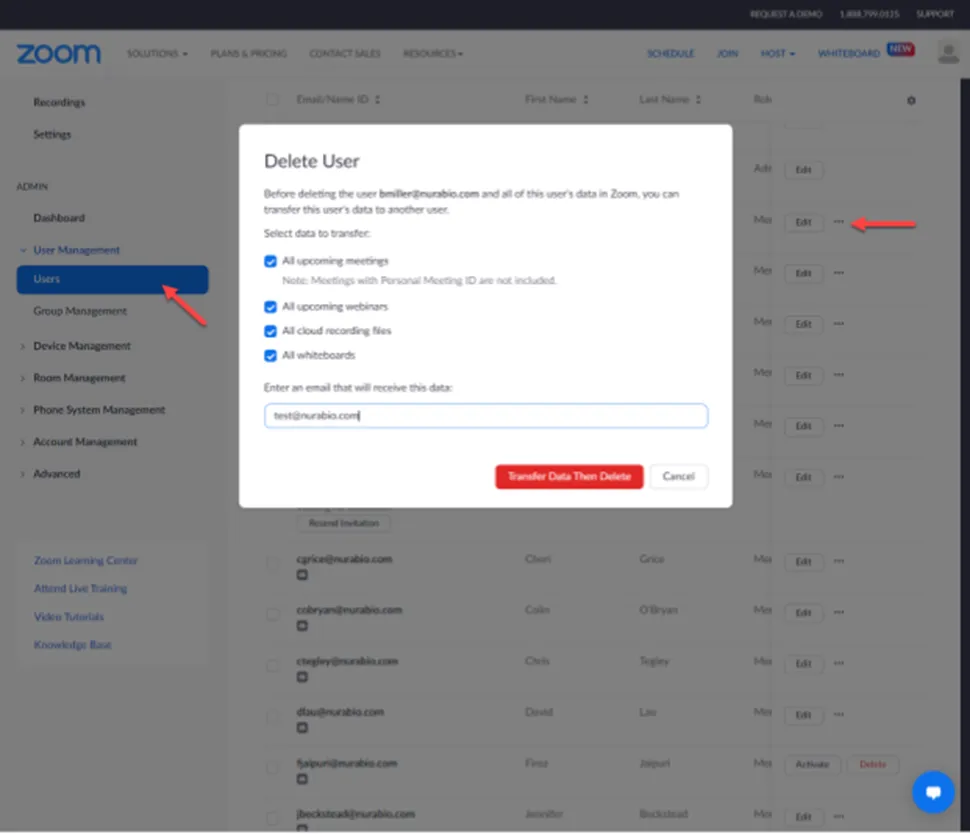
18. Under User Management, select Users. Search for the terminated user, and select the three dots on the right-hand side. From here, click Delete.
19. Select all checkboxes and input the terminated User’s manager to transfer data. Then hit Transfer Data Then Delete.
20. On Screenconnect, navigate to Nura’s print server, “NURA-MJ0FHDQJ” log in with the localuser account.
21. Open Chrome and navigate to 10.20.240.78:5000 the URL field. Log in with the provided credentials in PWState for ProNAS. (Nura Bio>Network Devices)
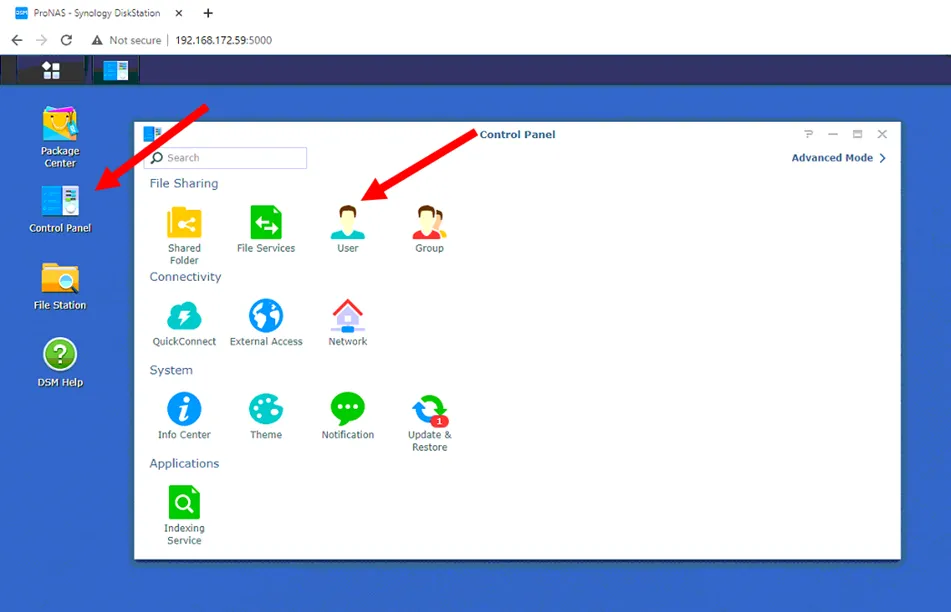
22. From here, select Control Panel, then Users. (Sometimes the terminated user is not listed)
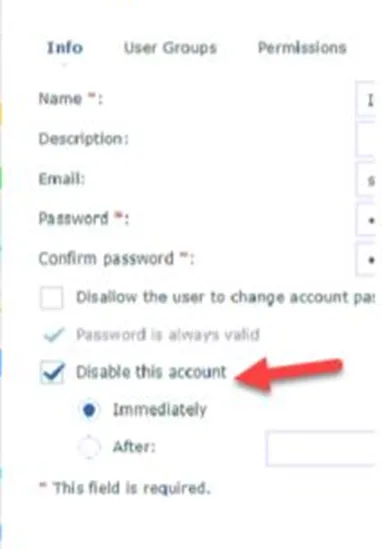
23. Locate the terminated user in the list. Double-click user to launch menu. Select checkbox next to “Disable this account” and select “OK”
24. Update the POC and ask to schedule a session to access the user’s machine remotely for Stage Two of offboarding.
The remainder of this offboard will be completed once scheduled with POC
Stage Two:
25. Once again, log into portal.office.com with the Admin credentials and navigate to the Admin portal. (You will need to unblock sign-in for this user)
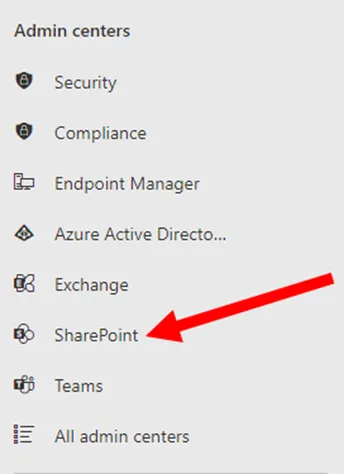
26. From the Admin Portal, select Sharepoint.
27. Under Sites > Active Sites, search for the Terminated Employees’ site.
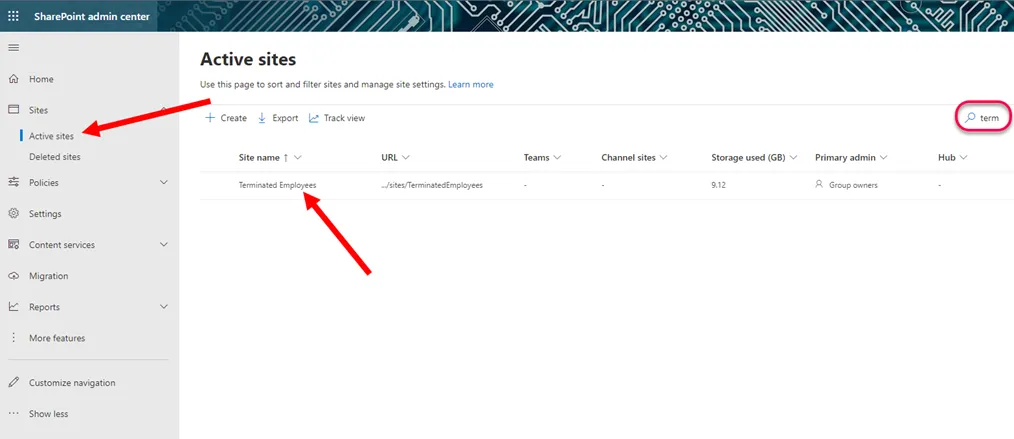
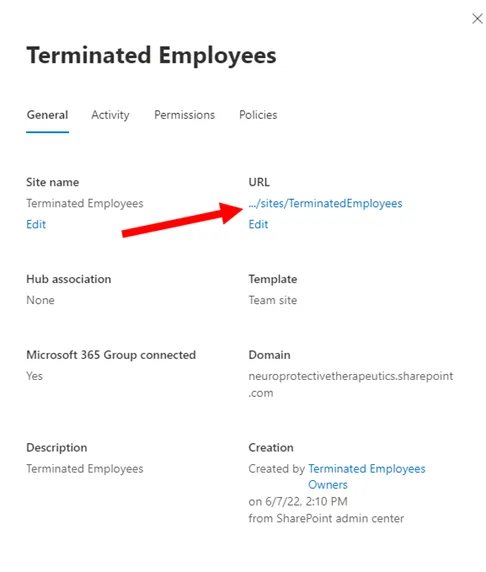
28. Select the URL to navigate to the Terminated Employees.
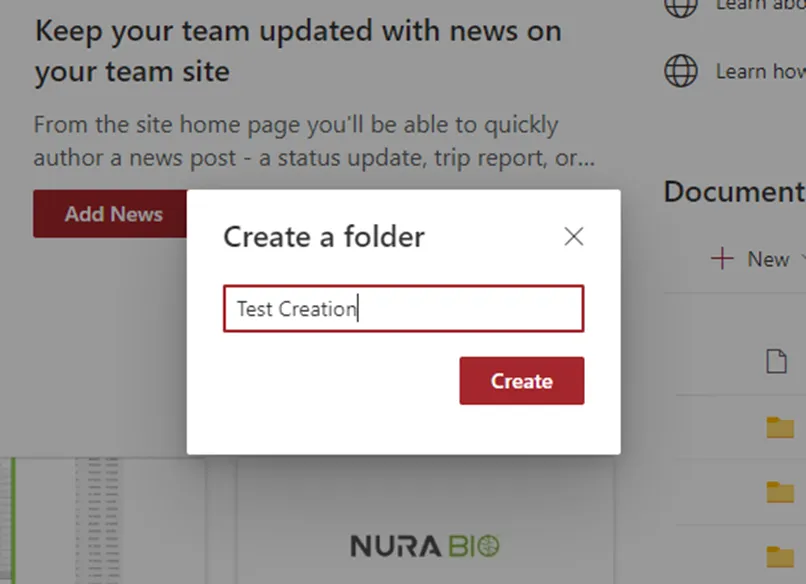
29. On the right-hand side select + New.
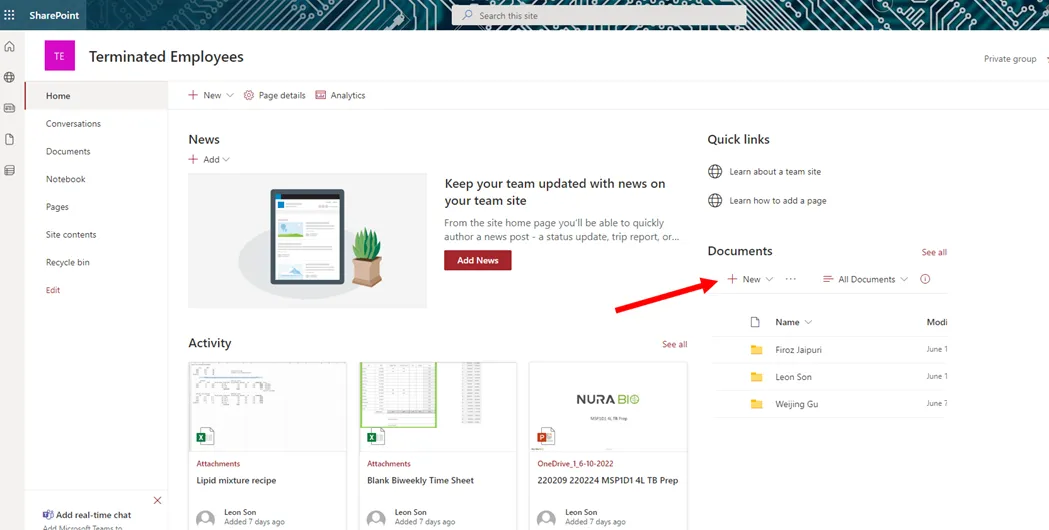
30. Create a folder with the terminated users first and last name.
31. Hover over your newly created folder and select the share icon.
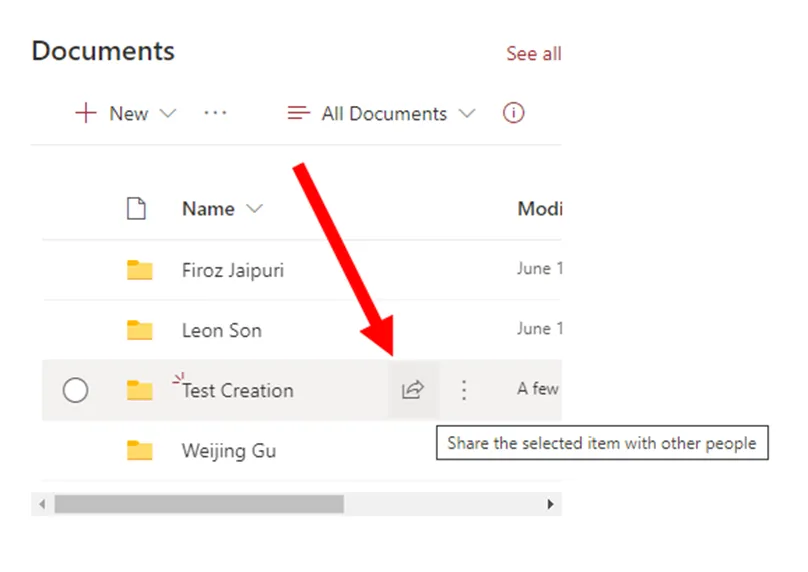
32. Verify the link you are sending allows editing, then add the terminated user and the requested manager in the field. Hit Send.

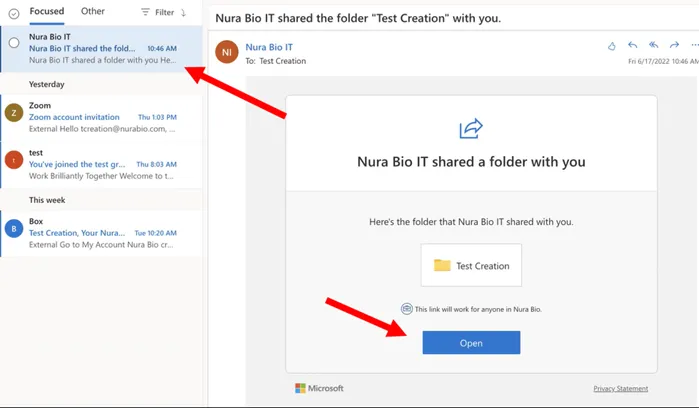
33. In an incognito tab, log in as the terminated user via portal.office.com, and navigate to the Outlook tab.
34. There should be a recent email to access the “Terminated Employees” Sharepoint site. Go ahead and select Open.
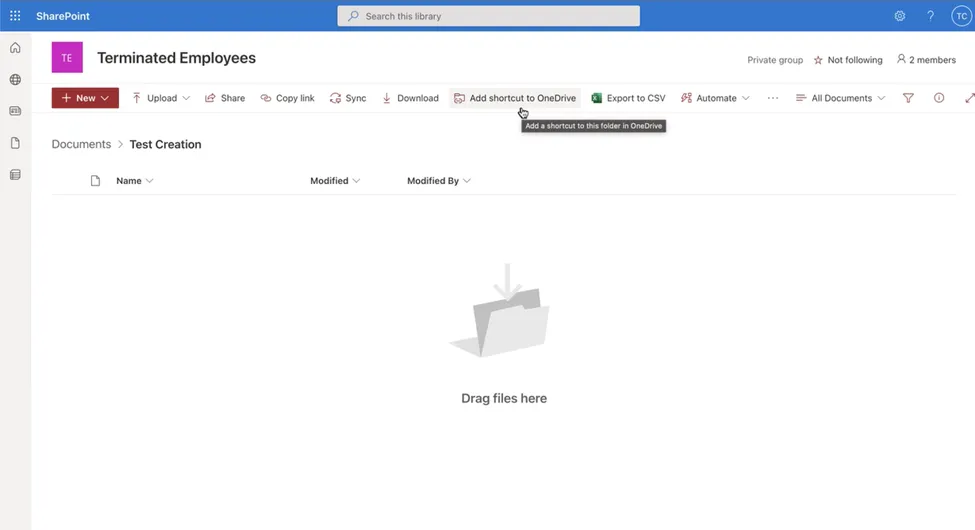
35. From the Sharepoint site, select Add shortcut to OneDrive.
36. Navigate to the terminated user’s OneDrive https://onedrive.live.com/about/en-us/signin/ and sign in.
37. Select all files except the recently created Sharepoint folder, then select Move to
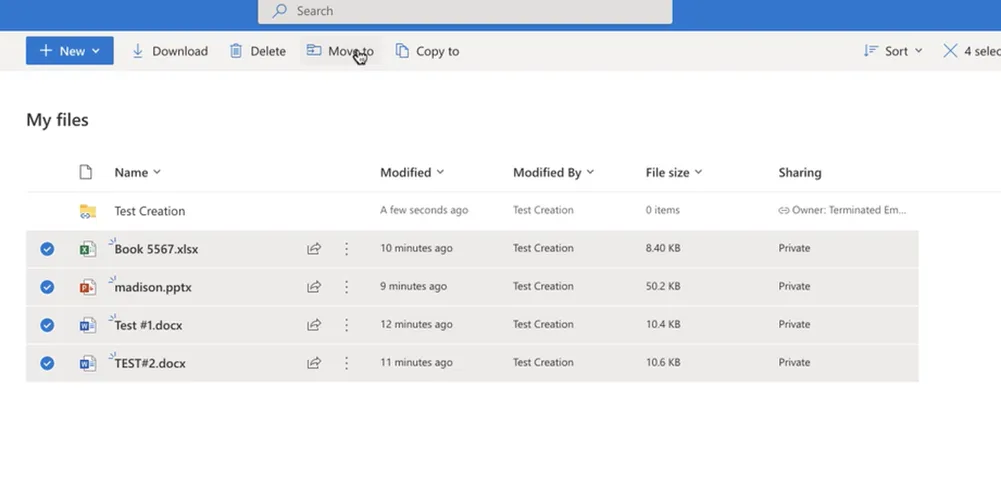
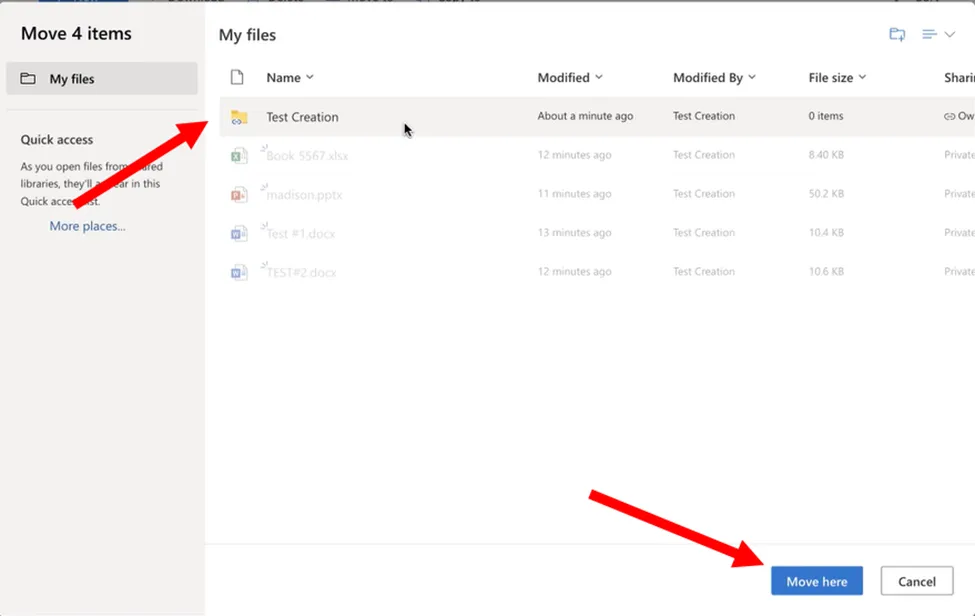
38. From the pop-up, select the newly created folder, and select Move here.
39. Return to the Admin Page within M365/portal.office.com. Re-disable the Terminated User’s profile.
40. Select Exchange on the left-hand side.
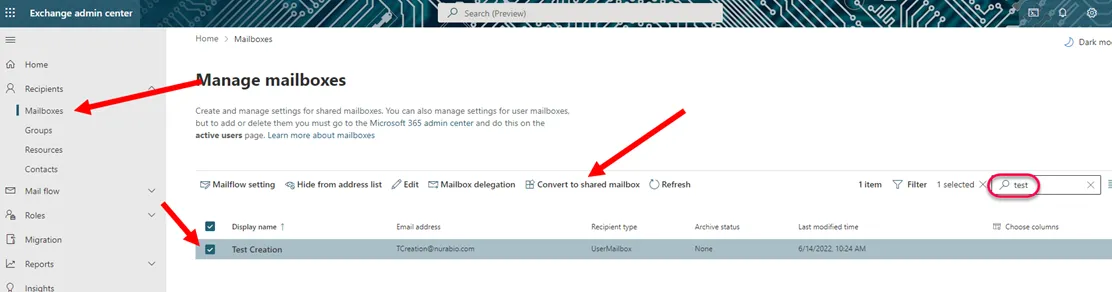
41. From Exchange, select Mailboxes then search for your Terminated User. Select the box next to their name then hit Convert to Shared Mailbox.
42. Once converted, return to the Admin Portal. Refresh your page, then search for your terminated user’s profile once more. Remove the user’s license(s).
43. Clear the user’s card from PaperCut by following these steps:
-
Launch papercut on the Management PC with the following creds on Chrome: credentials from 1Password
-
Select users and select your user. Scroll down to the following:
-
Clear this field and select “Apply”. 44. Once removed, updated the POC of completion and close the ticket.