1. Login to NAMG-FS1 via ScreenConnect.
2. Open up “Print Management”. You will have to know the location of the site, for example “Hemet”.

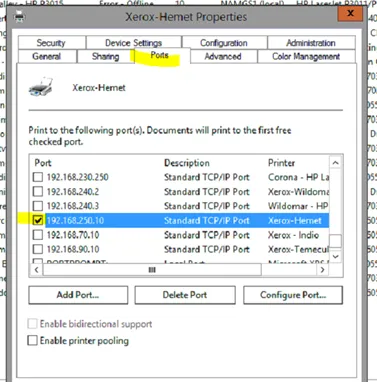
3. Double-click the printer at the site they need to scan from, go to “Ports”, and see what IP is being used.
4. Open Chrome, browse to the IP, and select “Address Book”.
5. Since they scan by user, it will be the scan folder that is set to the users Y: drive. If they don’t have one you will need to create one in \\NAMG-FS1\Scans\%location of user%
When making the folder, ensure the “Scans” account is added for explicit permissions.
6. Open the folder, and make a user folder, ensuring the “Scans” account has permissions to it as well.
7. After this, go back to the printer webpage and click “Add contact”.
8. Select “Network (SMB)”.
In the box that opens, fill out the following details:
* Nickname can be name of use
* IP address will be that of the NAMG-FS1 port, can be left default (139)
* Share is scans Just Scans
* Document path is: Foldername\username *EX: ParkSierra\test user*
* Login Name is: namg\scan
* Password can be found in PWState
Hit “OK”.
9. Get the full path of the Scan folder, in this example, \\NAMG-fs\Scans\Hemet\TEST.
10.Make sure that is set to the users Y: drive under profile in Active directory
11. Have user test Scan to email; a PDF should show up in the User folder.
Additional instructions for users who use days of the week when scanning:
1. Go to the printer webpage. Open one of the day contacts and note the share path. In this example, \\192.168.230.136\CRScans.
2. Connect to the user’s computer and map the path in Explorer or create a shortcut to the path on the desktop. Have the user scan to a day and verify the PDF shows up in that day’s folder.