Purpose:
Section titled “Purpose:”To train anyone who may need to use immyBot on how to perform this function
---
Scope:
Section titled “Scope:”Service Desk
---
Responsibility:
Section titled “Responsibility:”Provisioning owns ImmyBot and its documentation
---
Completion Criteria:
Section titled “Completion Criteria:”Successful tenant setup within ImmyBot
---
Records:
Section titled “Records:”Halo and ImmyBot itself
---
Steps:
Section titled “Steps:”- Open immyBot and navigate to the “Integrations” section of the sidebar
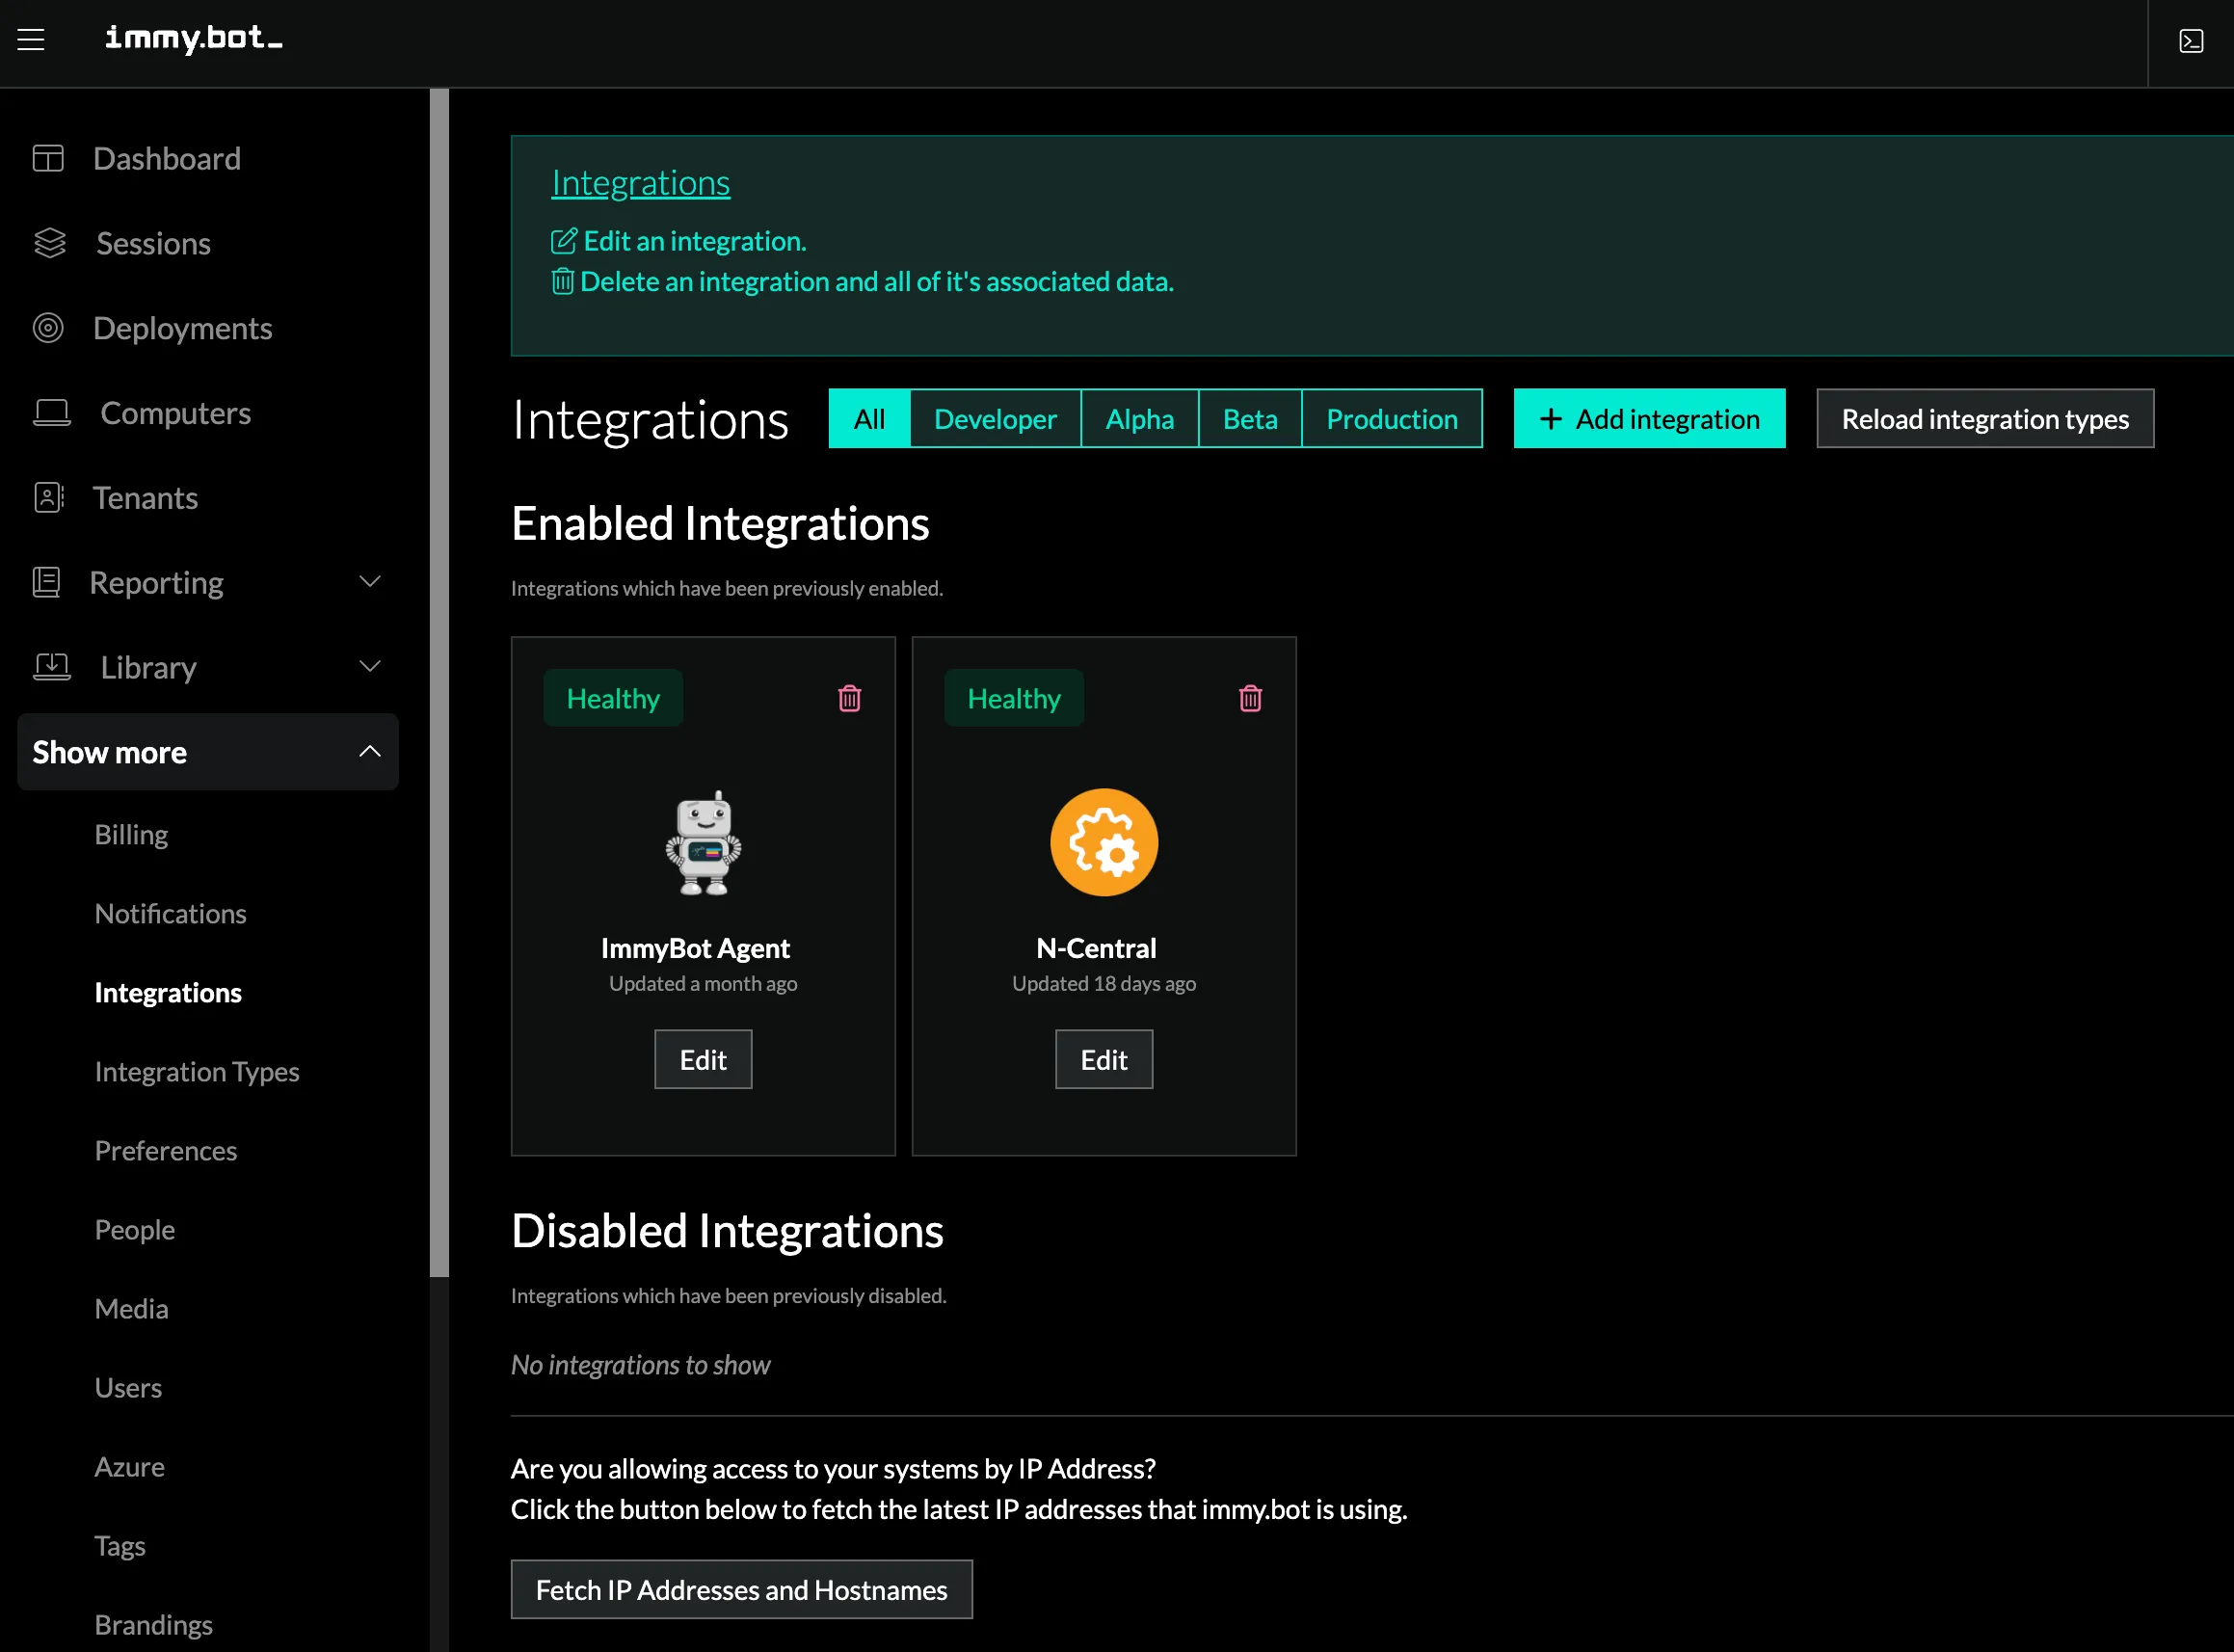
- Select the N-Central integration “Edit” button
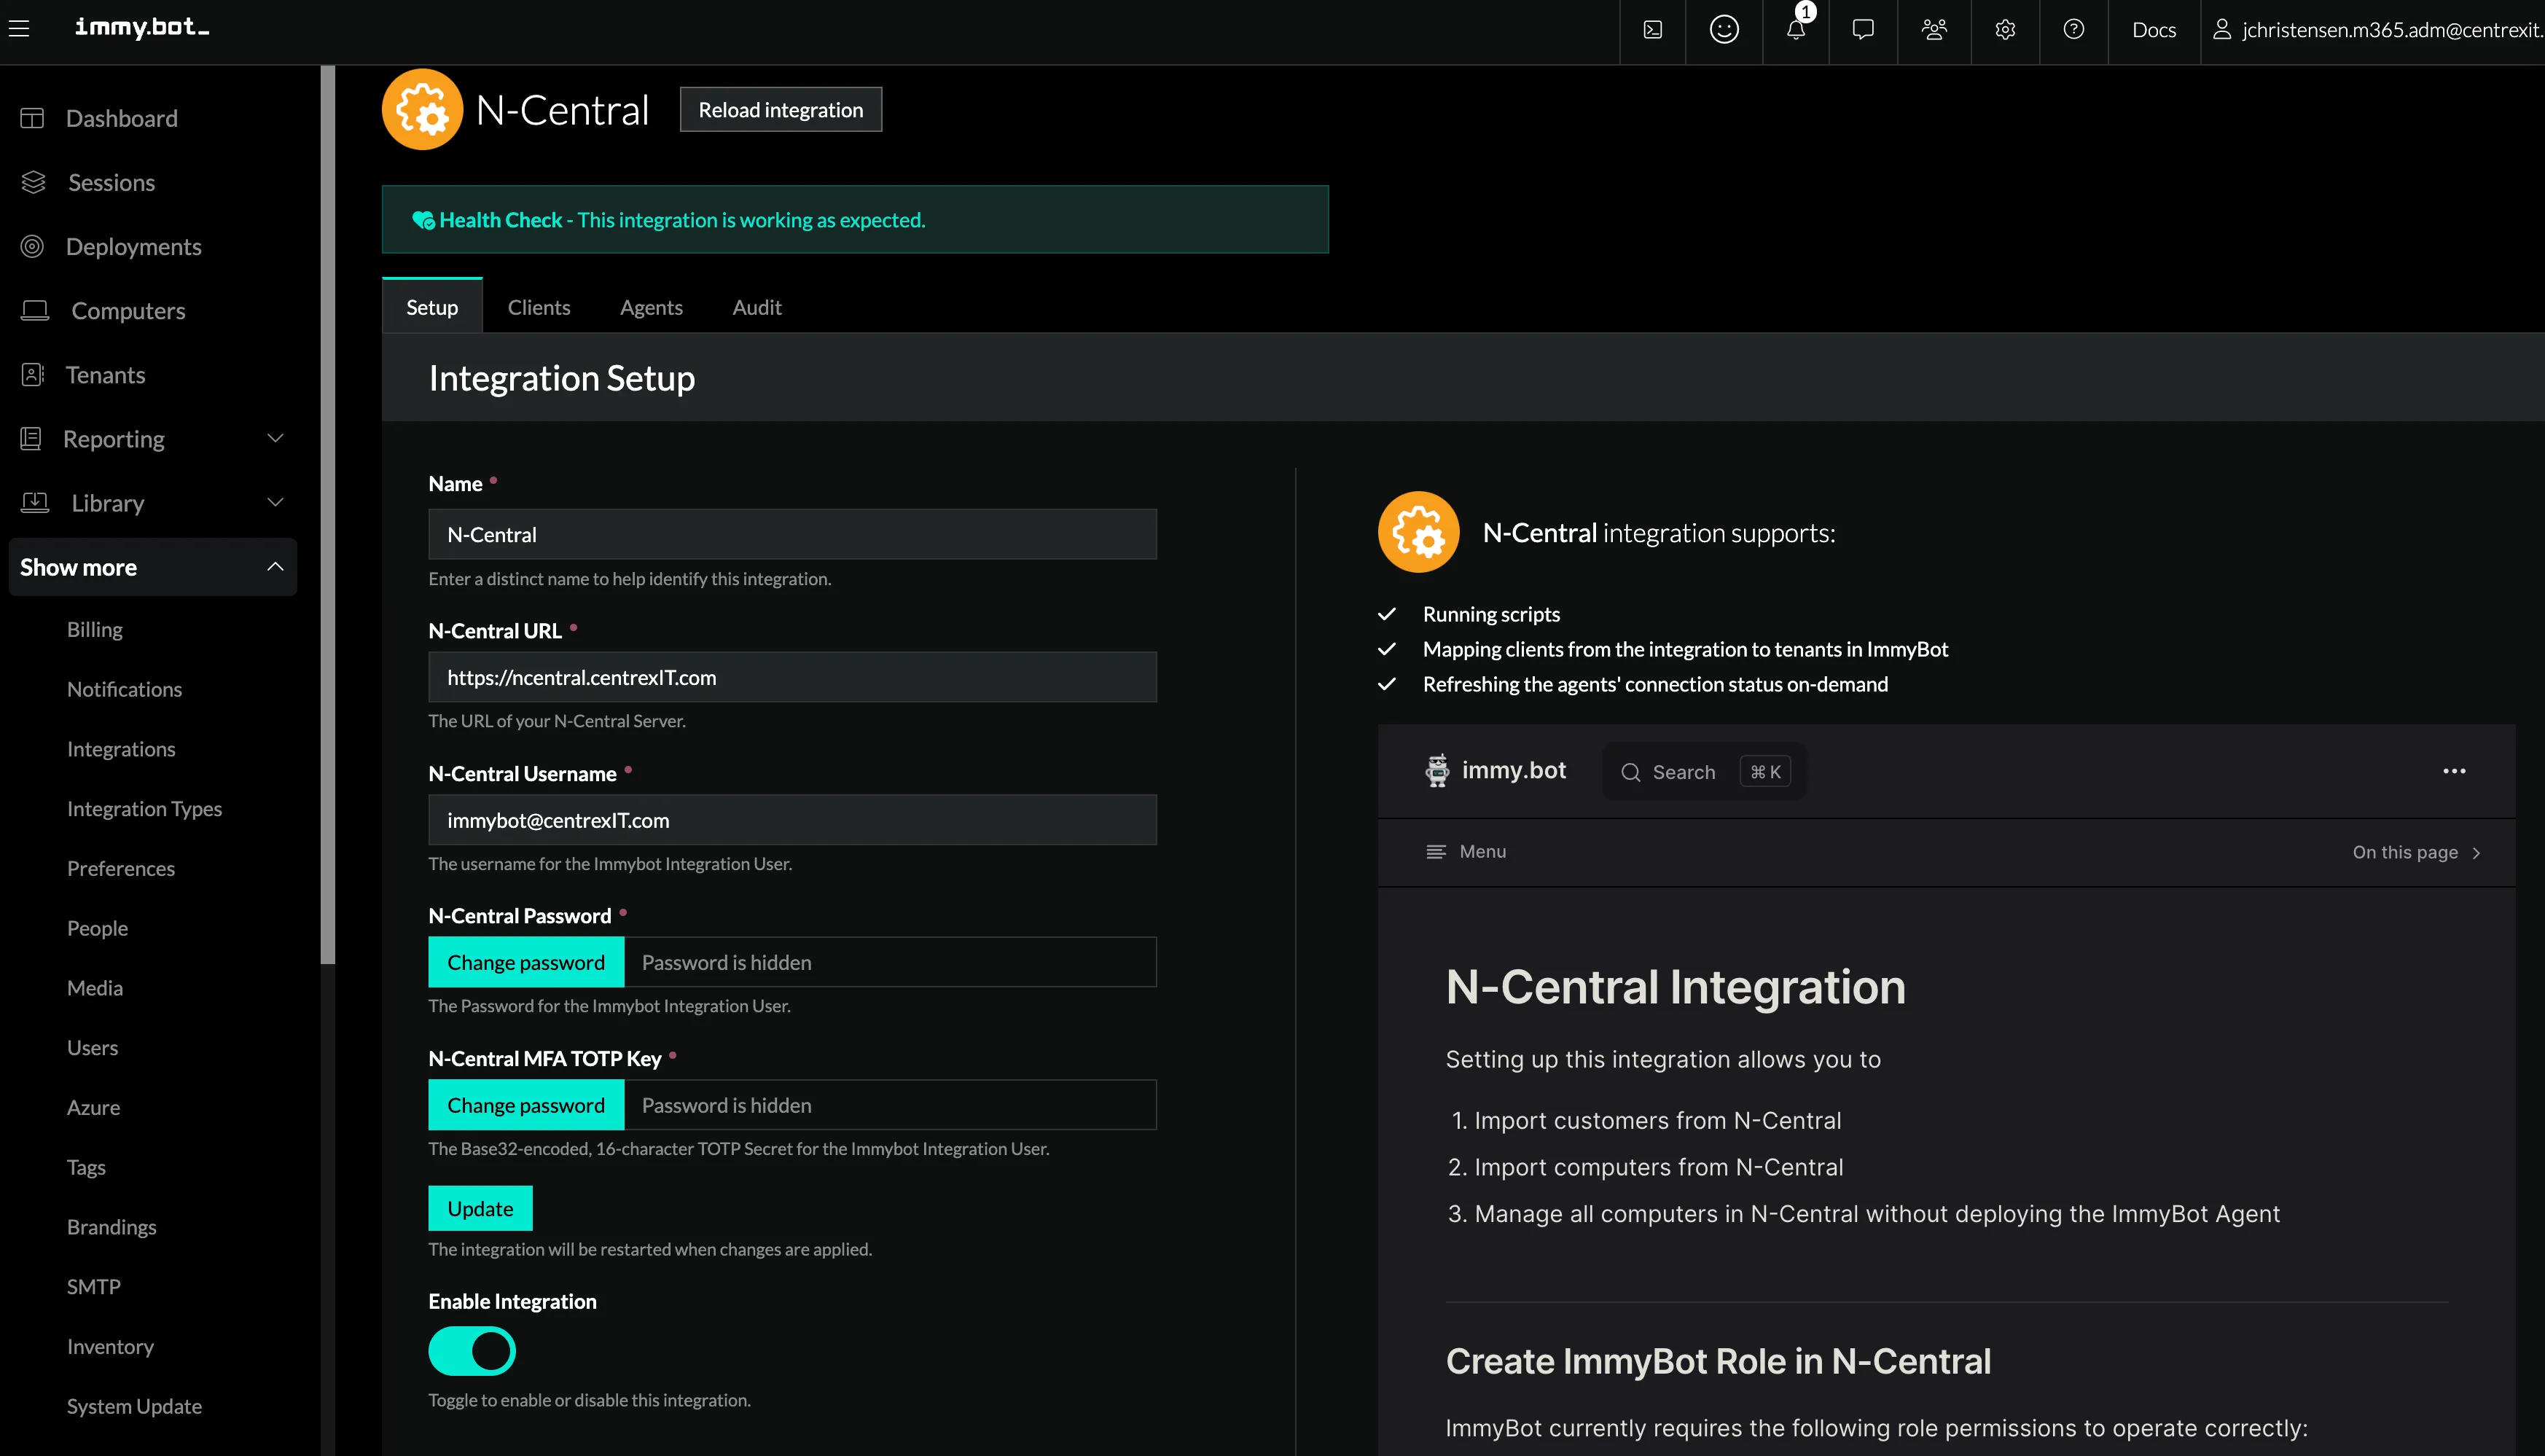
- Select the Clients Tab now that you are in the N-central integration edit view.
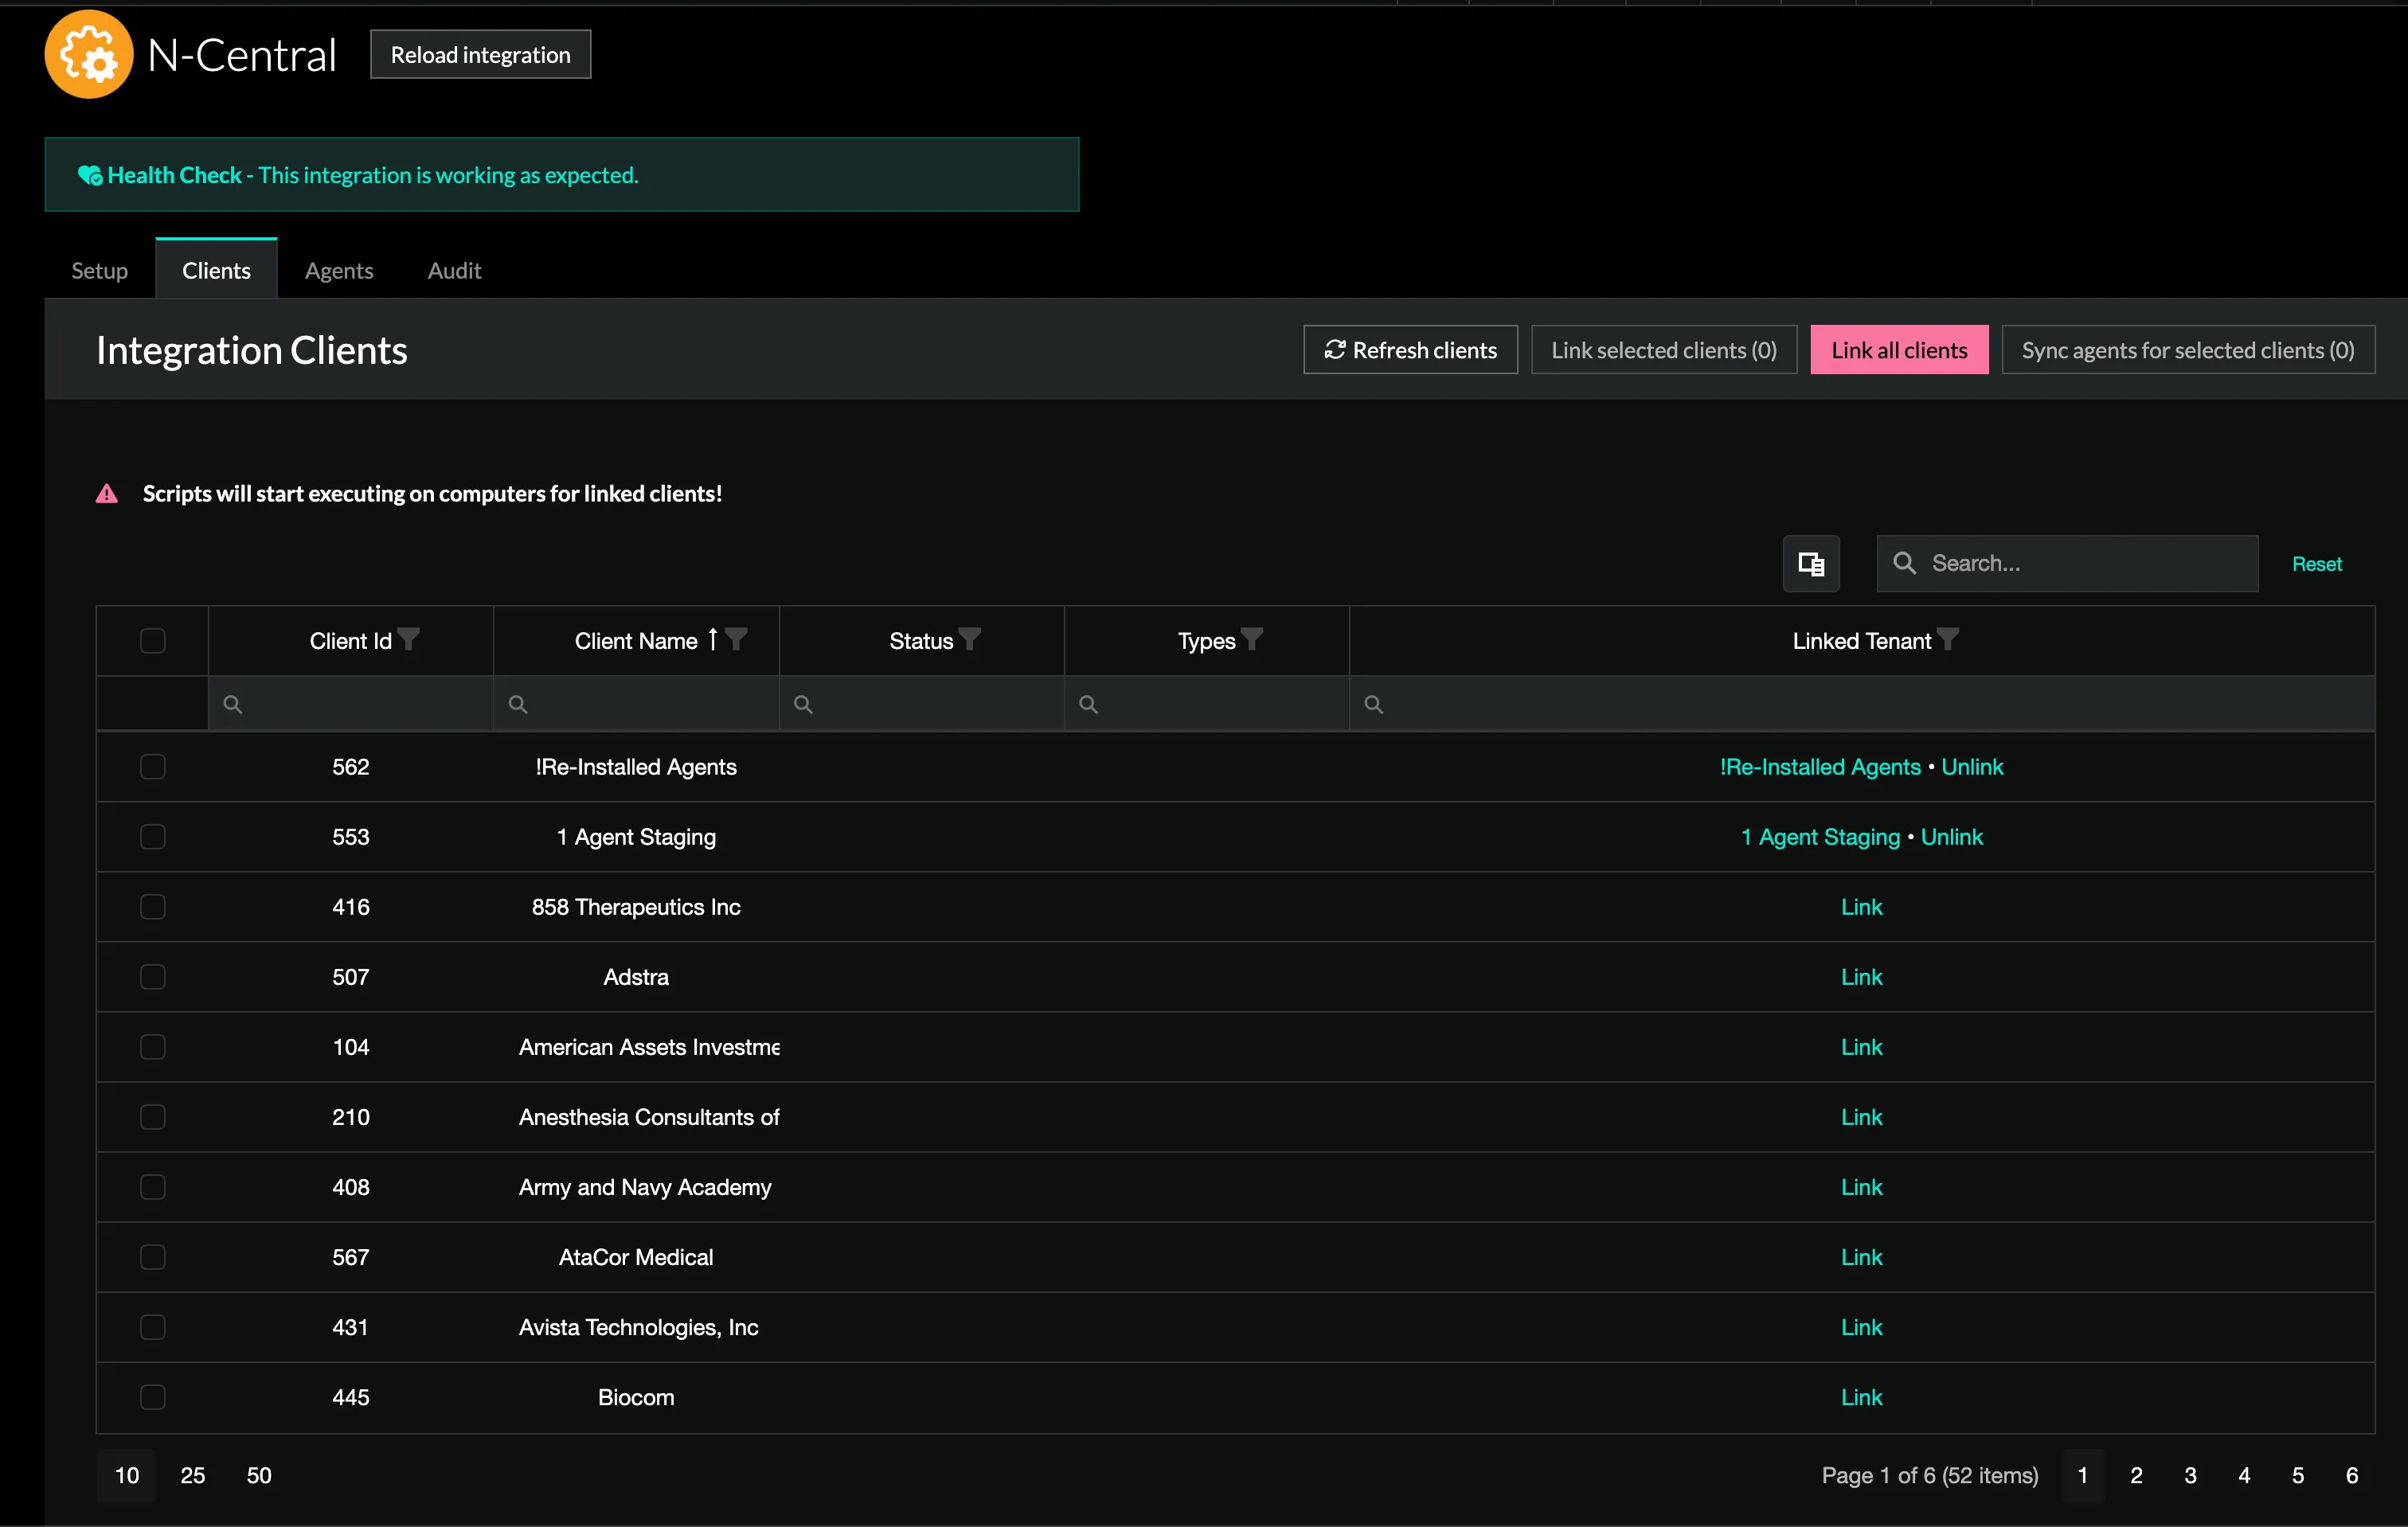
- Search for the client you want to link

- Select Link next to the client you would like to create a Tenant for

- Select +Create a new tenant to create a tenant with the same name as the client you are linking. This will house our future application and task deployments.

- Now that you have linked the client, navigate to the Azure section of your sidebar
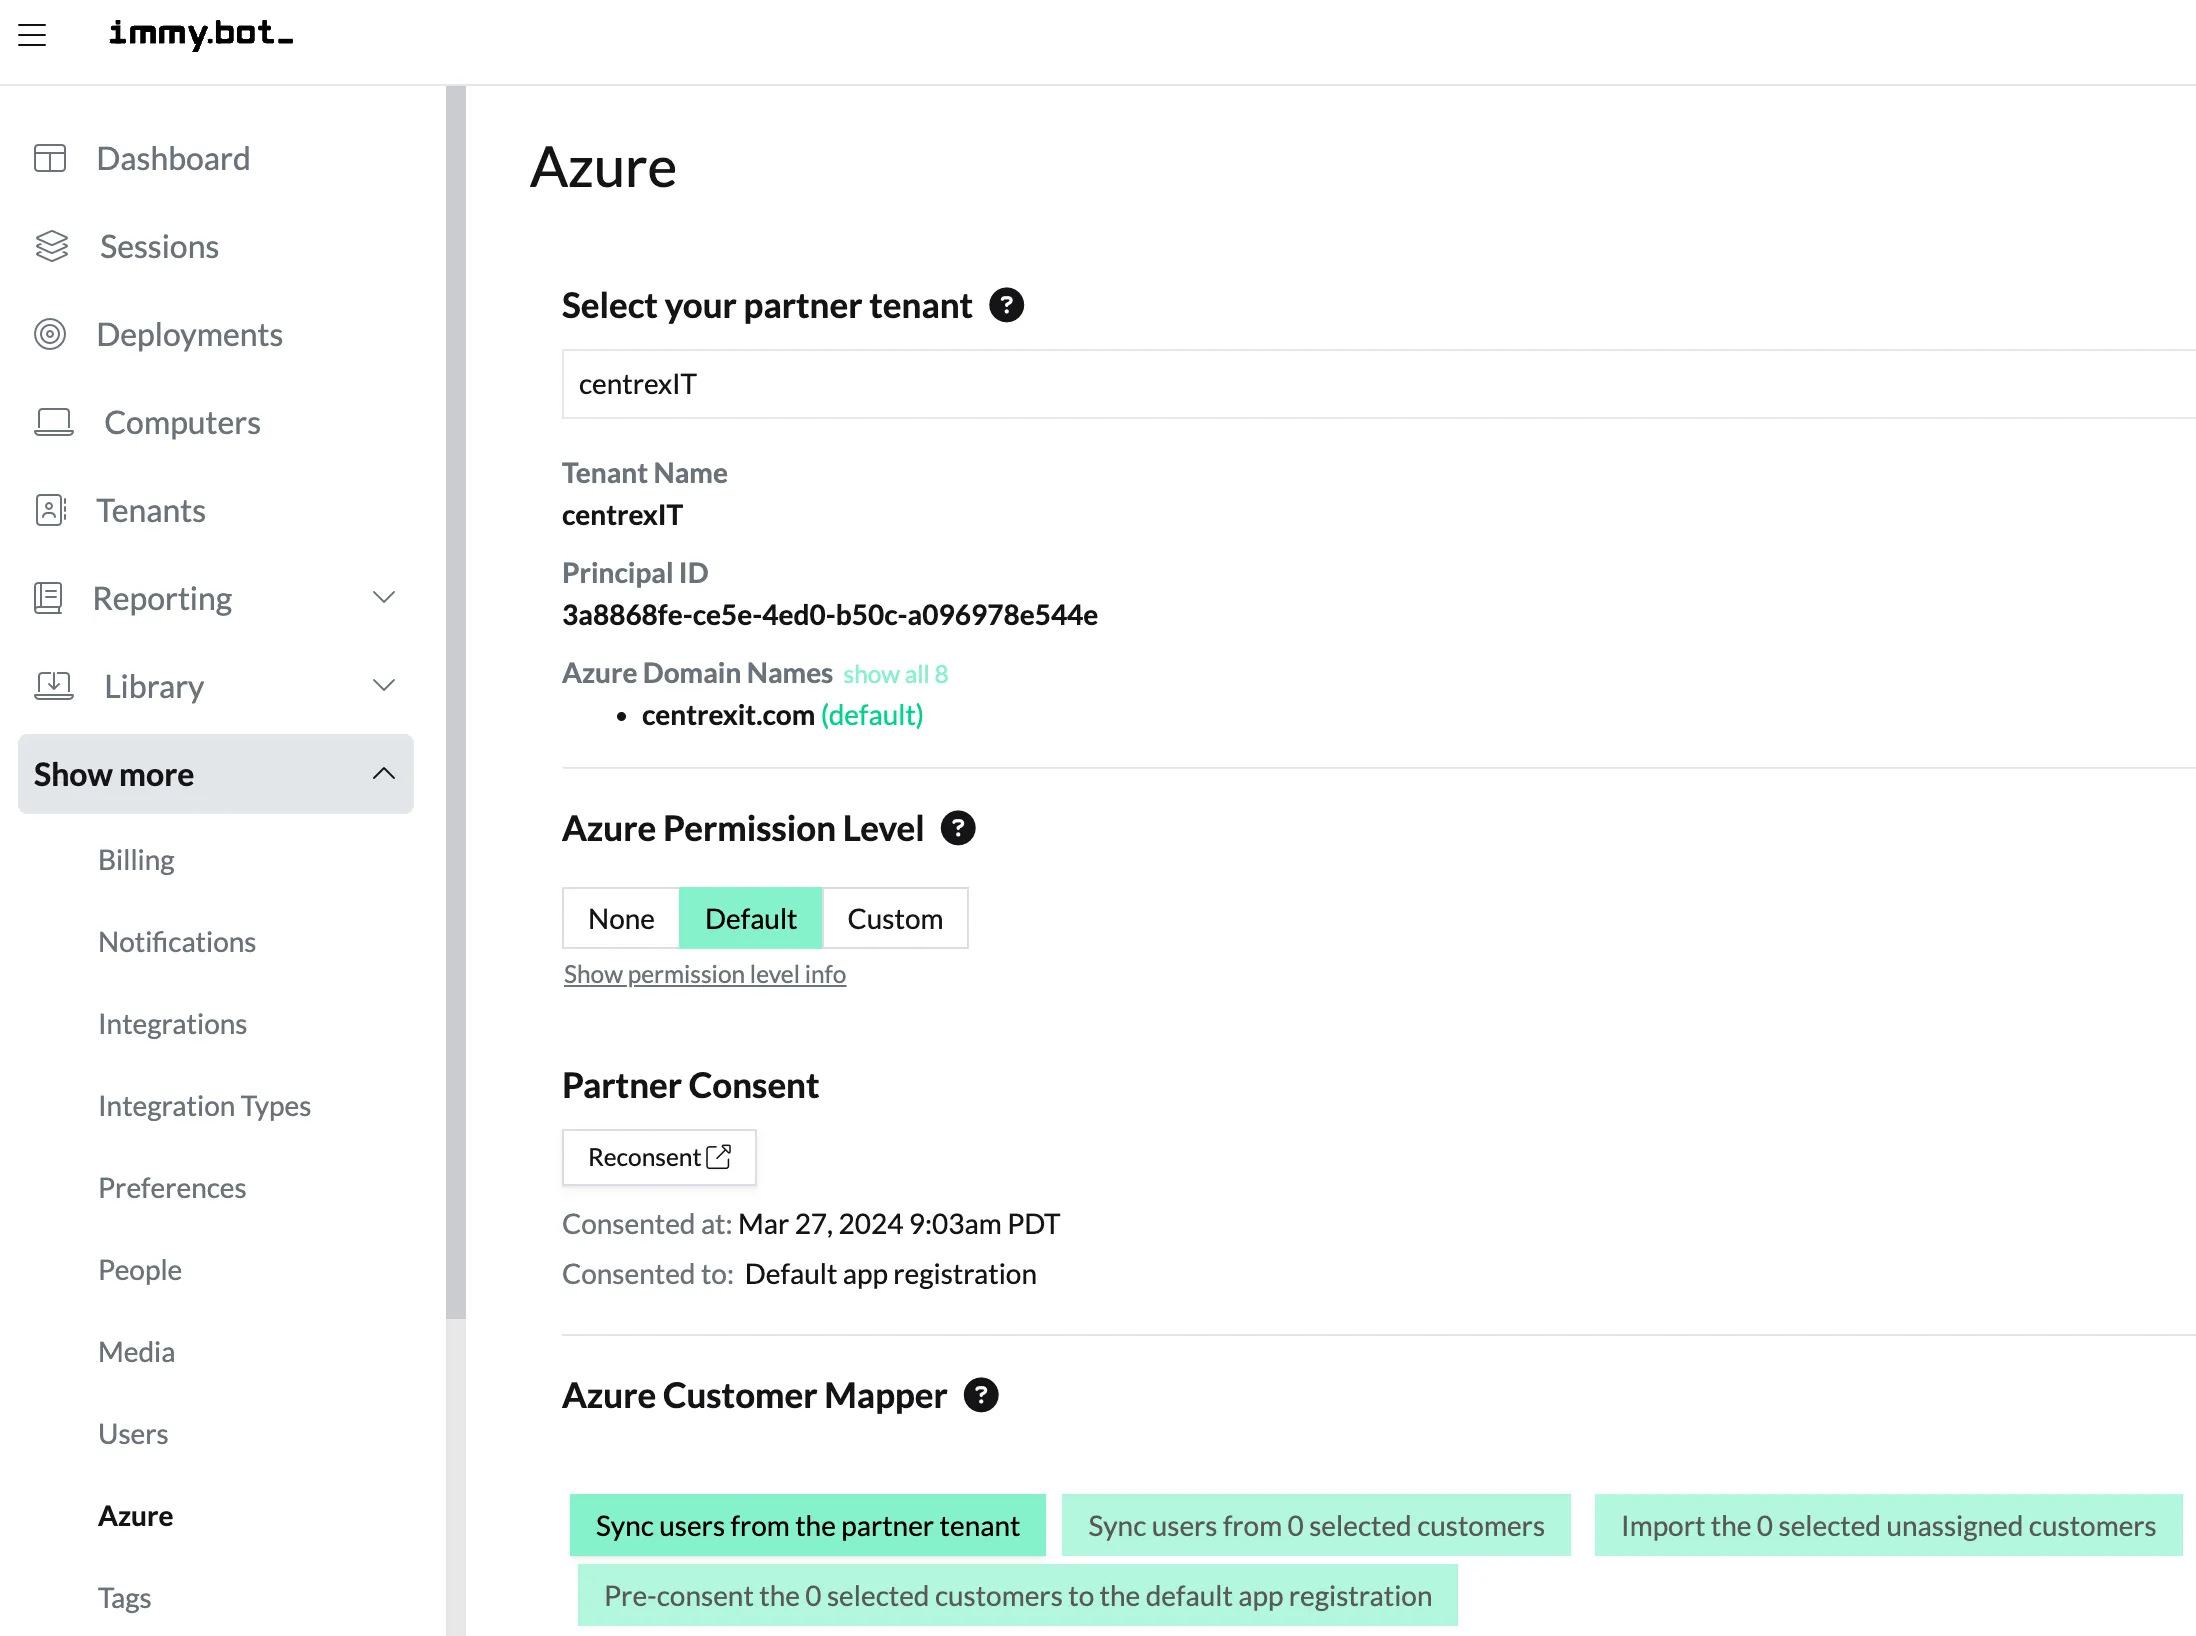
- Search for and locate the Client we just added.

- We will need to Link the Client in this view as well. Clink Link again.

- match the Client in the Azure section to the new Tenant we just created in the N-Central integration editor, as pictured above

-
We have now linked Adstra within the N-central and Azure integration sections. The next step will require consent from Microsoft 365 for ImmyBot to interface with its tenant.
-
This will require a 365 tenant administrator account for the client you are adding.
-
You can go back to your teants and select Adstea
-
Navigate to its Azure section within the top menu bar
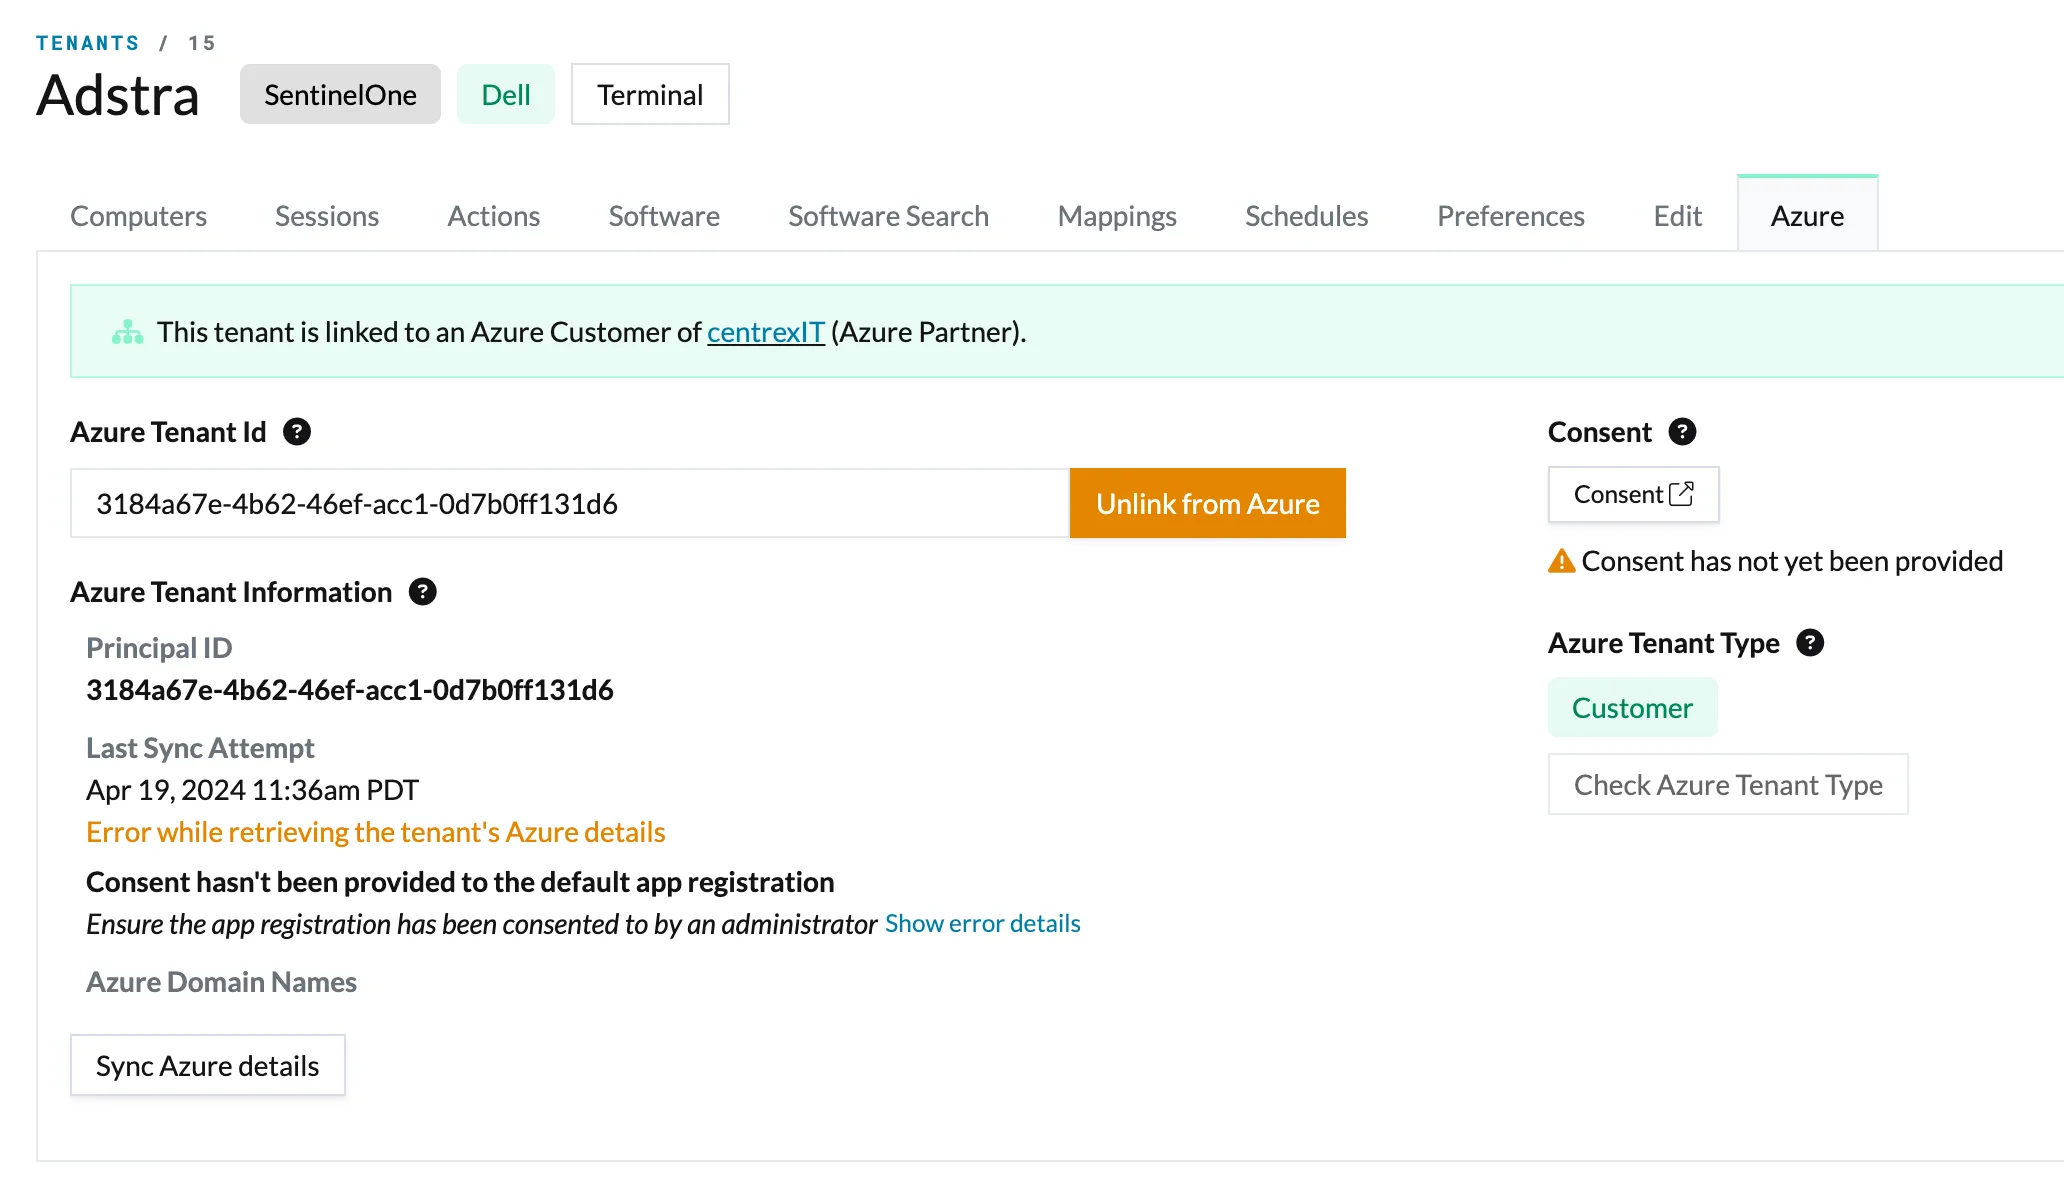
- On the right side, you will see an orange warning noting that you need to Consent for this Tenant to have full Azure functionality.
- Click Consent and a Microsoft 365 sign in window will appear.
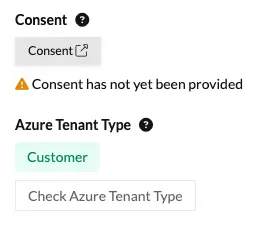
- You will want to sign into the 365 tenant of the client we are linking within Immy.bot.
-
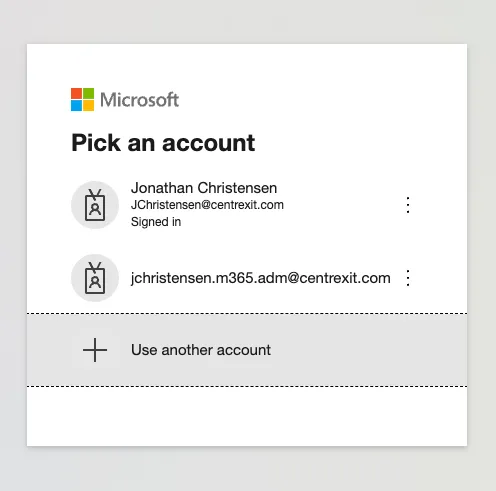
Accept the permission for Immense Networks and immyBot exclusively. This should be the only popup and form of consent we see.
-
Once consent has been accepeted and the system closes the microsoft 365 sign-in tab, you will see the date and time that the consent was granted.
-
If needed, you will be able to reconsent and re-link the teant, or u-nlink the tenant as needed

- You have now succesfully linked a Tenant to Immy.bot.
Process References:
Section titled “Process References:”KB00038352 WI - ImmyBot: How to Create a Deployment
KB00038353 WI - ImmyBot: How to Provision an Endpoint