This KB is a continuation of KB 3928. While that KB details the different processes and terminology for creating an application, this KB defines other related terminology.
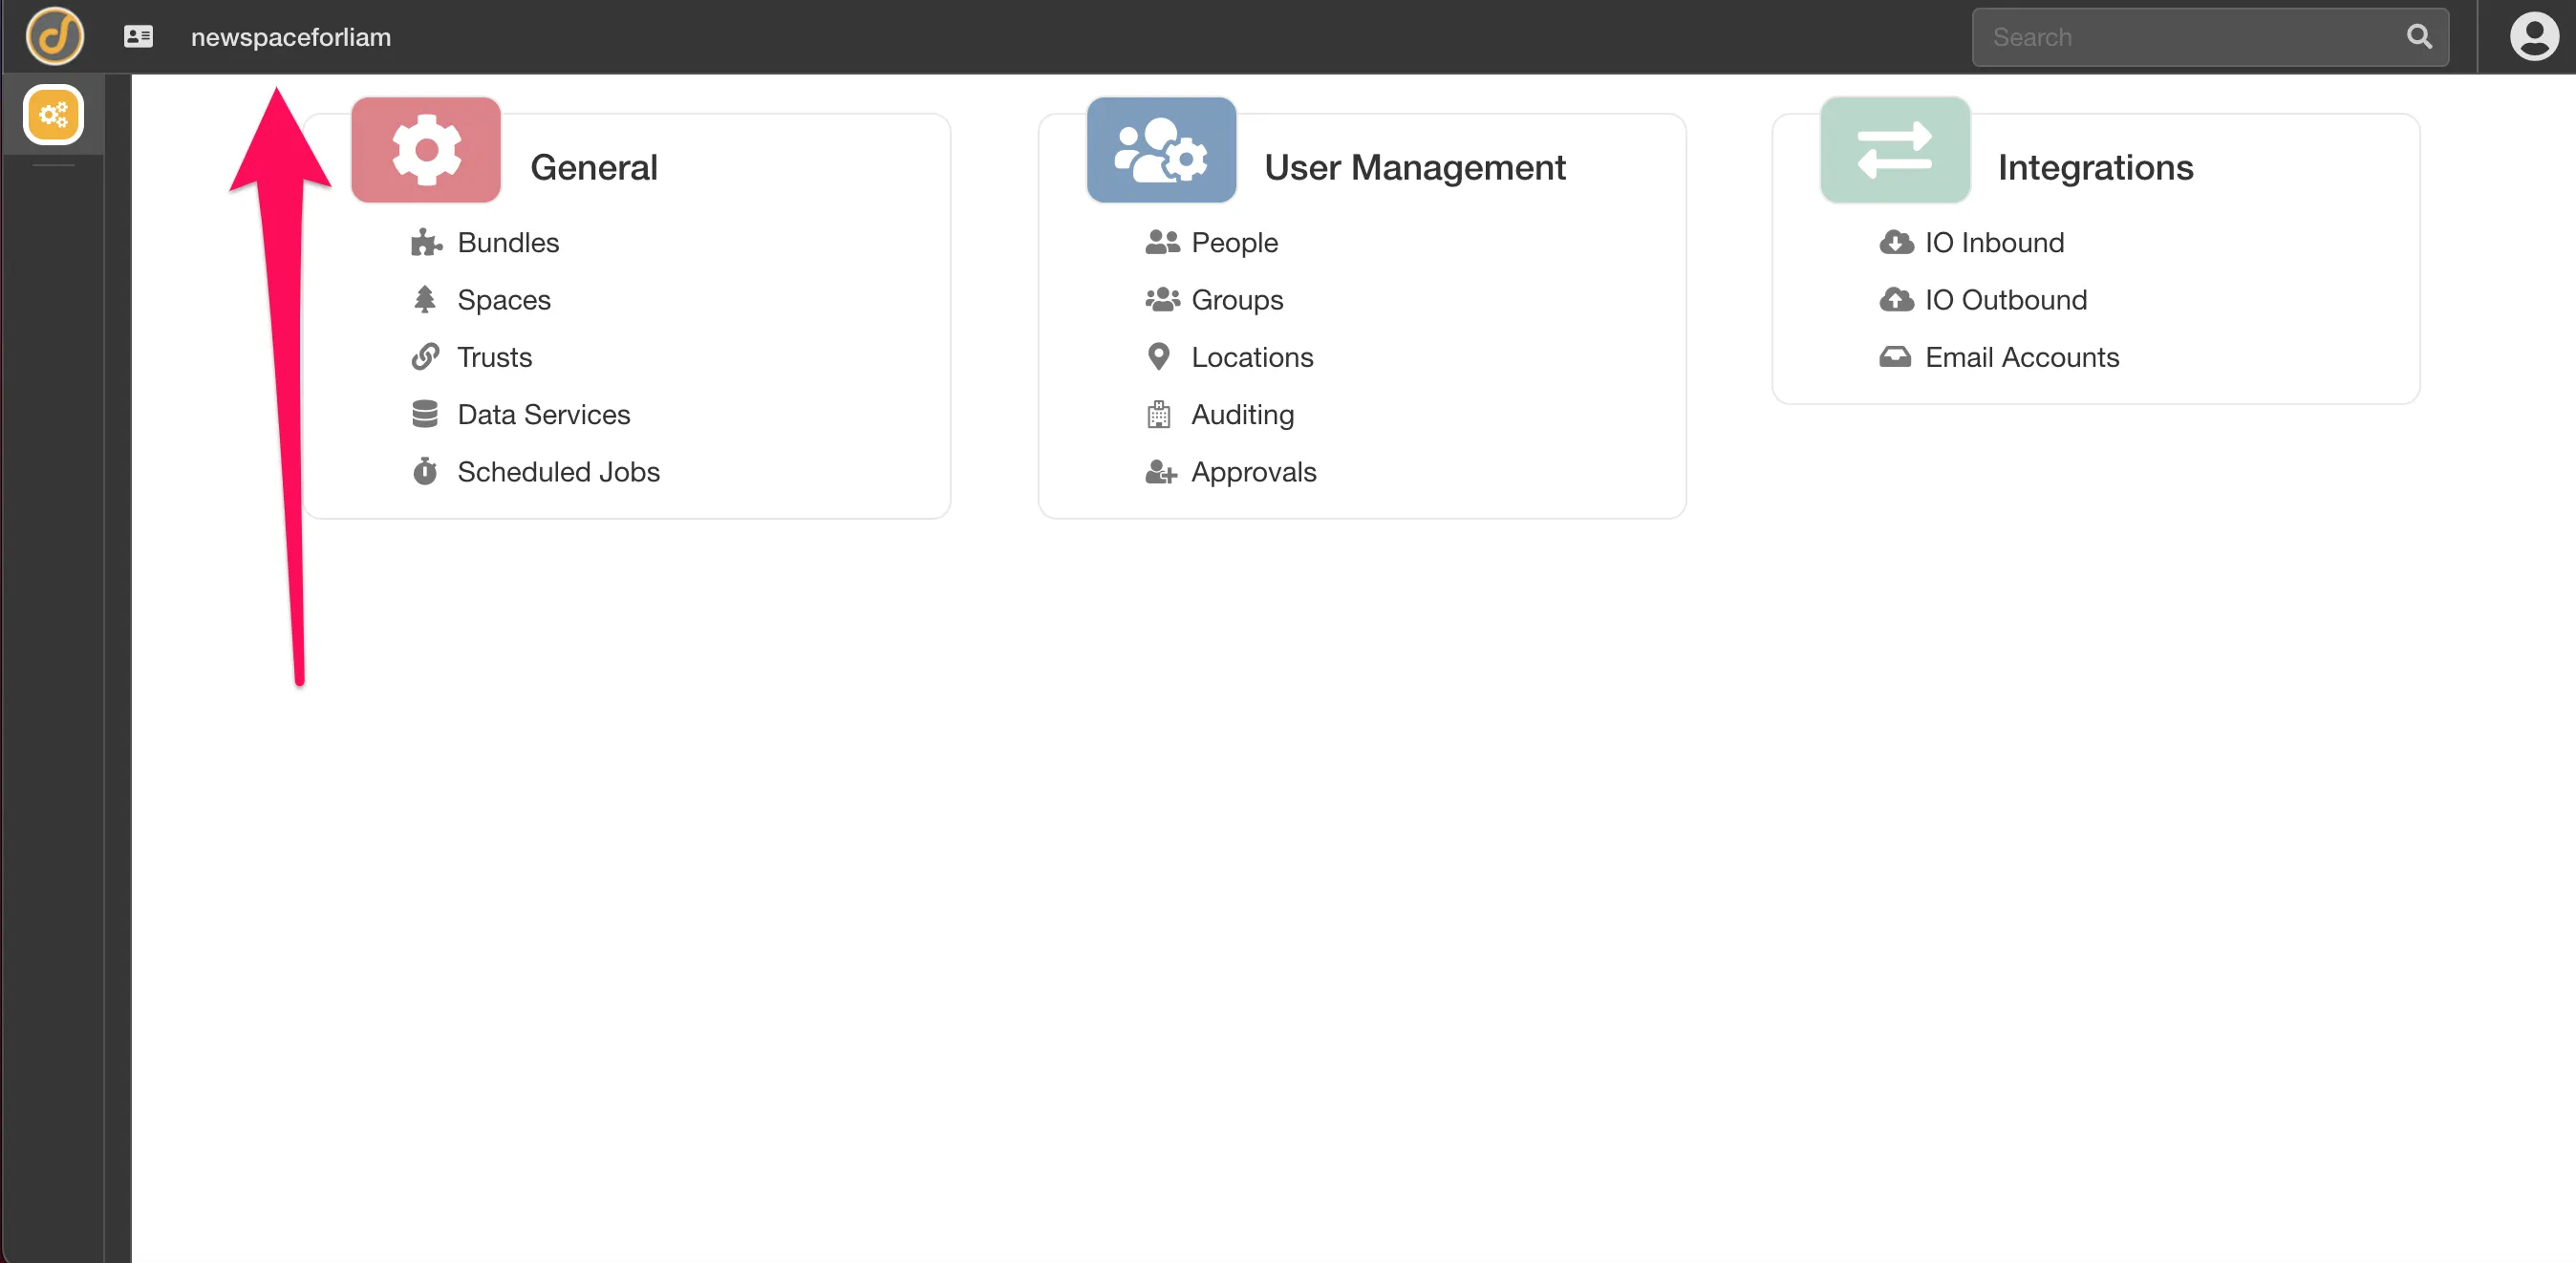
Workspace Page
Section titled “Workspace Page”Overview
Section titled “Overview”The workspace page allows one to view and manage any bundles that have been installed on the current Dreamtsoft space.
Alt+W or Option+W (for Mac) will open the Workspace page for Administrators. The icons listed on this page allow one to navigate and update the bundles installed in the space.

The icons on the page are as follows:
-
Icons on the left represent the installed bundles. Next to the icon will be the bundle name and version number.
-
Home - Goes to the bundle homepage.
-
Gears - Goes to the bundle information page, where general bundle information can be viewed, as well as any local/remote changes made to the bundle.
-
Sliders - Goes to the bundle preference page; this page contains admin-defined settings that allow for simple processes changes in the bundle.
-
Pencil - Displays the number of local changes existing in the bundle.
-
Blue circle - Displays the number of remote changes from the external git repository.
-
Plus sign - Goes to the Manage Bundles page where a new bundle can be created or loaded.
-
File export - Downloads a file of any of the local changes.
-
Cloud - Updates all bundles with any remote changes. Note: If there are conflicts, the bundle will not update and the conflicts will need to be viewed on the bundle information page.
Creating a Space
Section titled “Creating a Space”Overview
Section titled “Overview”A space is the term used to define an environment or instance. They can be used for separating customers or departments, and can also be provided for data and process separation.
Creating a Space
Section titled “Creating a Space”The following instructions are for creating a new space:
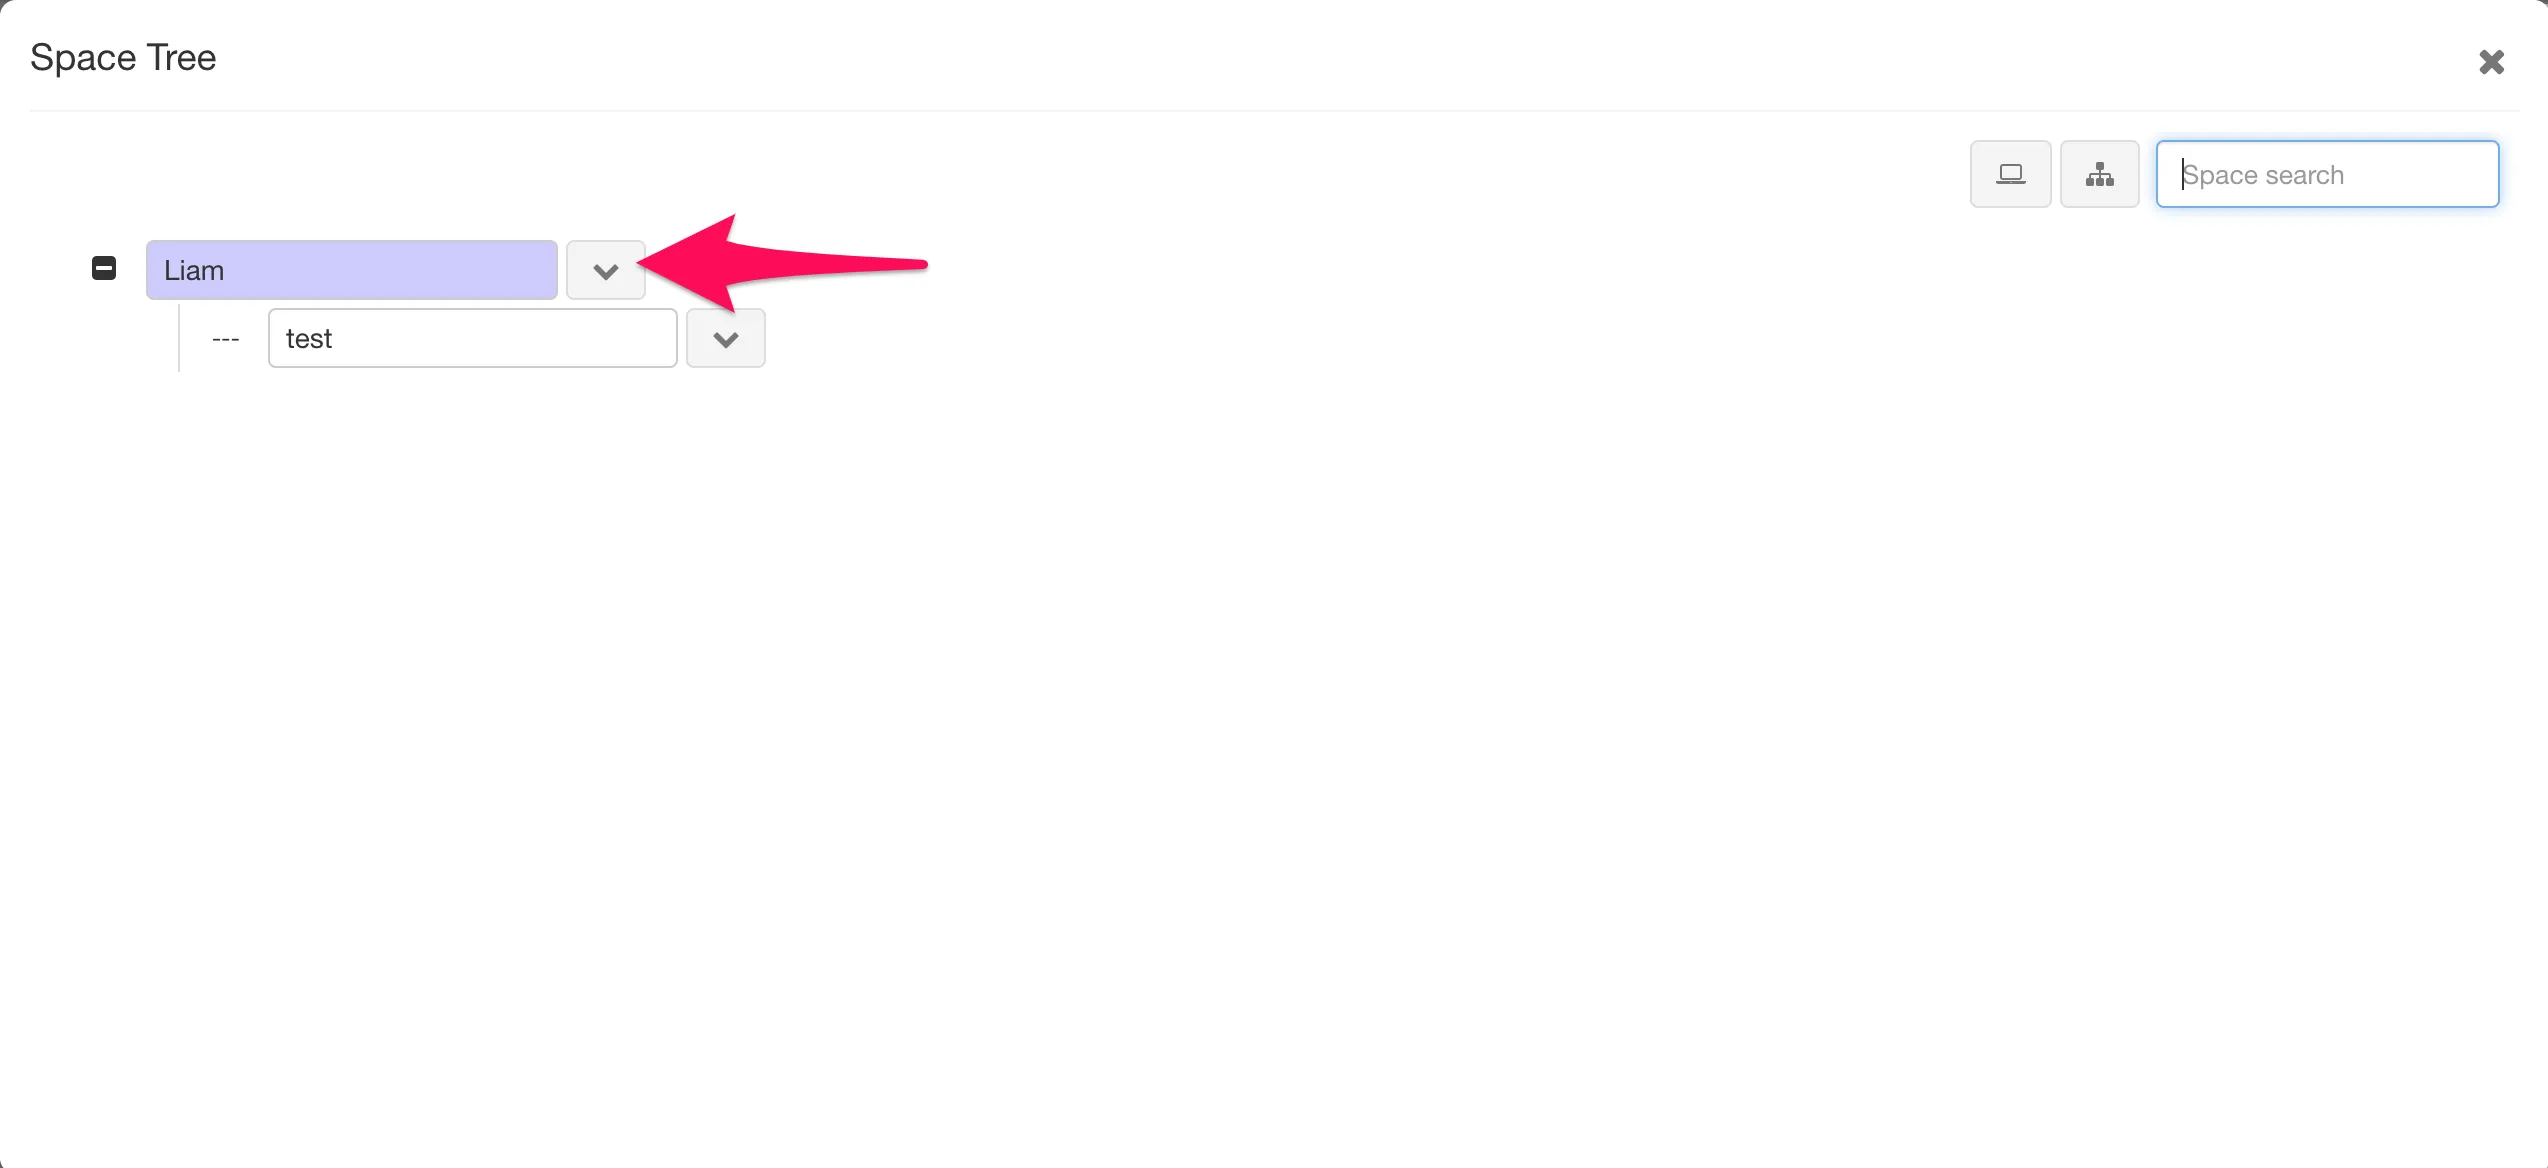
1. Click on the hierarchal icon at the bottom left-hand corner of the page. Clicking on this will open the Space Tree page.
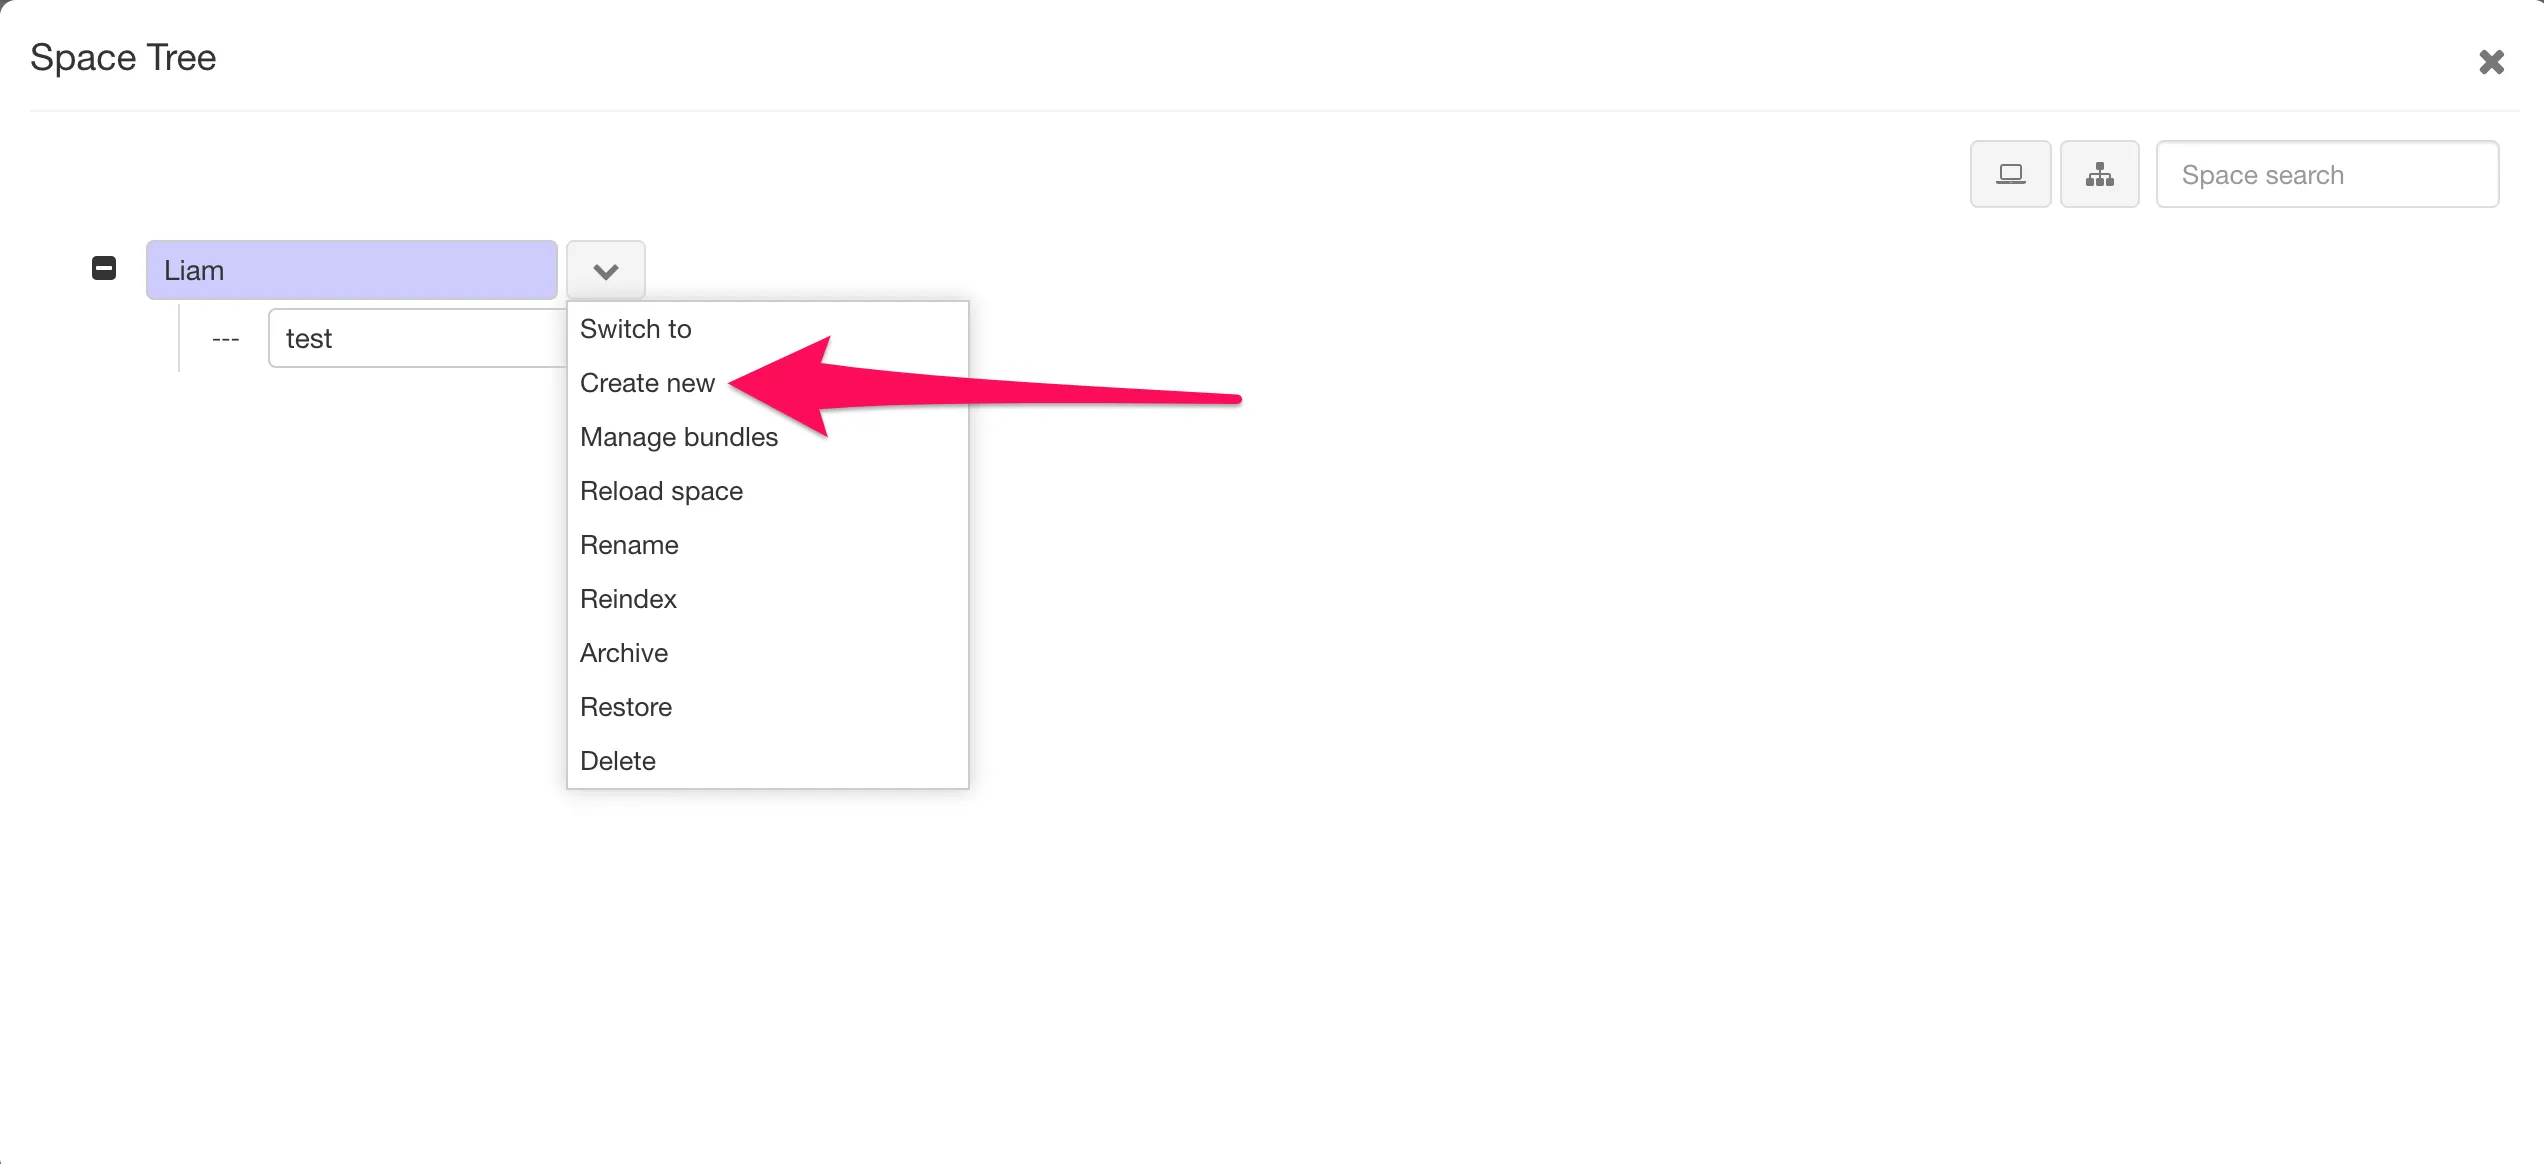
2. Click on the drop-down arrow to the right of the space name (there is usually only one with a fresh instance of Dreamtsoft) and select the “Create New” option.
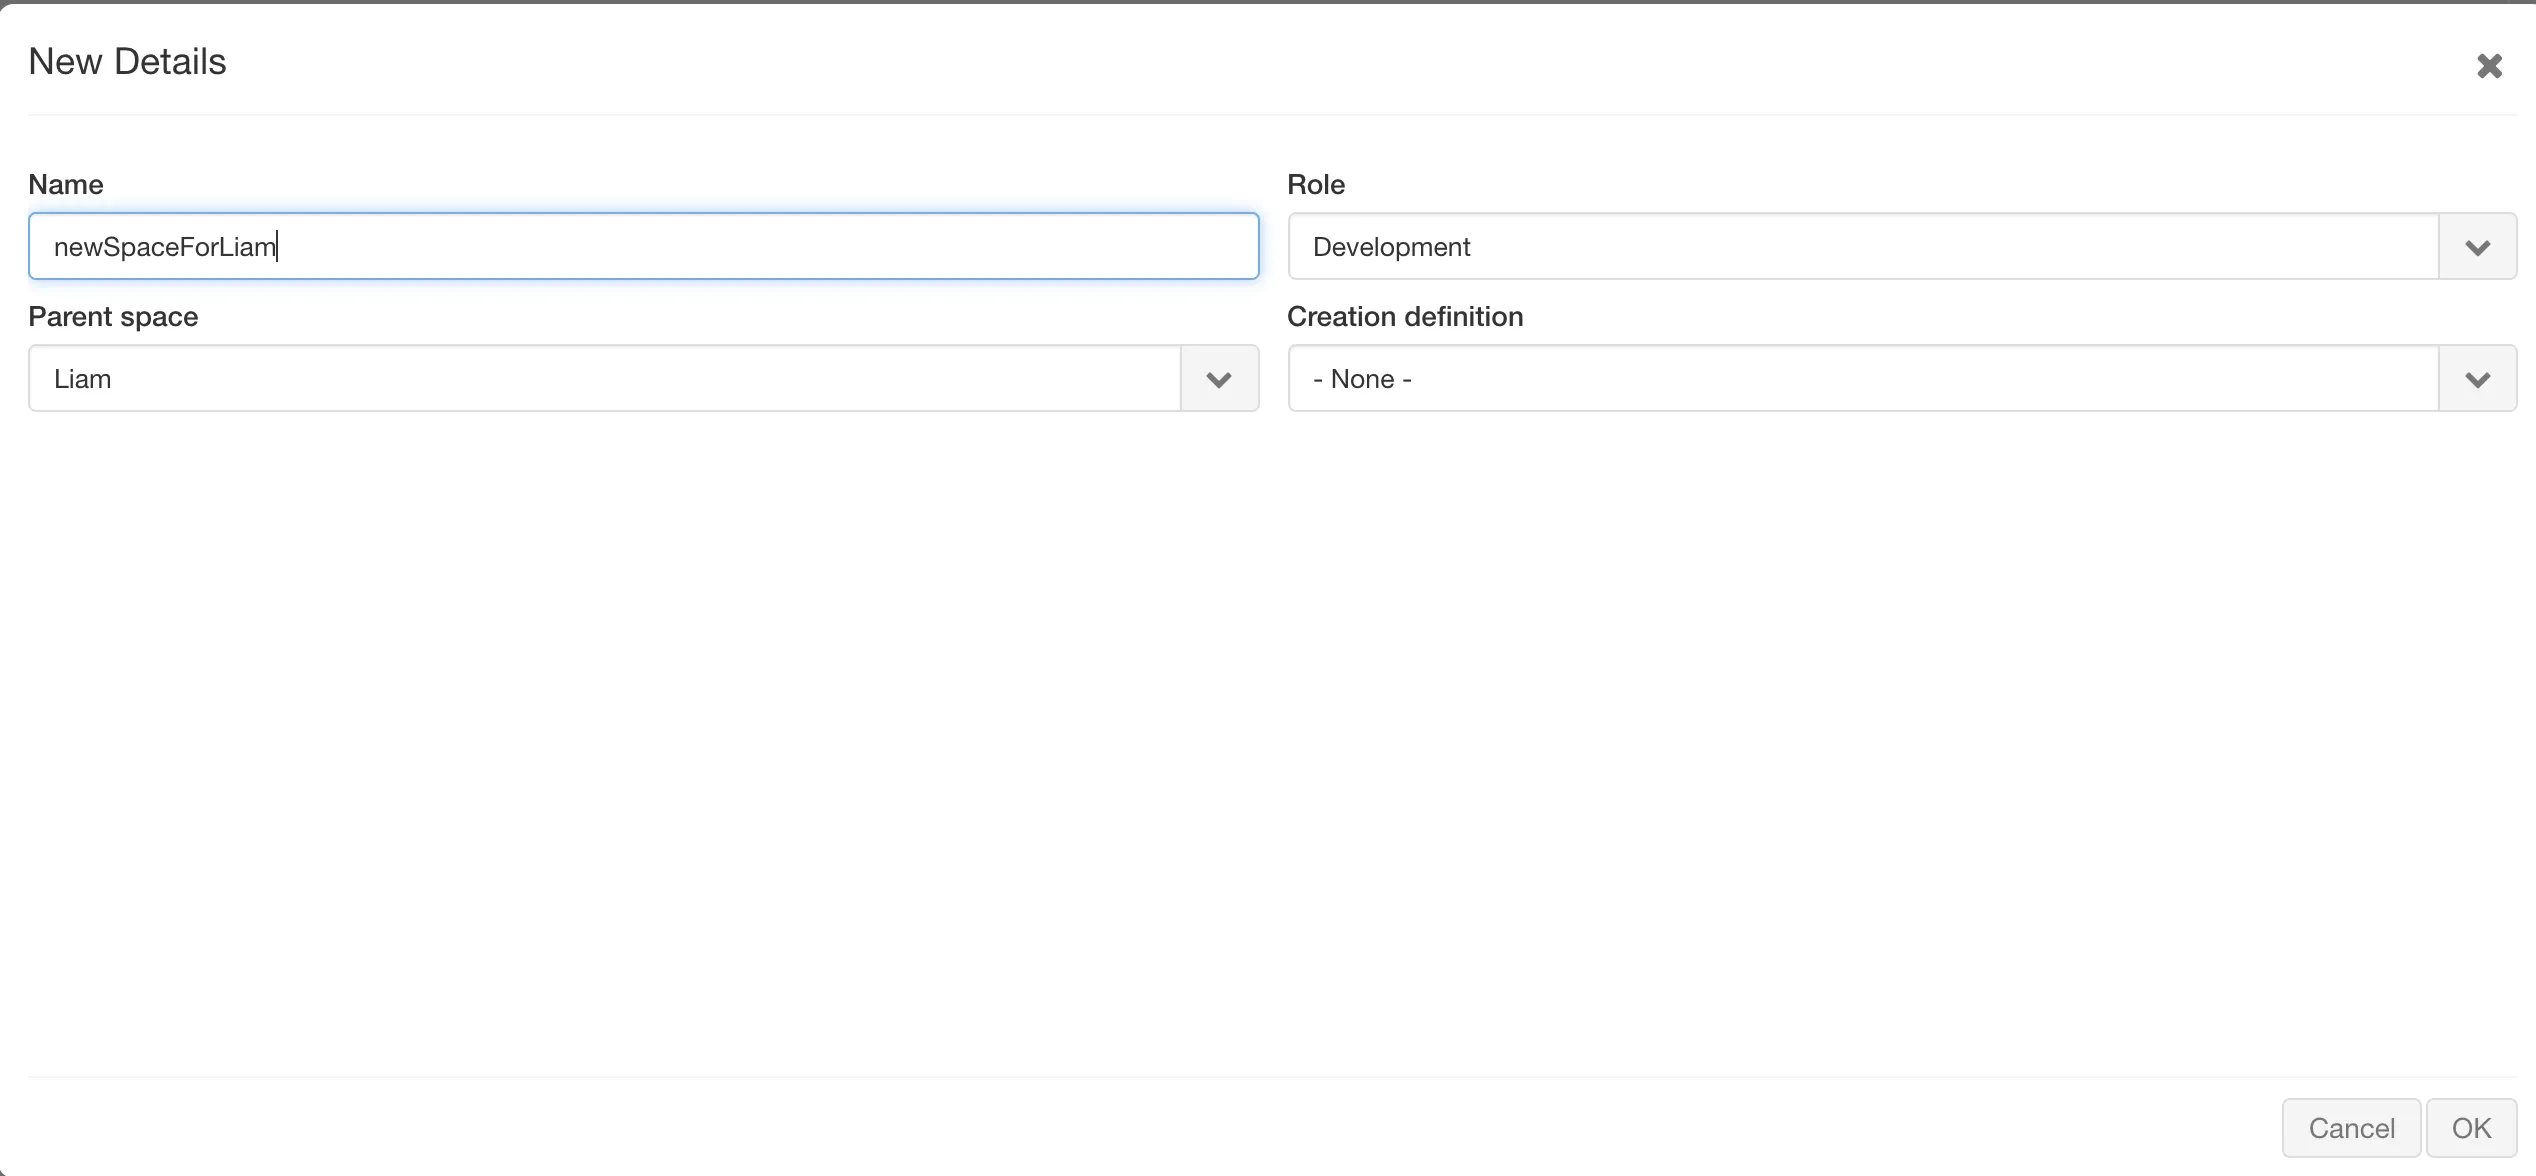
3. Fill out the space information and then click OK.
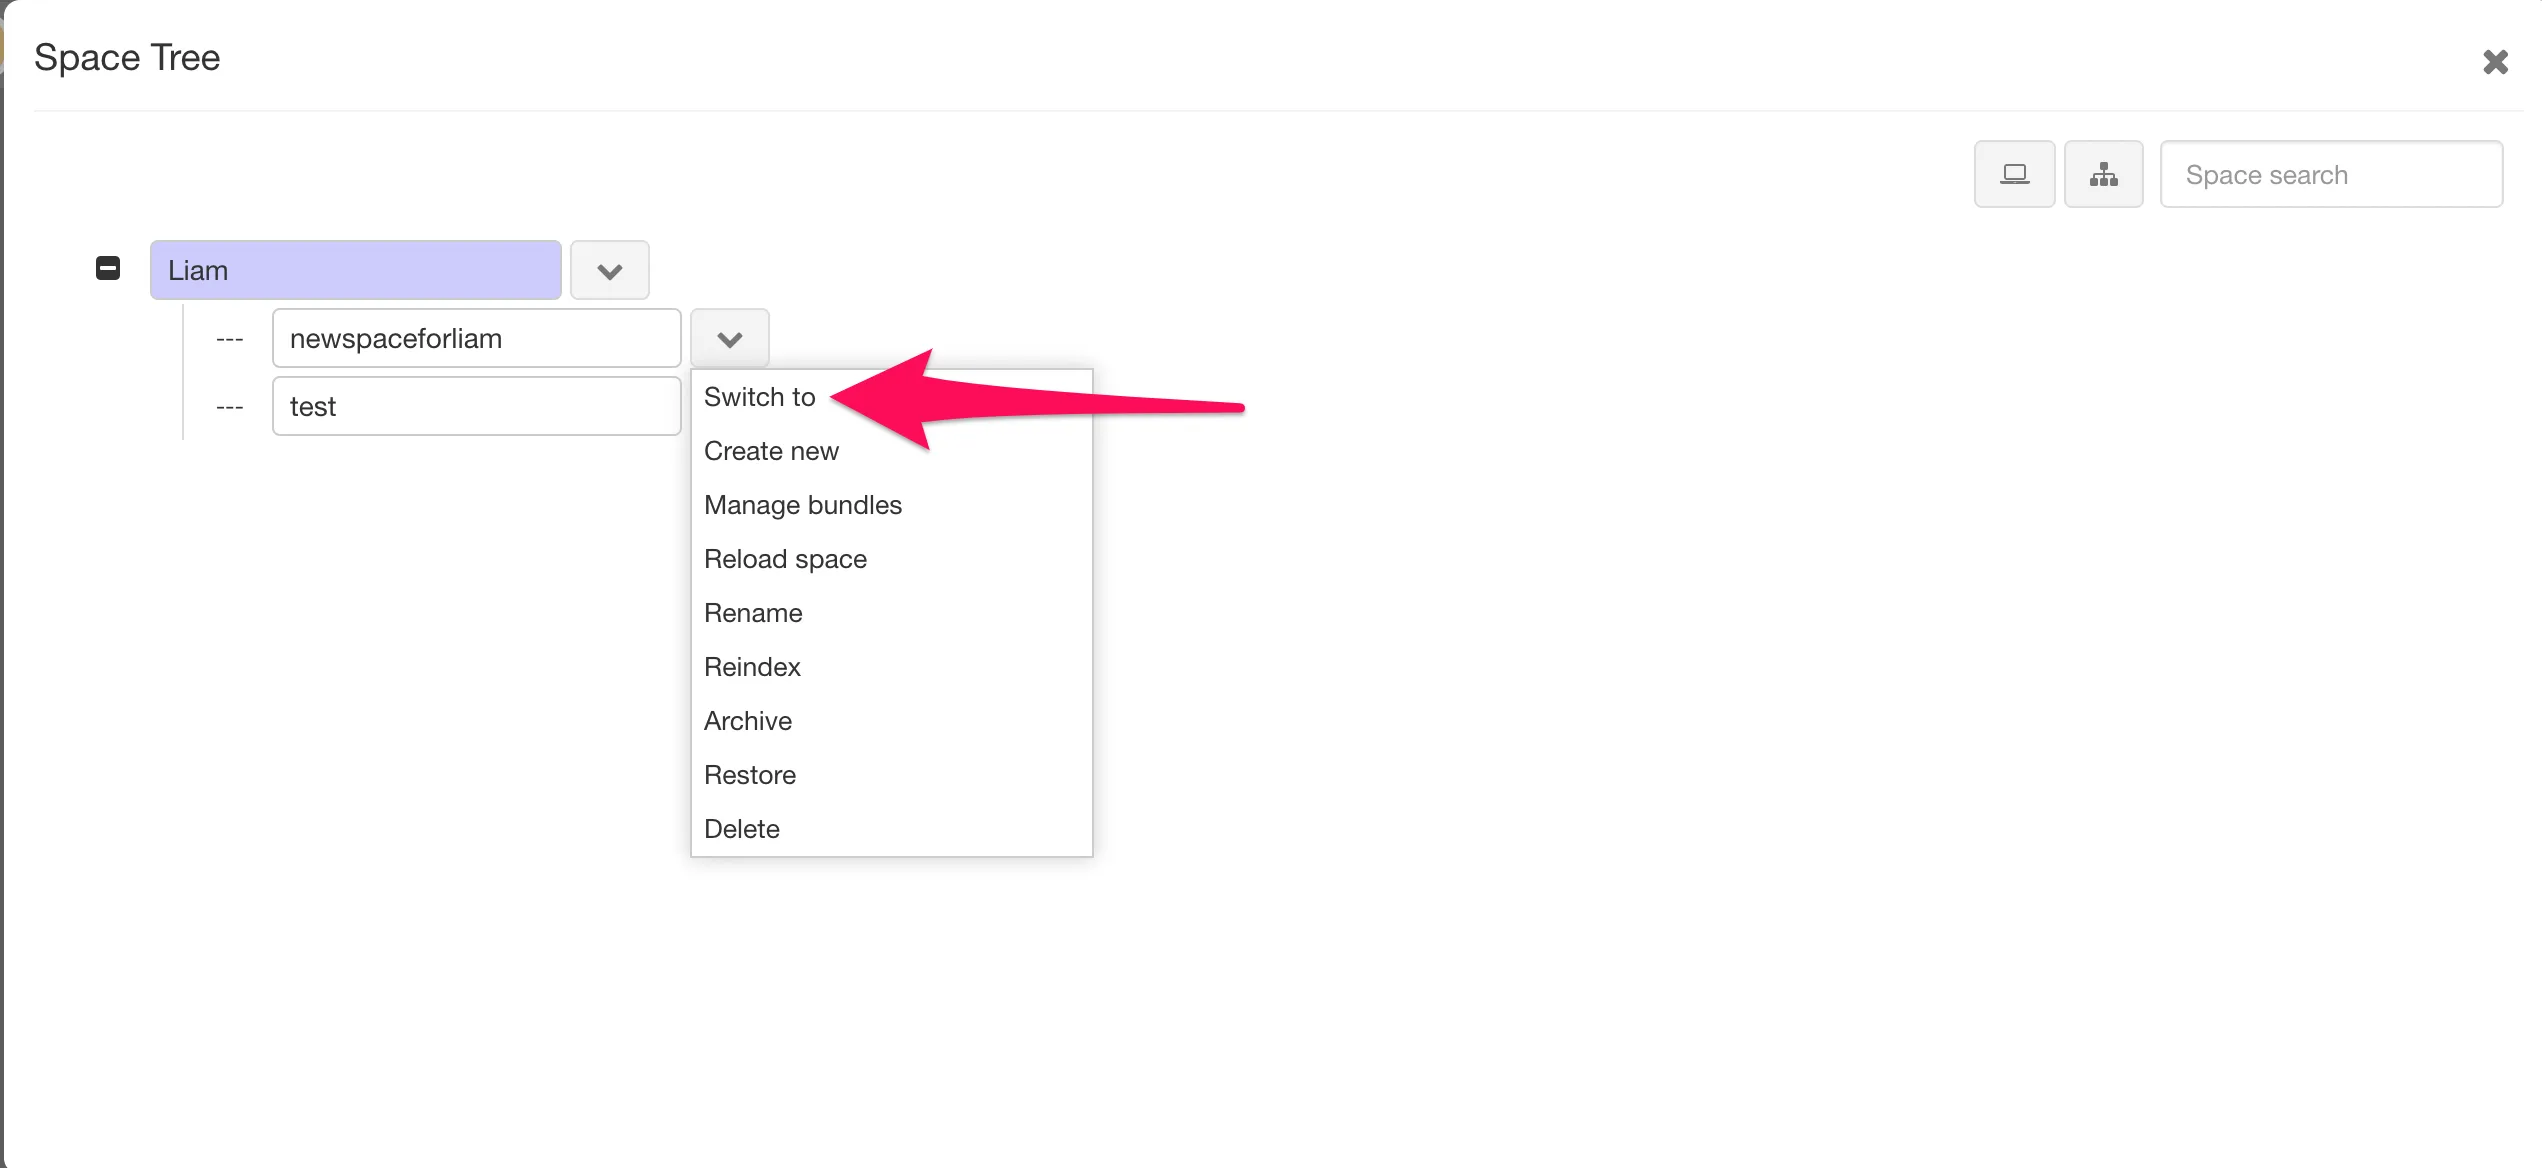
4. Once saved, use the newly created space drop-down and select the “Switch to” option. This will open the new space.
One can also search for spaces and change the look of the space tree using the search bar at the top right corner of the page.
Trusted Groups
Section titled “Trusted Groups”Trusted groups allow one to define which subspaces users can access. Essentially, trusted groups are a grouping of user groups that specify which spaces the user groups access extends to. They are configurable to allow access by a group to all subtenants or to a specified list of subtenants.
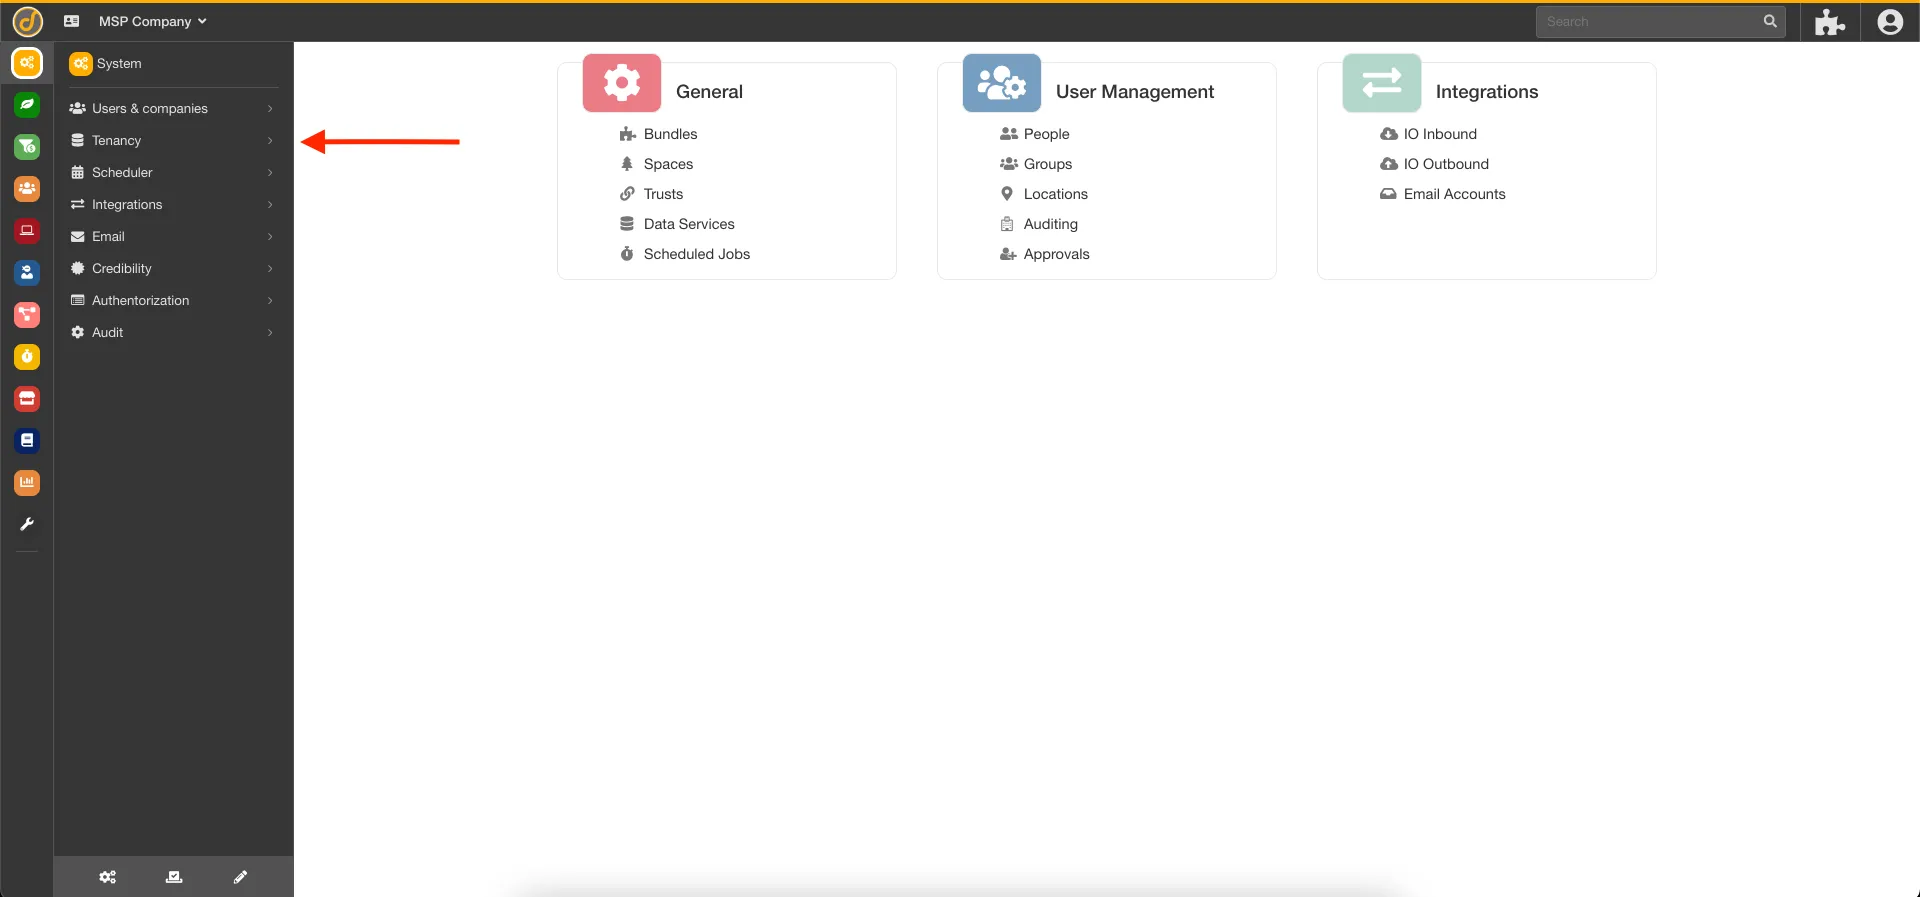
Trusted groups are part of the system bundle. In order to view the trusted groups, go to the system bundle by clicking on the gears icon on the bottom left-hand corner of the screen. The groups can then be accessed by selecting Tenancy in the Bundle Navigation panel in the left-hand menu and from there, selecting the Trusted Groups option.
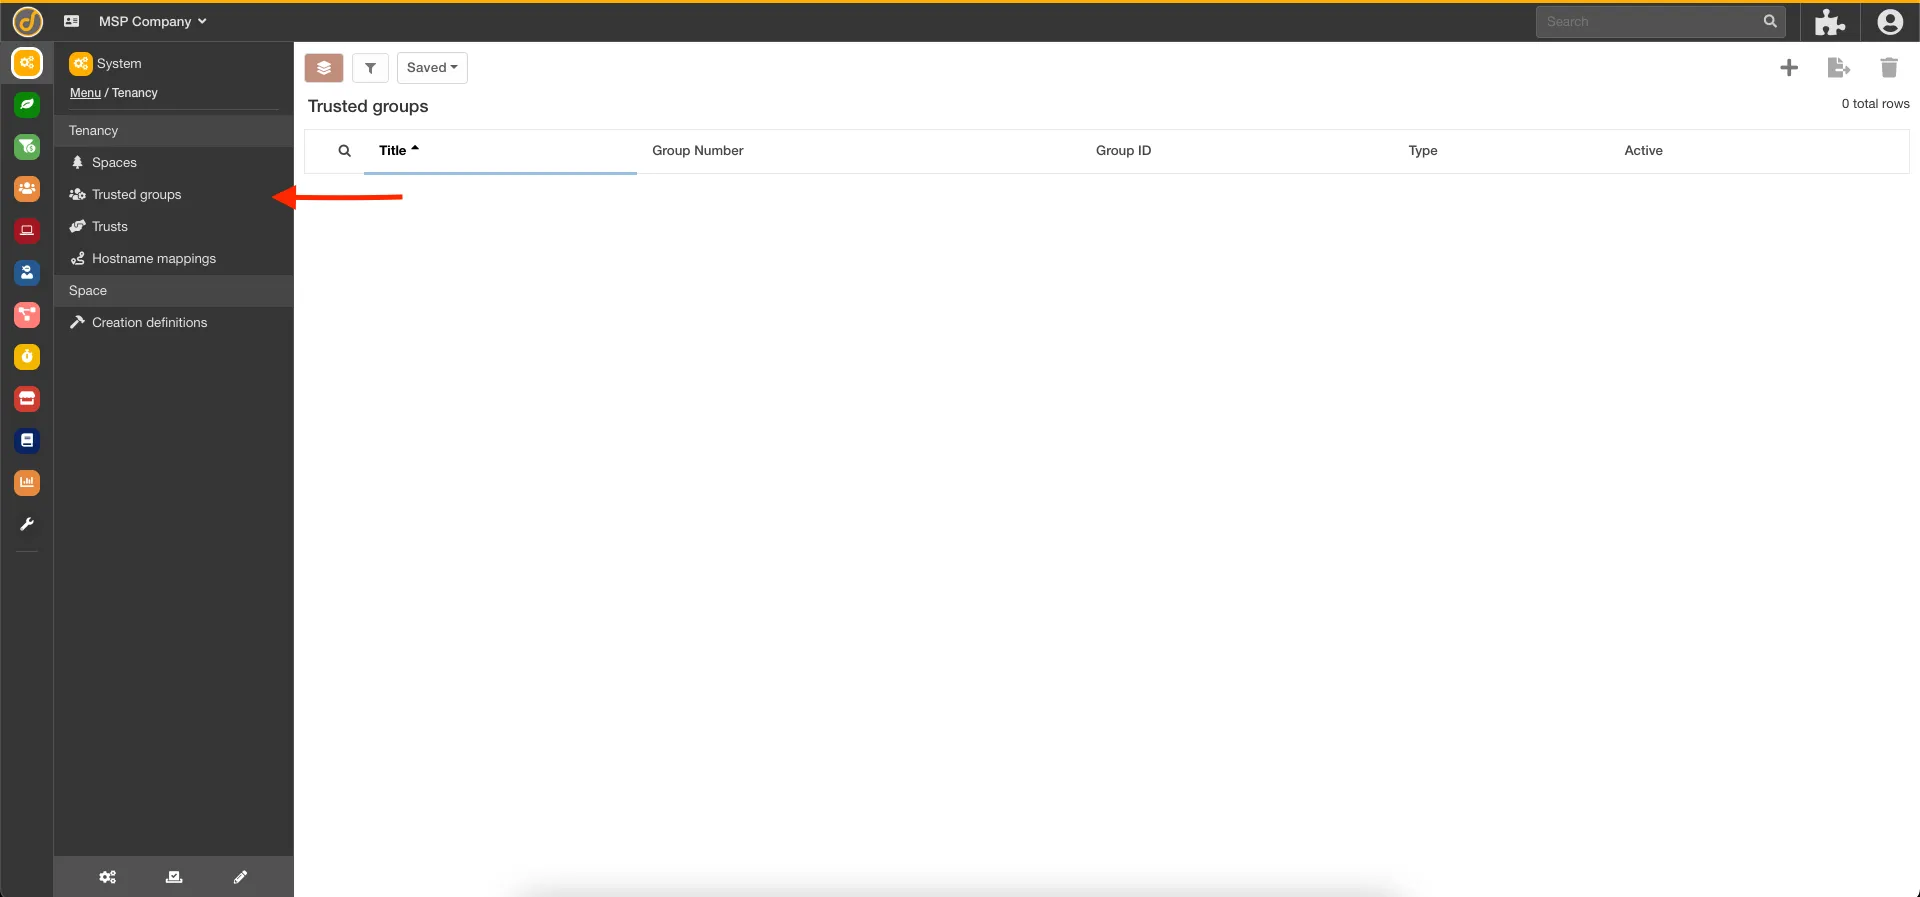
Setting Up a Trusted Group
Section titled “Setting Up a Trusted Group”When creating a new trusted group, there are six slots to fill out, though the Group Number slot is the only one required to create the record. The Name, GroupNumber, and Description slots are purely descriptive slots for the record, while the Active, Type, and Group ID slots effect how your group will function. The Active slot is used to quickly disable/enable the group, while the Group ID slot is used to easily locate the record in scripts. The Type slot has two choices to control which spaces will trust this group. Selecting “Auto trusted by all subtenants” automatically sets all subspaces to trust the group. Selecting “Specify subtenant trusts” requires setting up a trust between the current space and every space that should trust the new group.
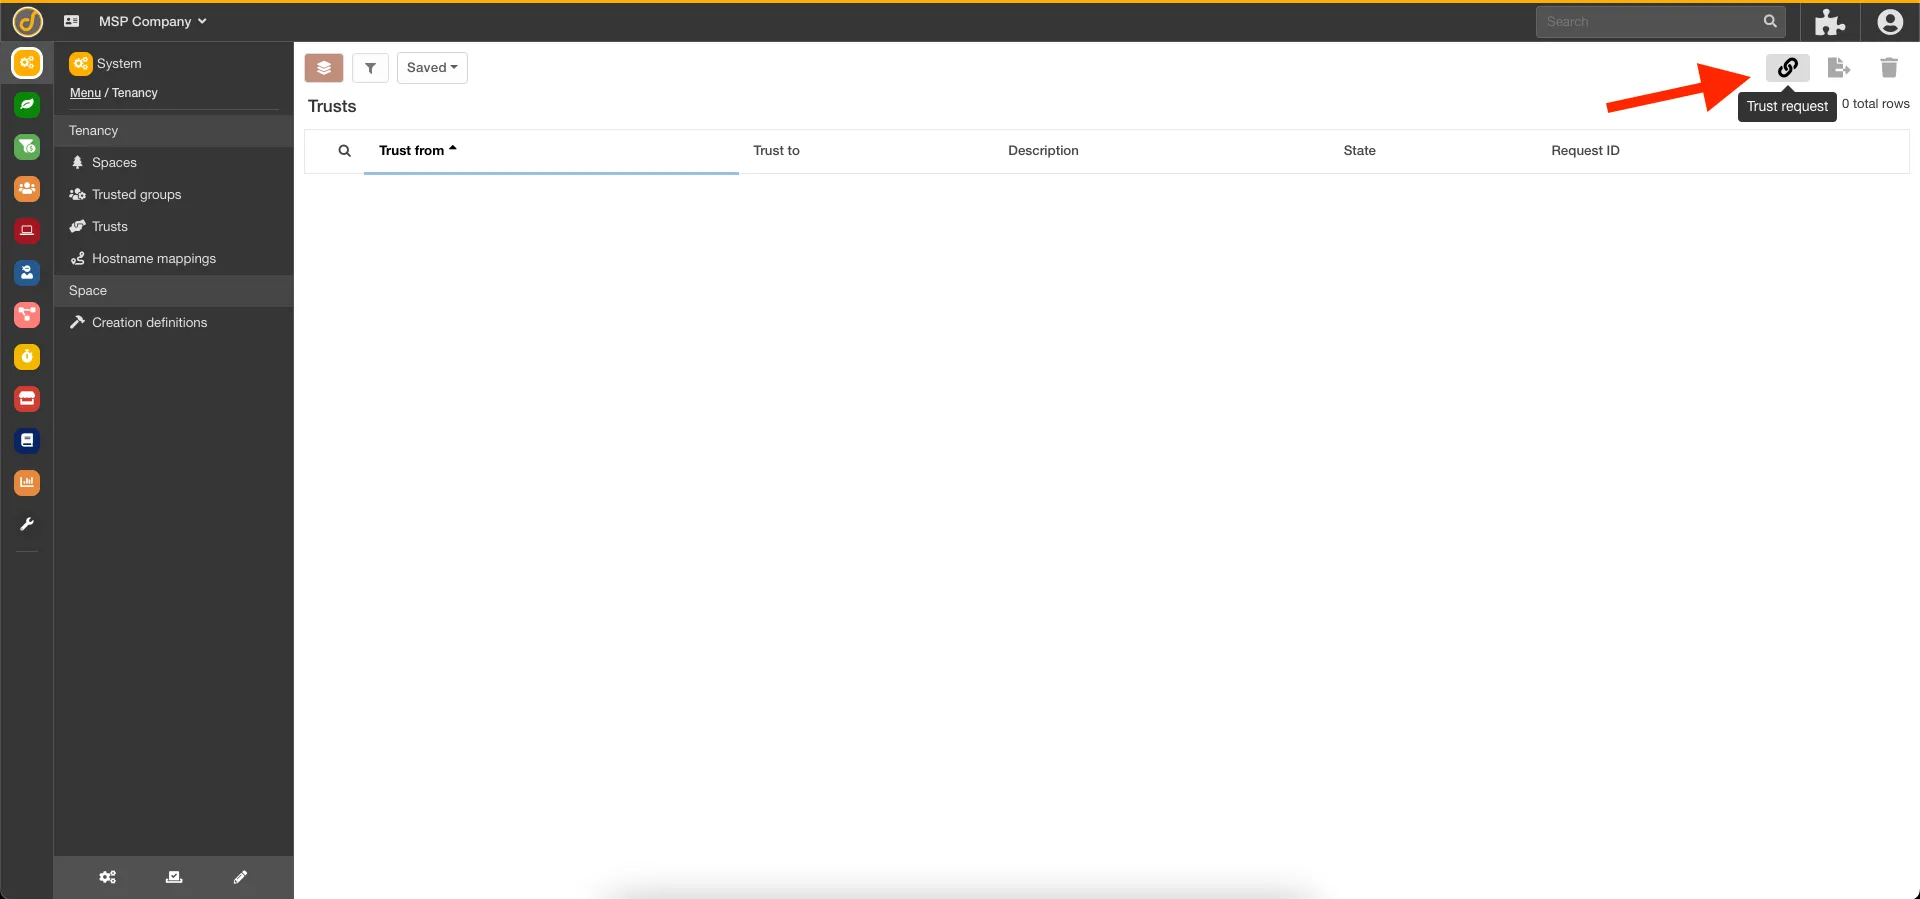
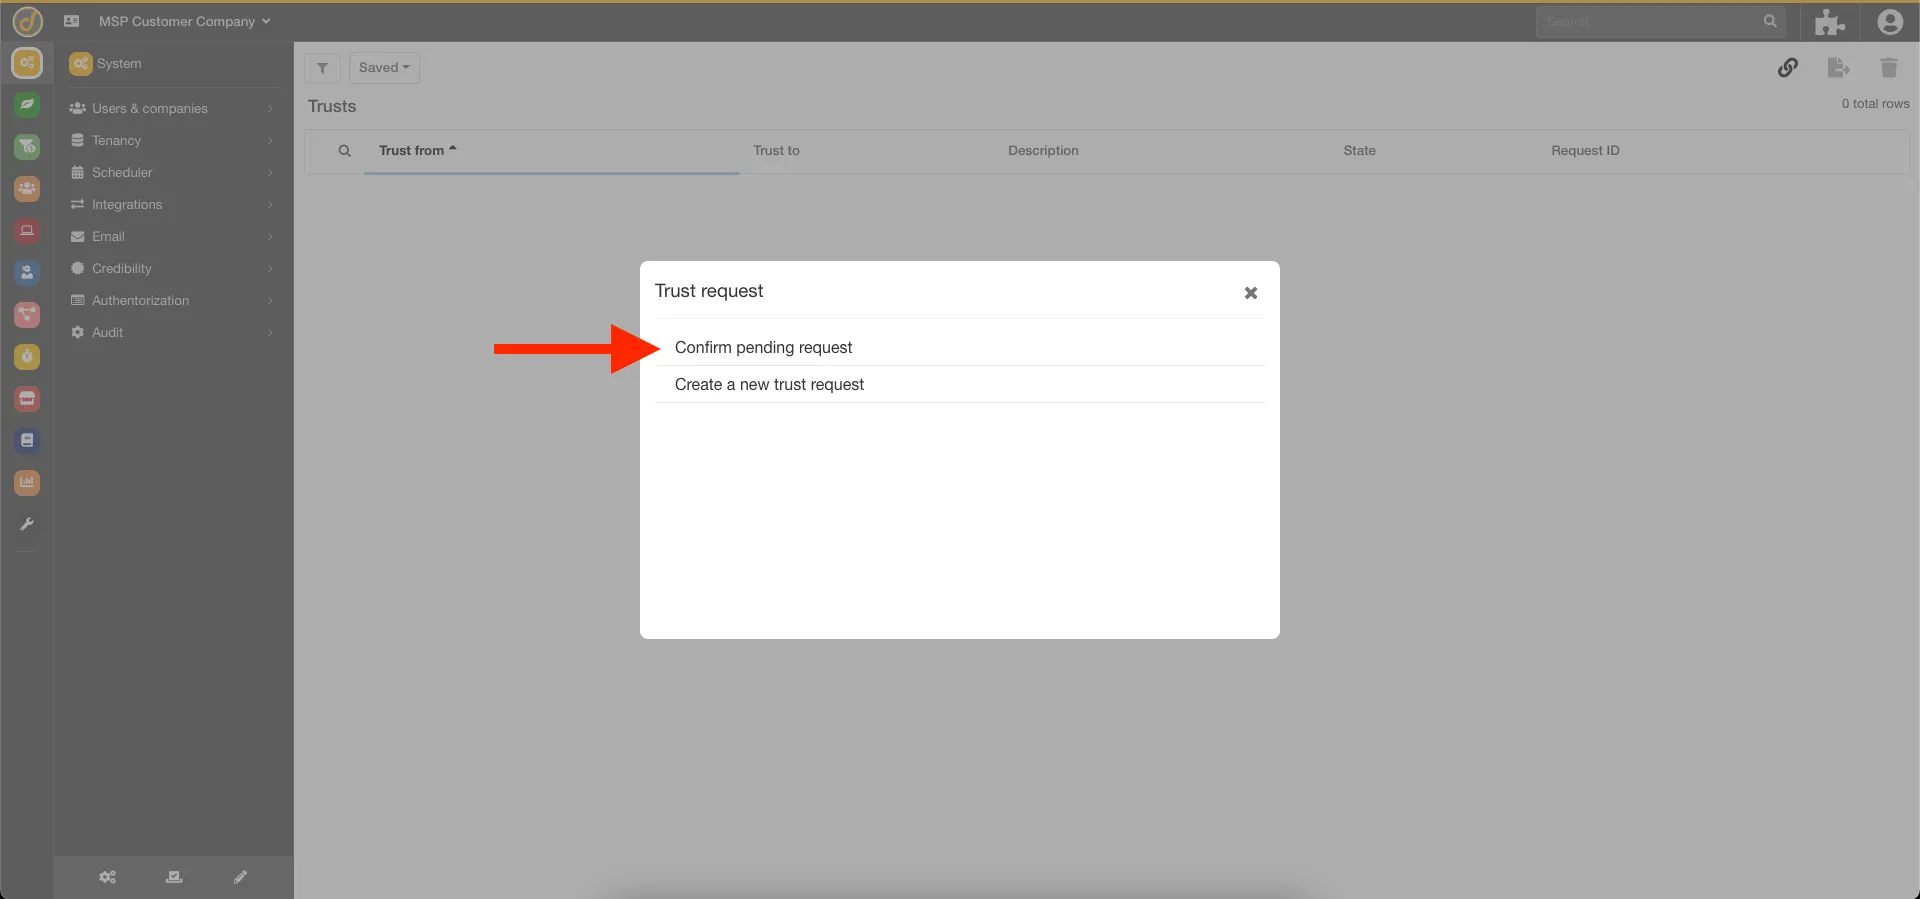
Below are the steps to create a trust:
1. Navigate to Trusts in the navigation menu on the left.
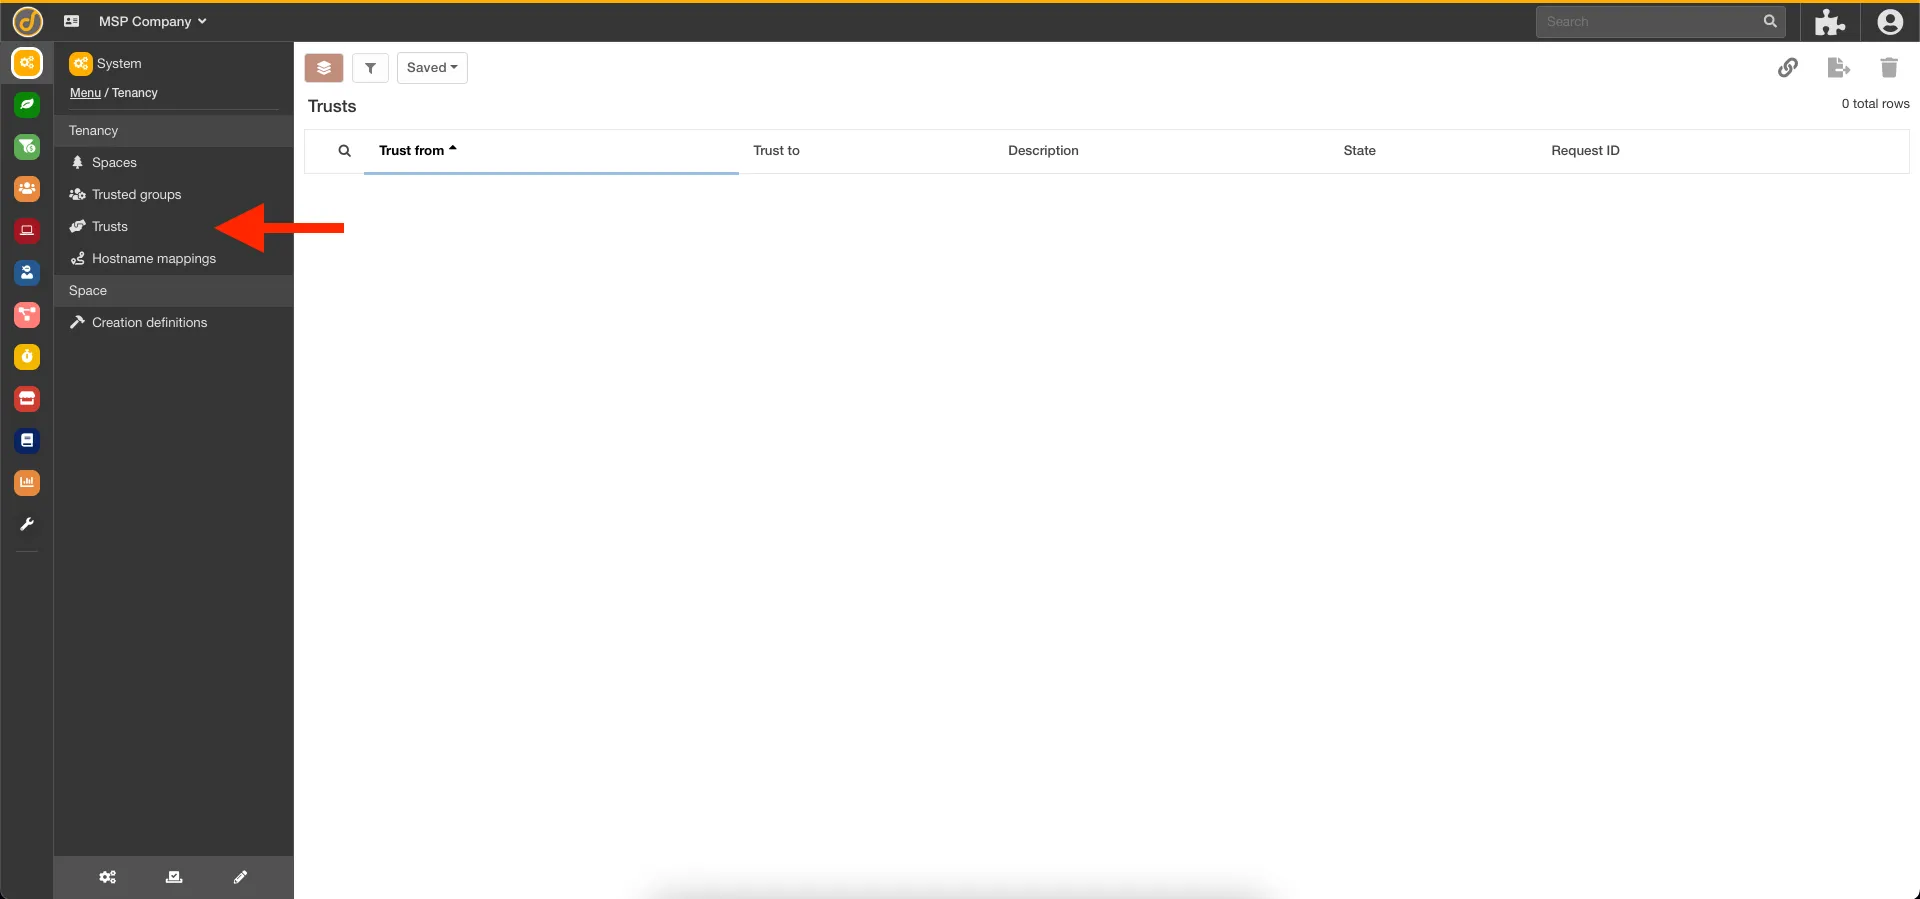
2. Select Trust request option in the top right.
3. Select the Create a new trust request option in the menu that opens.
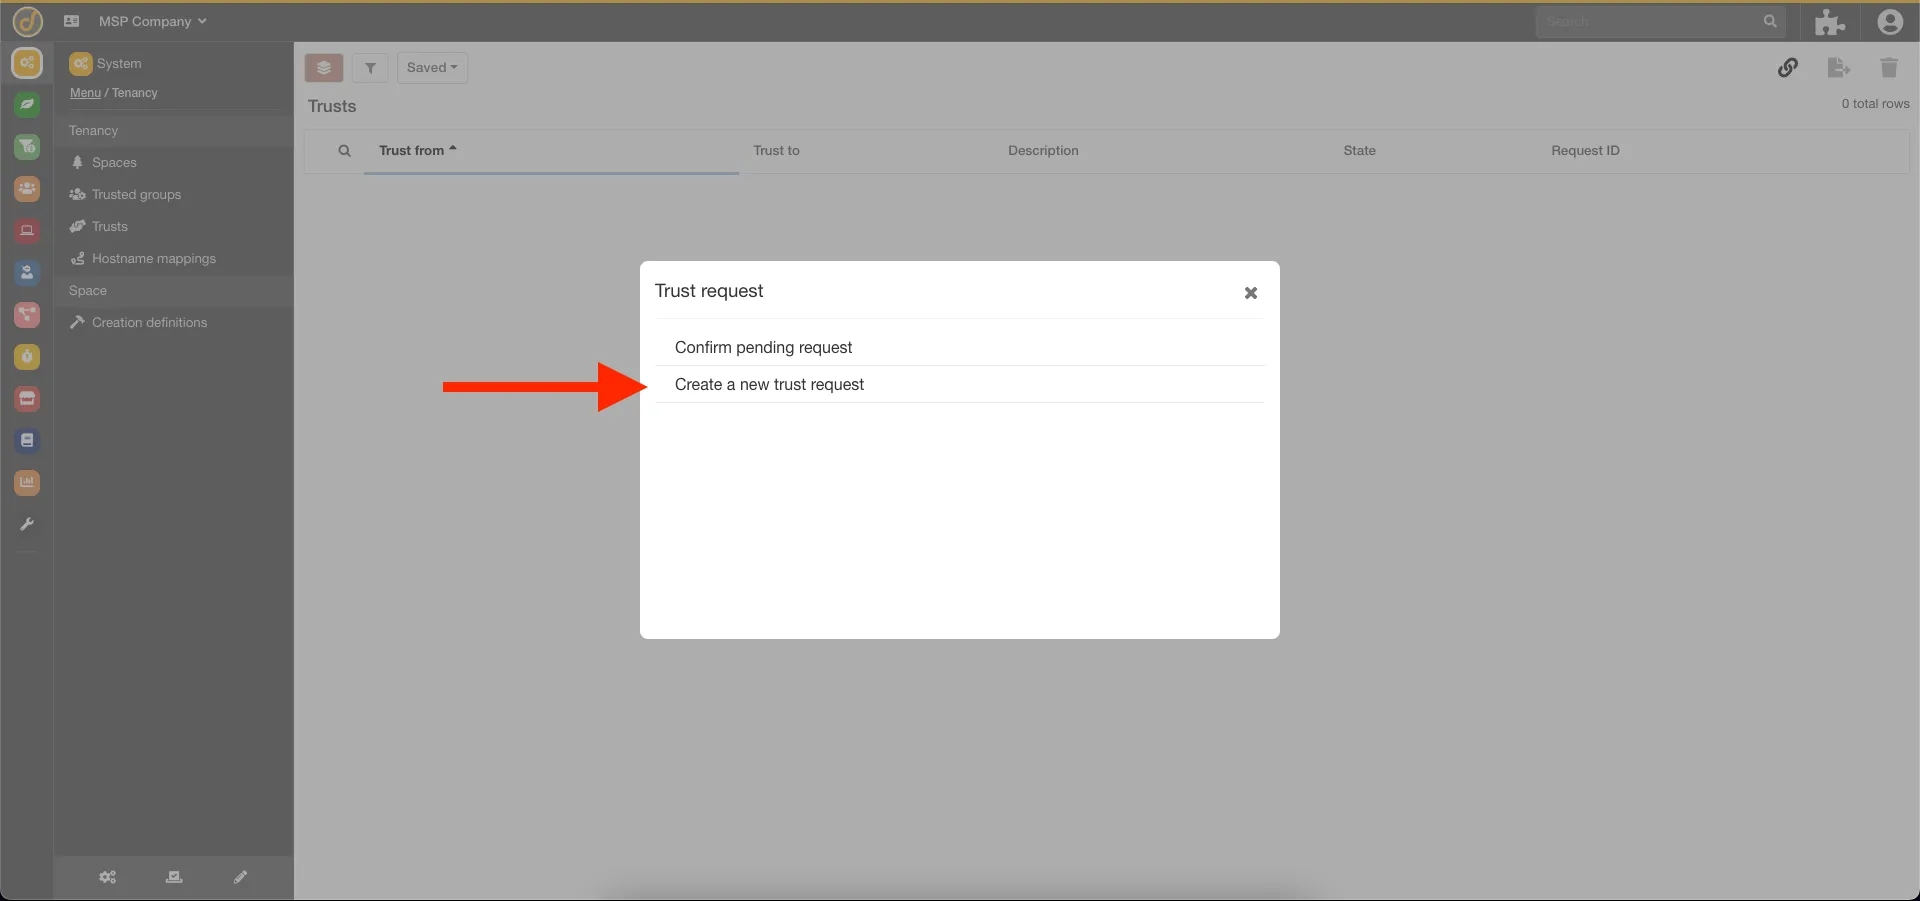
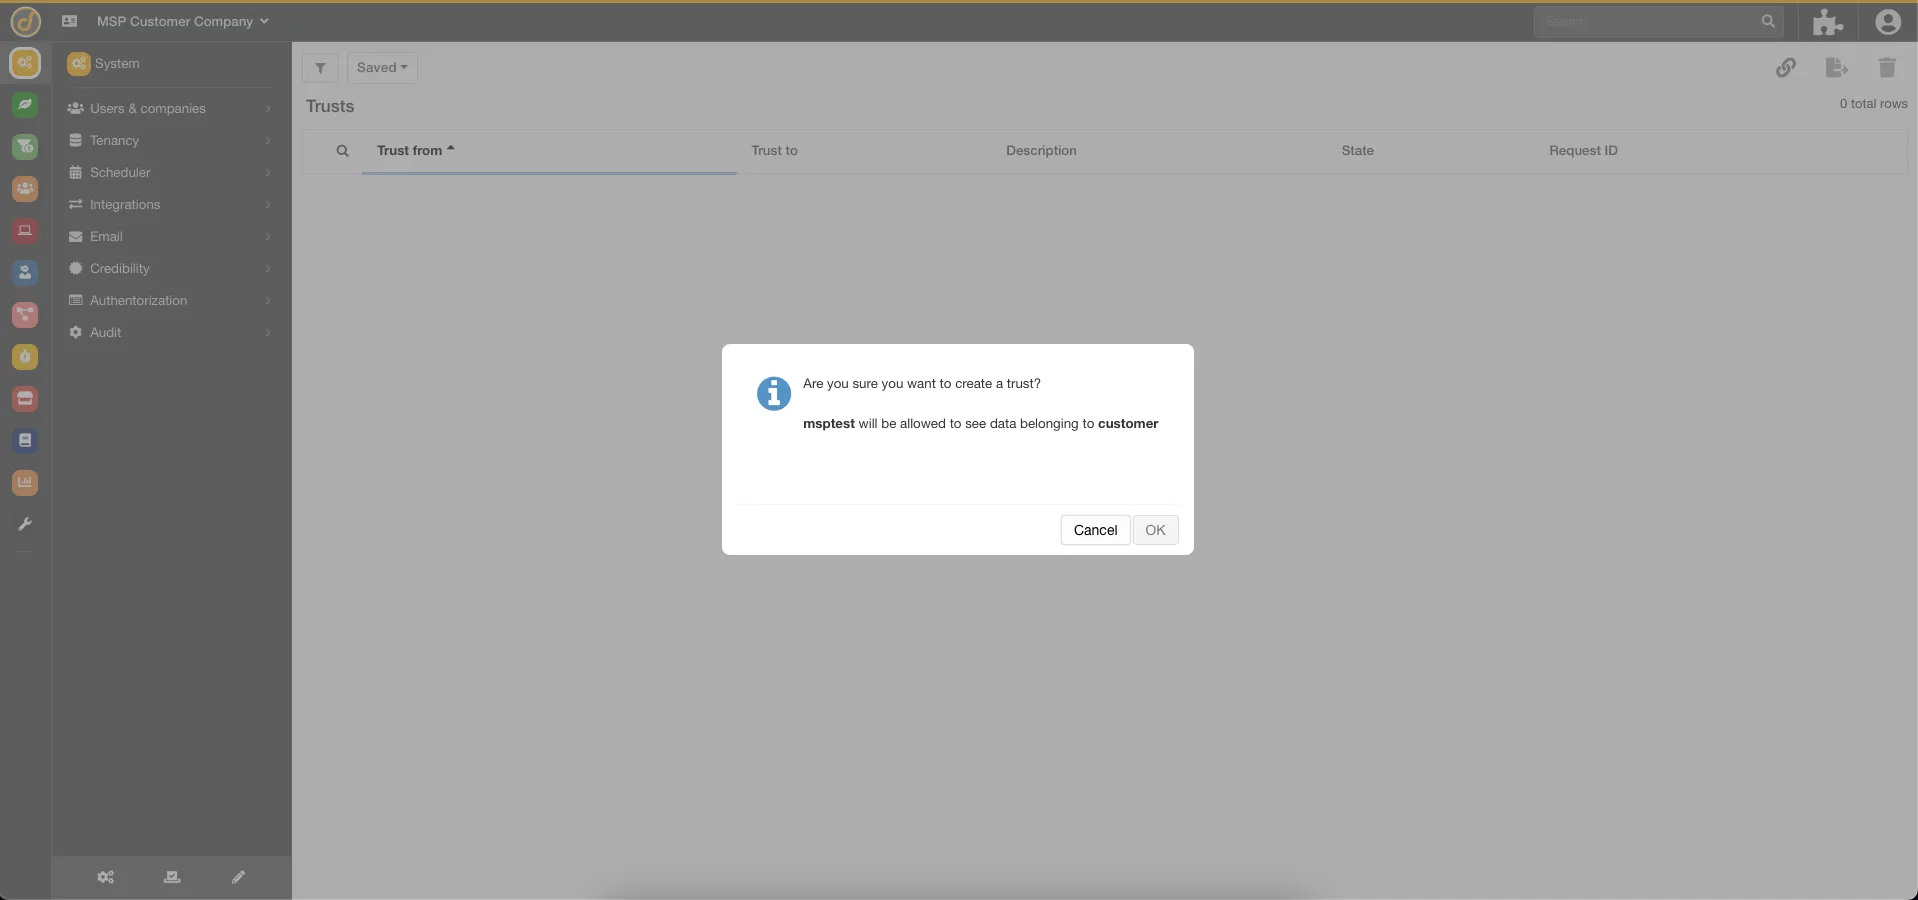
4. Select Request access to another space’s data.
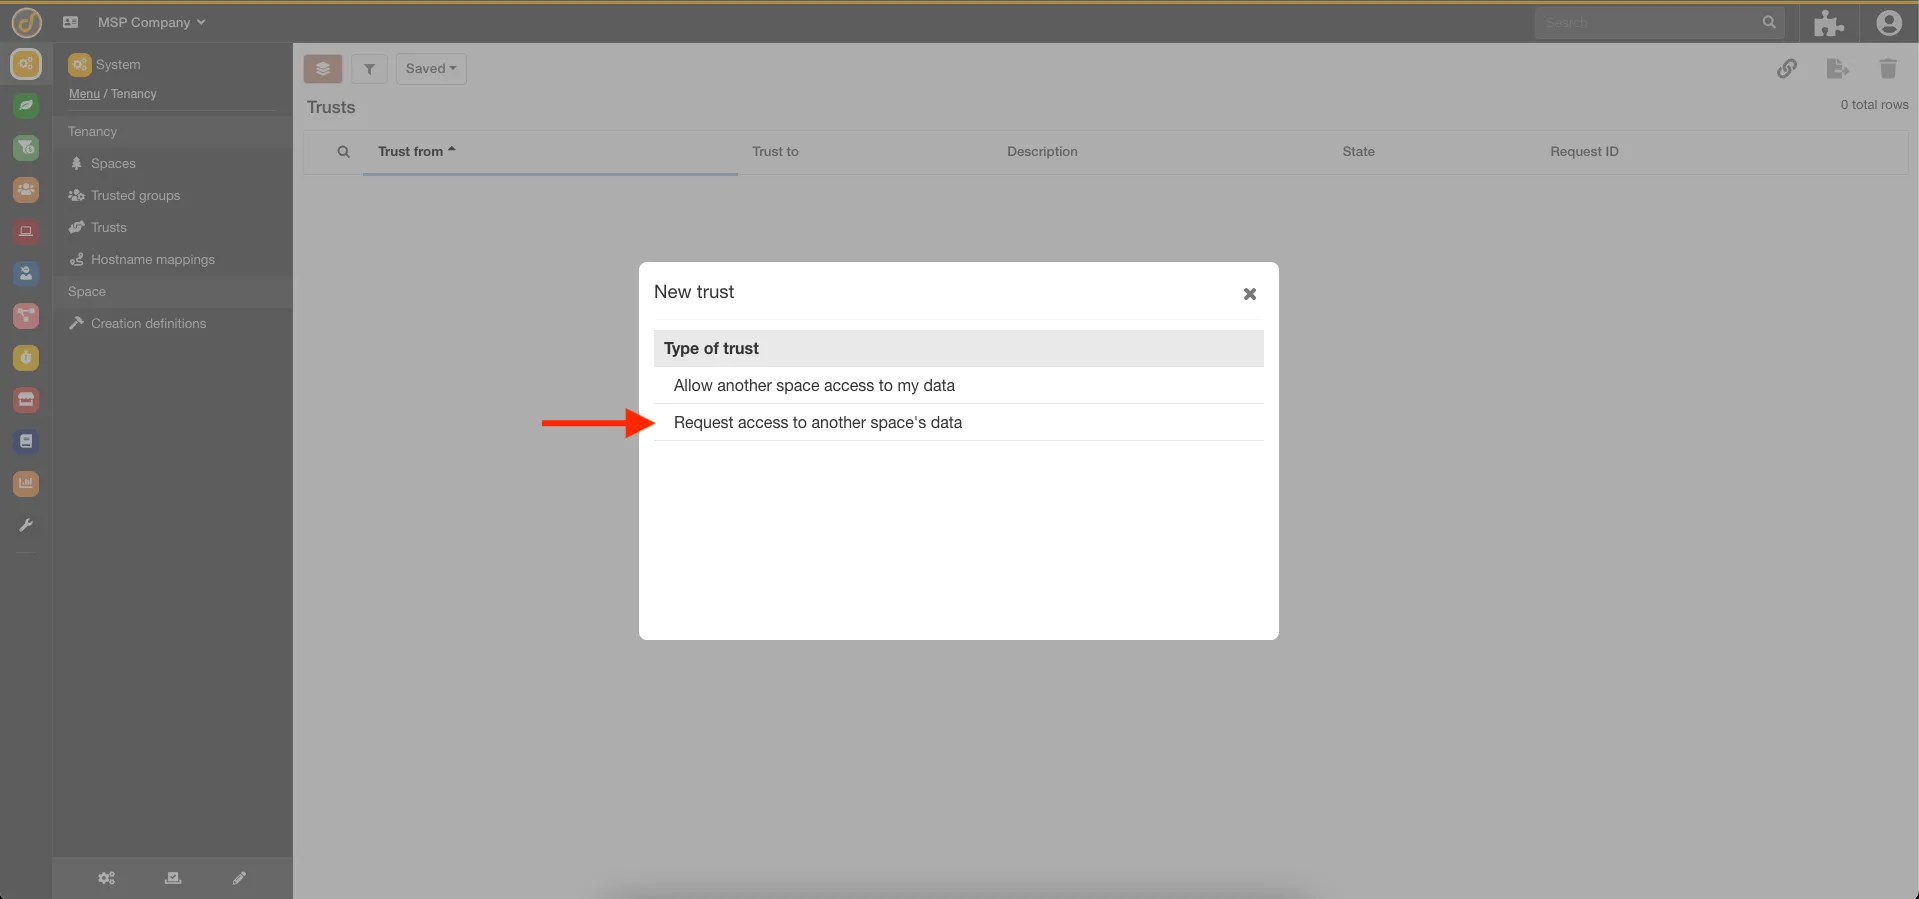
5. Copy the newly created trust record ID.
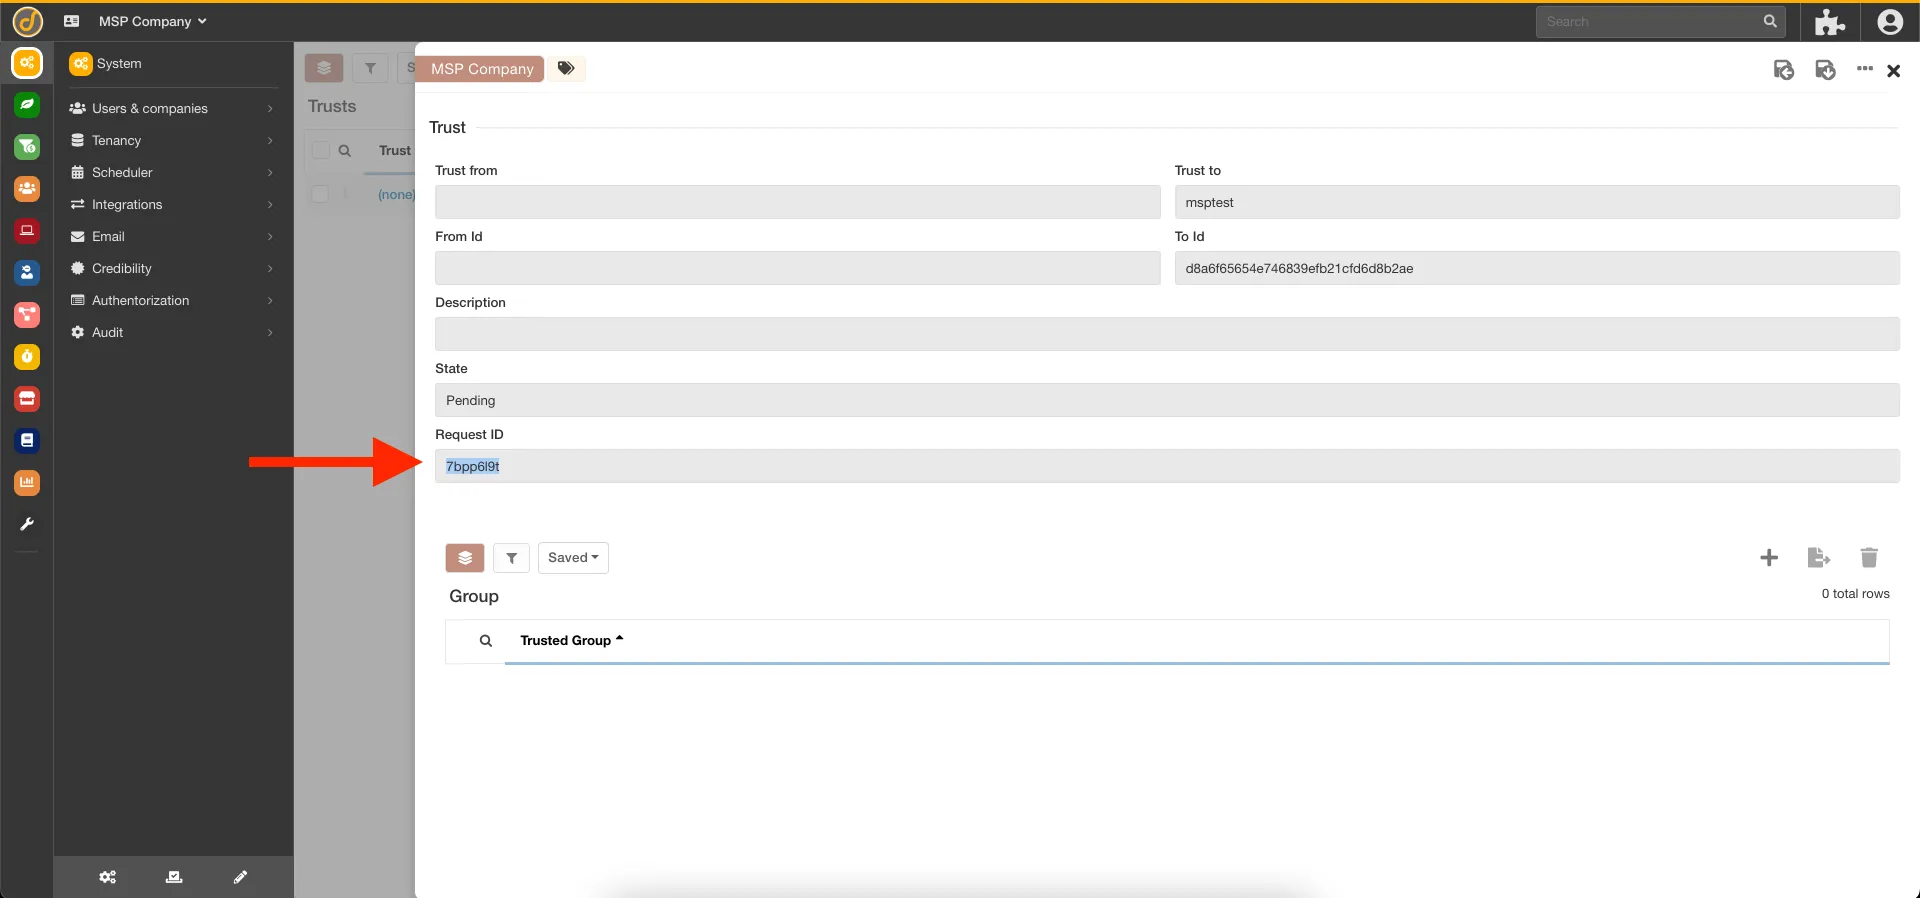
6. Switch into the subspace that the trusted group will need to access from the space tree at the top. After this, navigate to the trust bucket and select the Trust Request button at the top right.
7. Select Confirm pending request.
8. Paste the request ID copied earlier.
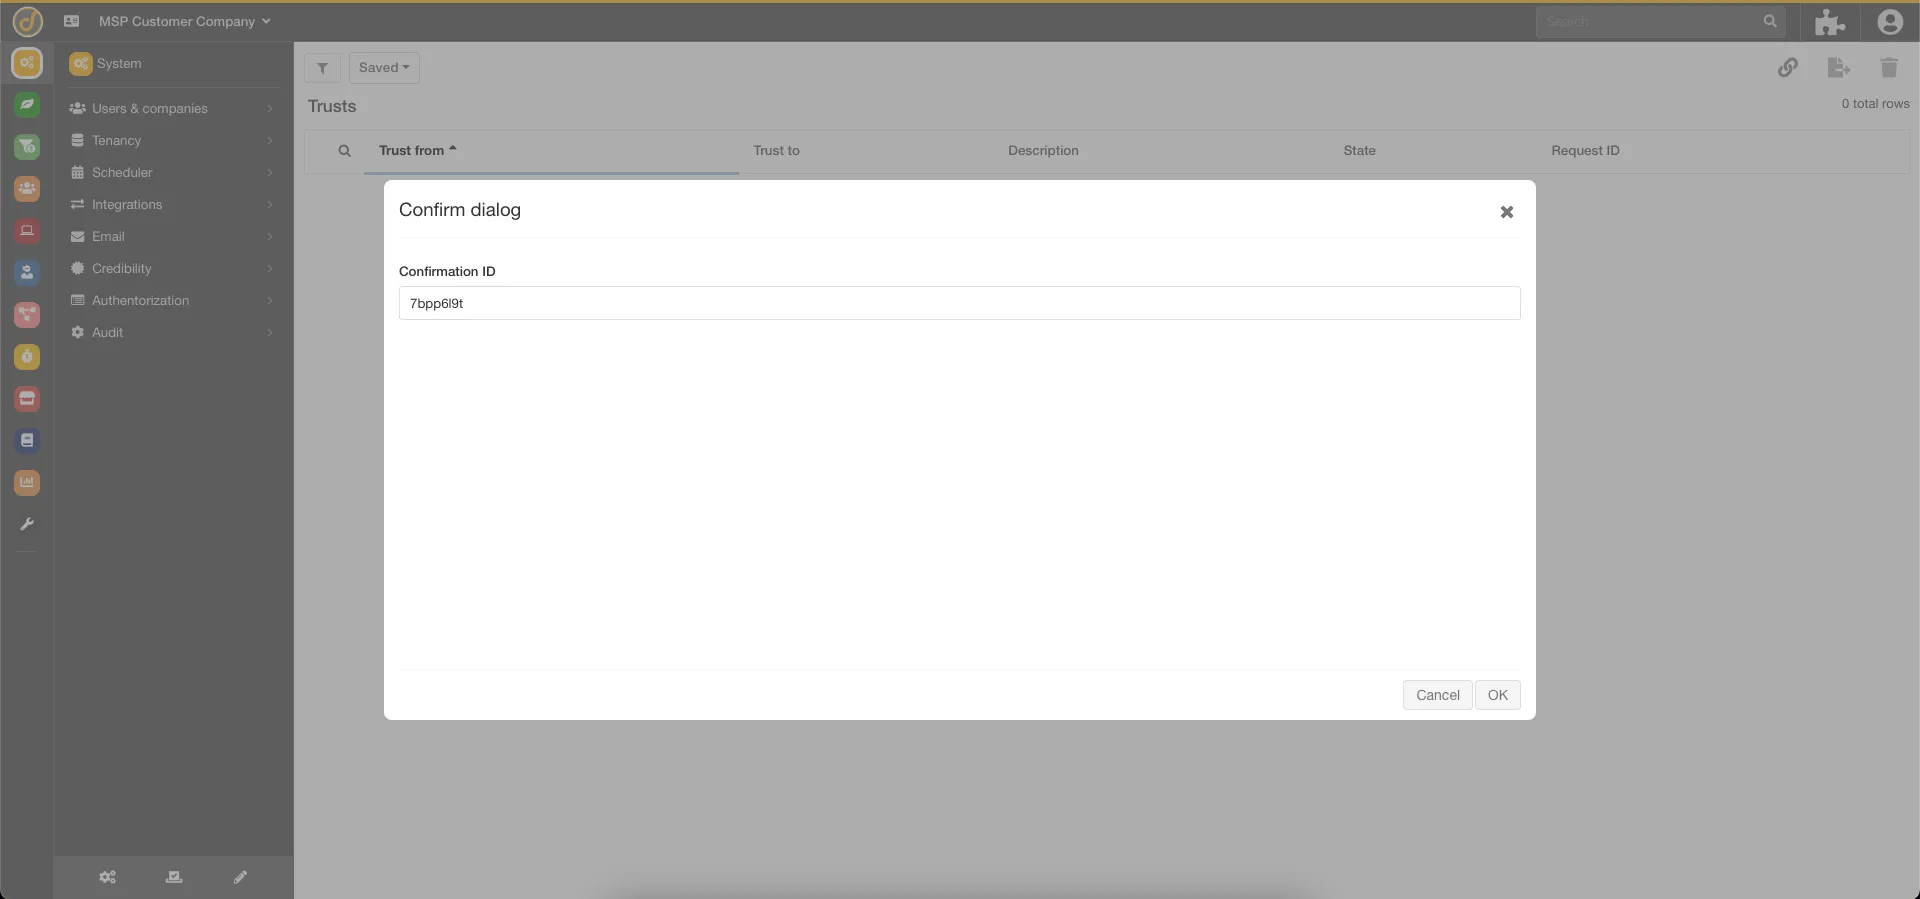
9. Click OK to confirm the trust.
Adding Users to the Group
Section titled “Adding Users to the Group”To add users, click on the Trusted Group record, where the “Groups in trusted group” option is located.
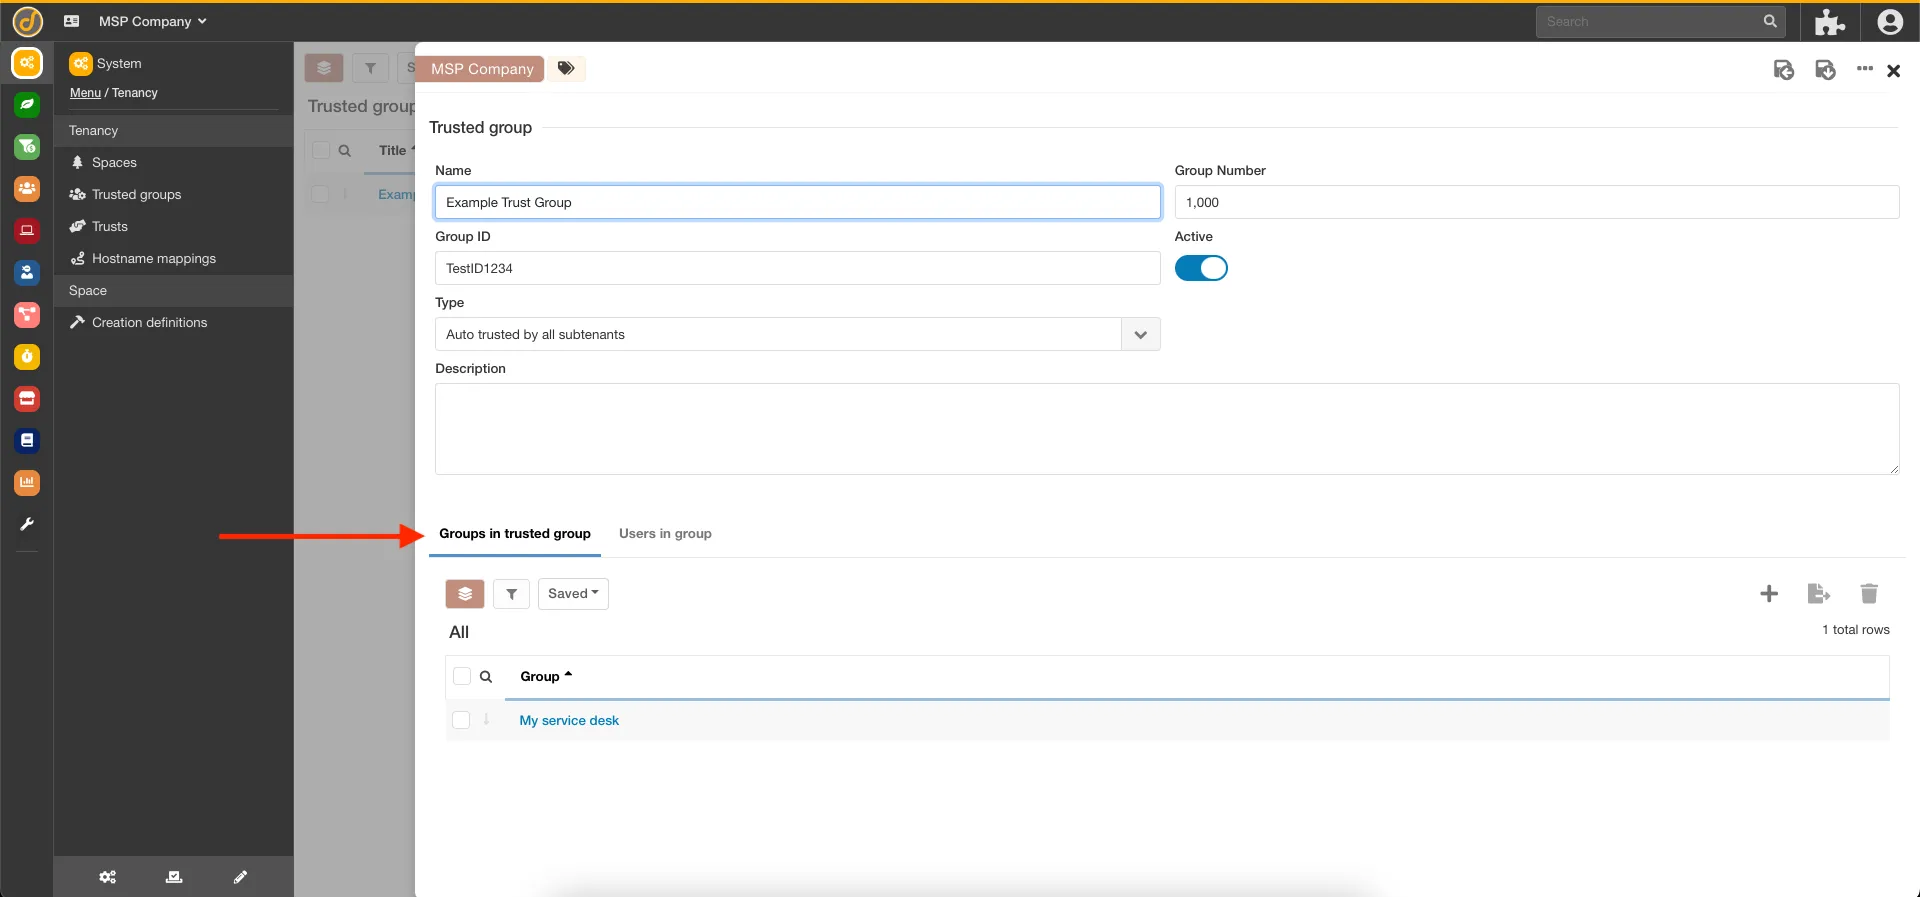
Clicking the plus sign allows one to select the group to add or remove using the arrow buttons. After completing this, click OK to save.
Script Mappers
Section titled “Script Mappers”See attached document “Script Mappers” for code related to this item.
ProcessRunner
Section titled “ProcessRunner”See attached document “Process Runner” for code related to this item.
Tree Definition
Section titled “Tree Definition”Overview
Section titled “Overview”A tree definition is an array of JSON objects used to indicate what goes into a tree. The tree definition is related to the bucket tree component, which is used to display related records in a tree hierarchy. In order for this to work, the tree structure must be specified in the bucket tree component’s tree definition. The bucket tree component also requires a buck to be specified as the starting point for the tree. After that, the tree definition is used to specify how the tree is to be built.
JSON Object Properties
Section titled “JSON Object Properties”Tree nodes are defined using a JSON object. The tree definition contains an array of JSON objects that are displayed in the tree as siblings. Each JSON object also contains a children array of objects that are used to define the child tree nodes for the JSON object.
The type property identifies the type of tree node specified. It contains one of the following values:
-
Label - Display a static label for the tree node
-
Bucket - Display the tree nodes for each of the matching records for the Bucket specified for the Bucket Tree Component. This is really the starting point for generating the dynamic tree nodes.
-
Related - Display records that are related to the parent of this node