cIT - WI - New cIT user onboarding
Section titled “cIT - WI - New cIT user onboarding”Onboarding ticket is initiated by the hiring manager filling out this m365 form: https://forms.office.com/r/z4qL6BMhid
Step 1: AD User account
1.a Setup an AD user in the correct OU associated with the users role.
1.b Add users to the required groups, if unsure work with hiring manager, hr, or senior IT manager to ensure new user has the access and email groups needed.
1.c Sync the user to m365
Step2: M365 Account
2.a Setup the user in M365
2.b Add the following licenses for all centrexIT users:
2.b.i Microsoft 365 E3 (No Teams)
2.b.ii Microsoft Teams Enterprise
2.b.iii Microsoft Defender for Endpoint P2
2.b.iv Microsoft Entra ID P2
2.b.v Microsoft Teams Audio Conferencing includes dial-out to USA/CAN only
2.c Add other licenses as needed.
2.d add user to the appropriate MS Teams groups per hiring manager. All users need to be added to CentrexIT Team one and Department Team.
Step3: Avanan (User will be added to Avanan automatically)
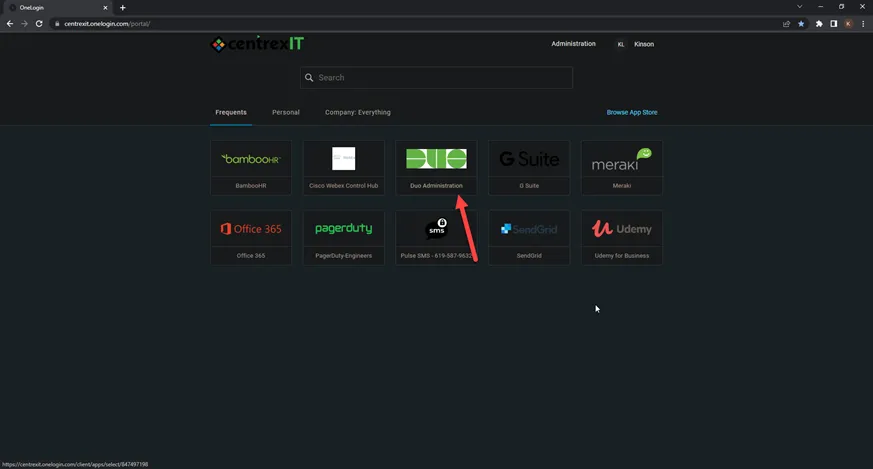
Step4: OneLogin
4.a Add user to one login
Step5: DUO
5.a add user to Duo and Setup DUO device
Step6: Webex
6.a Add user to webex
6.b add users phone extension
6.c add new user to centrexIT - Team one in webex.
Step7: Add the user to the following systems as needed based on the role, if unsure, reach out to hiring manager or senior IT manager.
7.a Ncentral
7.b OpenDNS - Security Manager to setup (Josh)
7.c TrueMethods
7.d Pax8
7.e align
7.f SOPHOS Central
7.g Masergy (Webex Contact Center) - If Service Desk User
7.h Lucid
7.i Udemy
7.j 1Password - Security Manager to setup (Josh)
Assign the onboarding ticket to Senior IT Manager (Mike Hicks) to setup the following:
8.a.j OpenPath/Avigilon Alta (Poway Door Control system) - Senior IT Manager can add
8.b Halo (Mike H.)
8.c My IT Process (Mike H.)
8.d ADT (Poway alarm system) (Mike H.)
See below for How to guides for the individual setups for the New User:
*Setup AD and M365 user account
- Log onto CITS4 using the Admin account
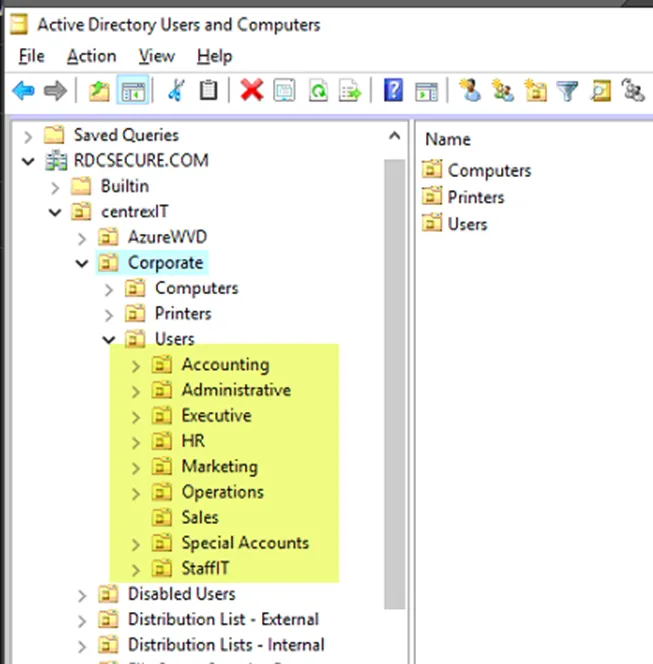
- From ADU&C, navigate to the correct OU the new user will be in
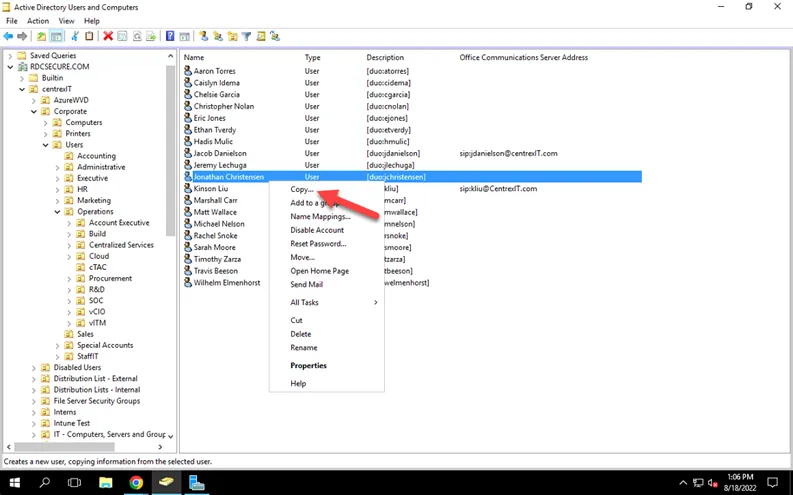
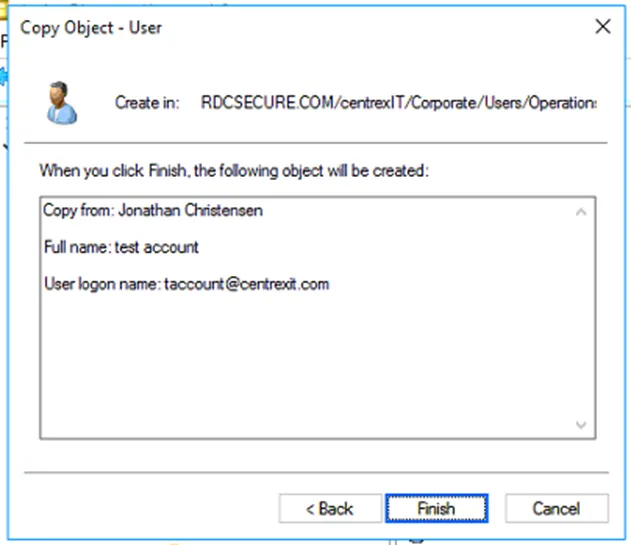
- Find a user that shares the exact same role, right click and select copy (this will make the new account inherit all the groups from the original account)
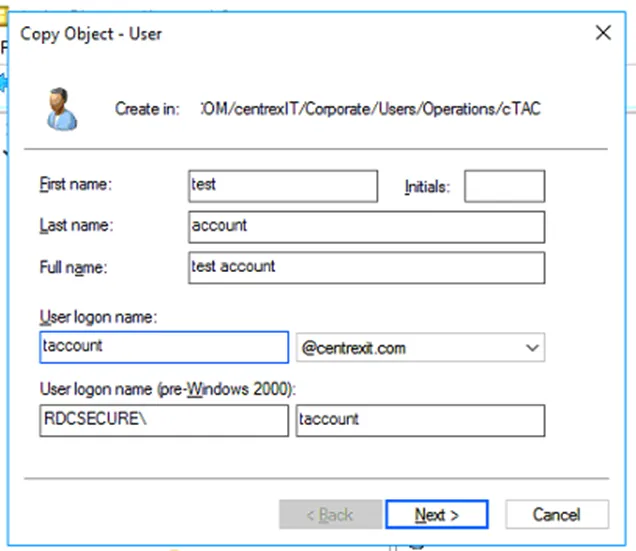
- Put in the new user’s first and last name as well as selecting a User Logon name (normally it’s first initial last name)
- Click next
- Select a password and confirm it. The password can be anything you want at this time. And then click next

- Click finish
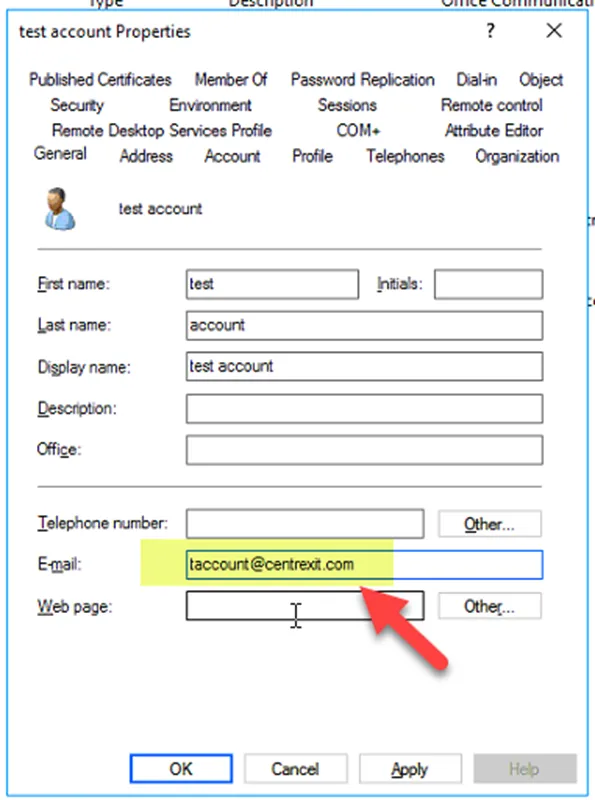
- Open the newly created account’s properties and put in the email address with the username@centrexit.com
- In the description field, put in [duo:username]. Please include the “[“ and “]” as show in the screen shot
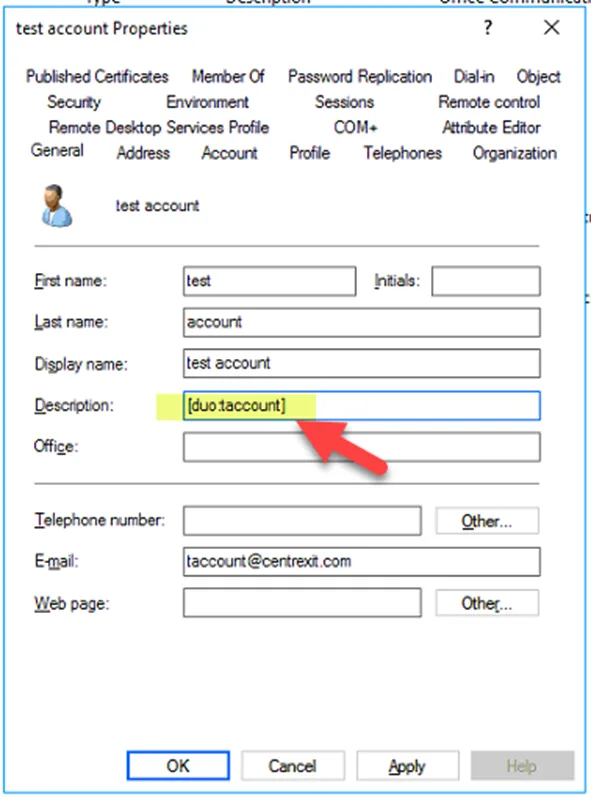
- Click Apply
- Force a delta sync with M365
- Then log onto M365 admin portal as Admin
- Search for the user account you just created fro the Active Users list
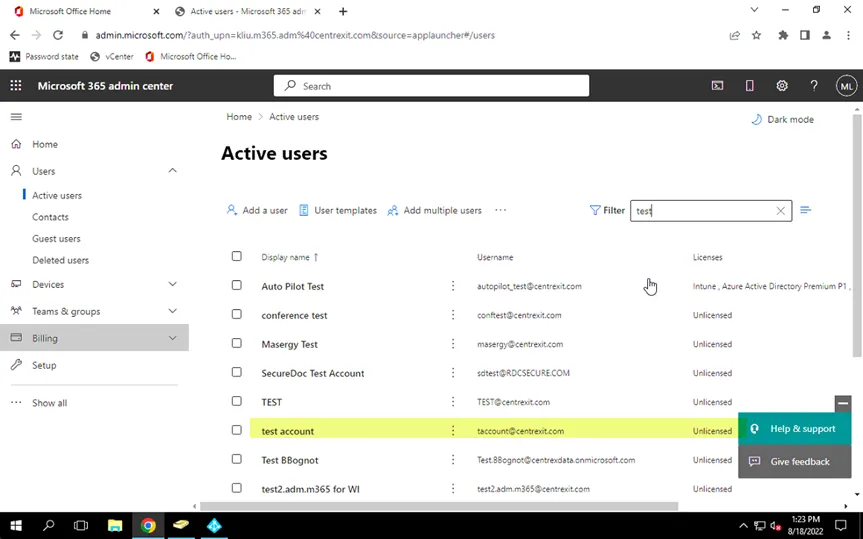
- Select the correct license(s) based on what was requested in the User onboard form

- Click on Save Changes
- The mailbox should be generated
*You have completed the user account setup and mailbox setup*
------------------
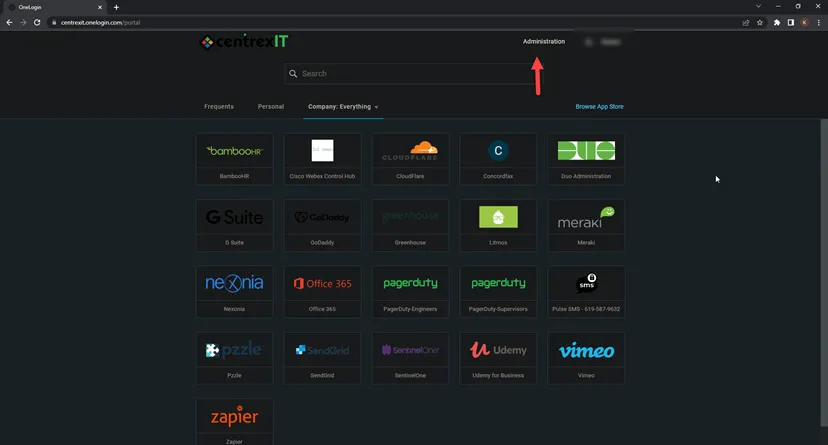
*Setting up OneLogin*
- Log onto OneLogin and then select Administration
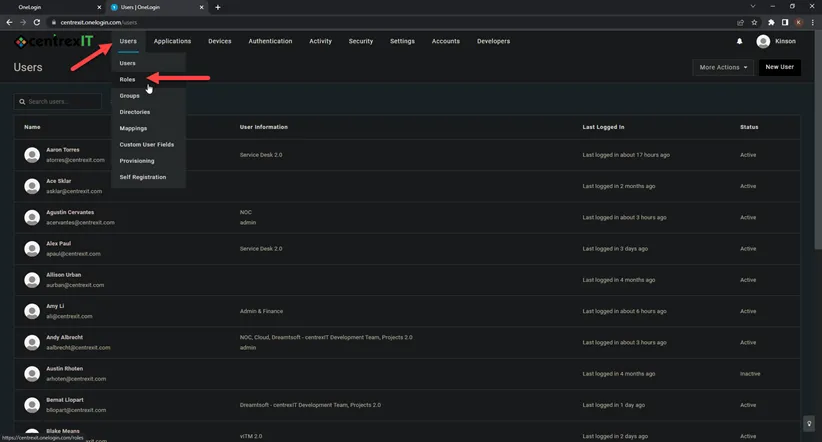
- Go to Users > Users and then search. You should be able to see the new user account created

- Once confirmed, please go to Users > Role
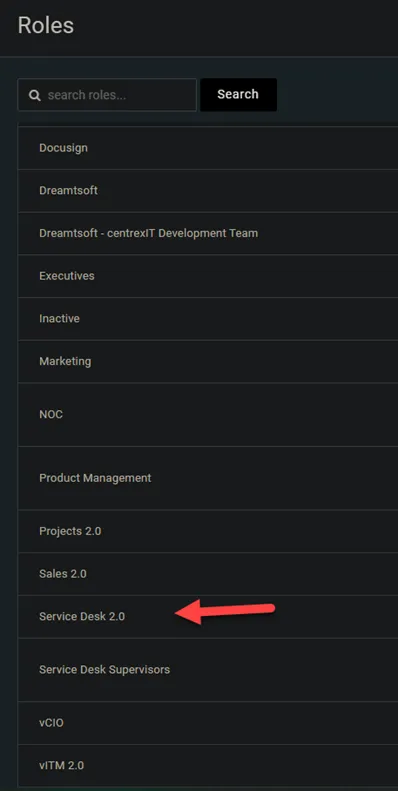
- Based on the role this user will be, find the appropriated group/role and click on it. In this case, let’s use Service Desk 2.0 as the example
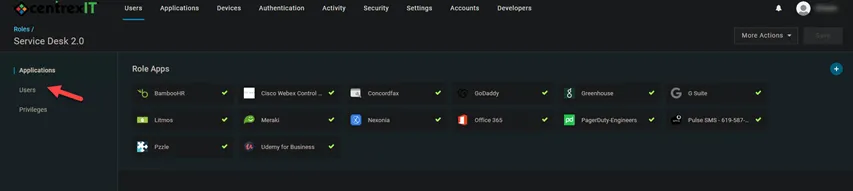
- From here, click on Users
- In the search field, start putting the in the user’s name and you should get a list of selectable names. Pick the newly created account that you need to set up access to OneLogin. Then also click Check
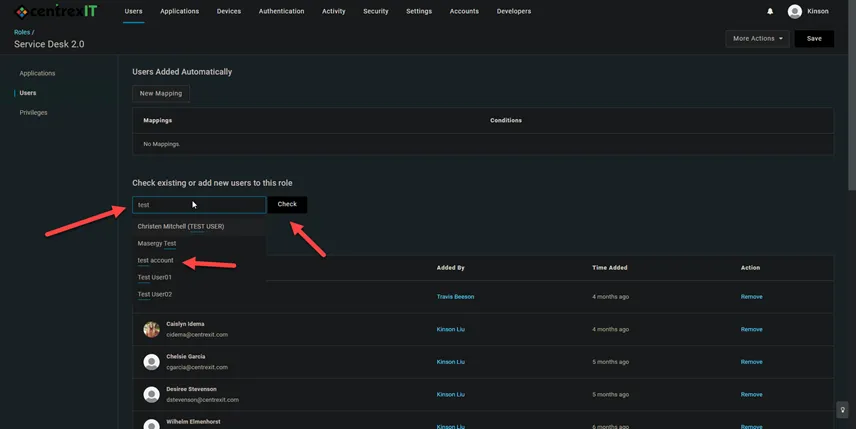
- You should see the account showing in this list. Click on Add to Role at the end of that line
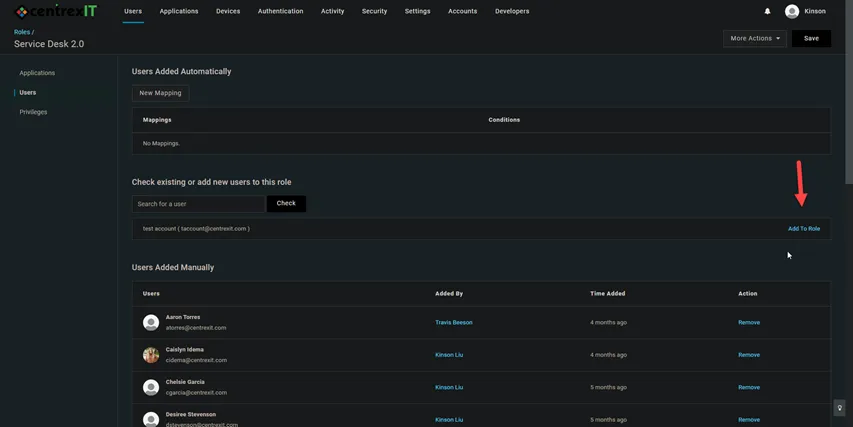
- You should see the account added to this window. Then click Save
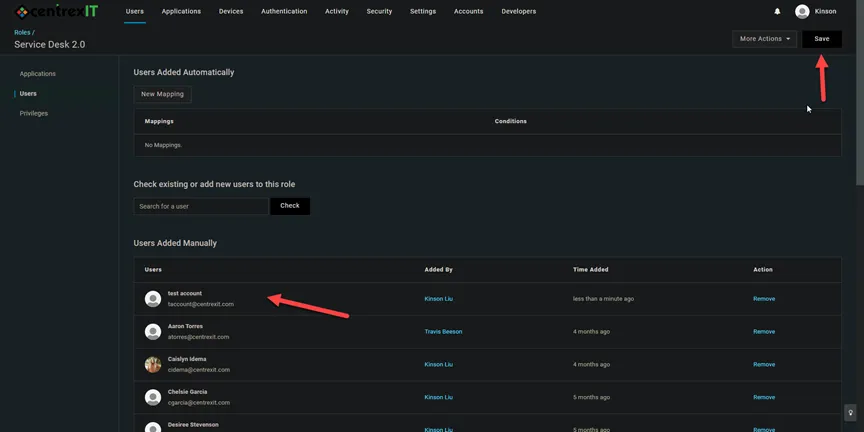
*You have completed OneLogin setup*
------------------
*Setting up Webex*
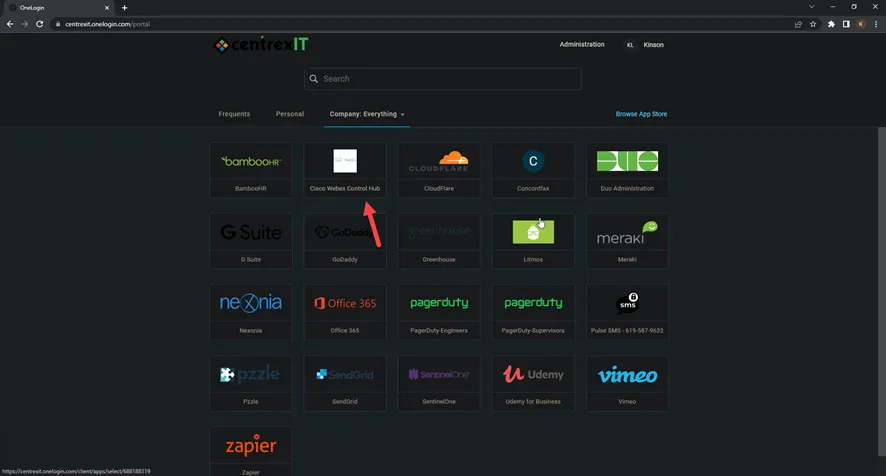
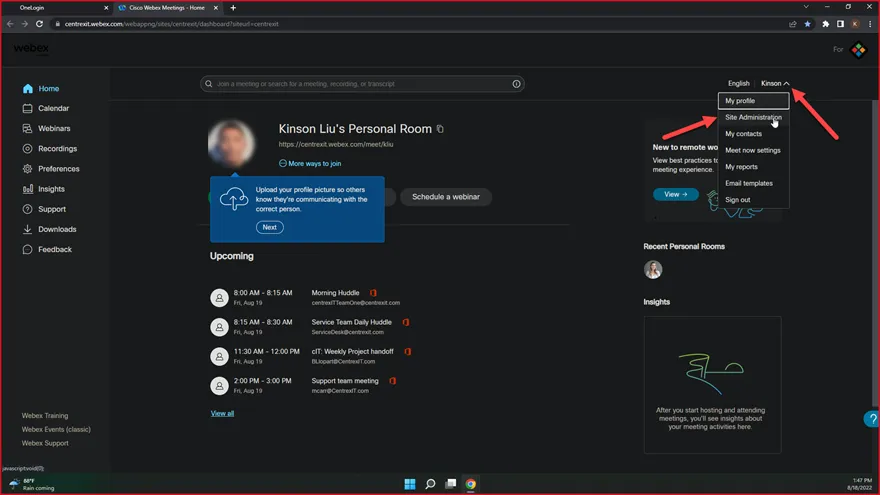
- From OneLogin, click on “Cisco Webex Control Hub*
- Click on your name on top right with the drop down and the select Site Administration
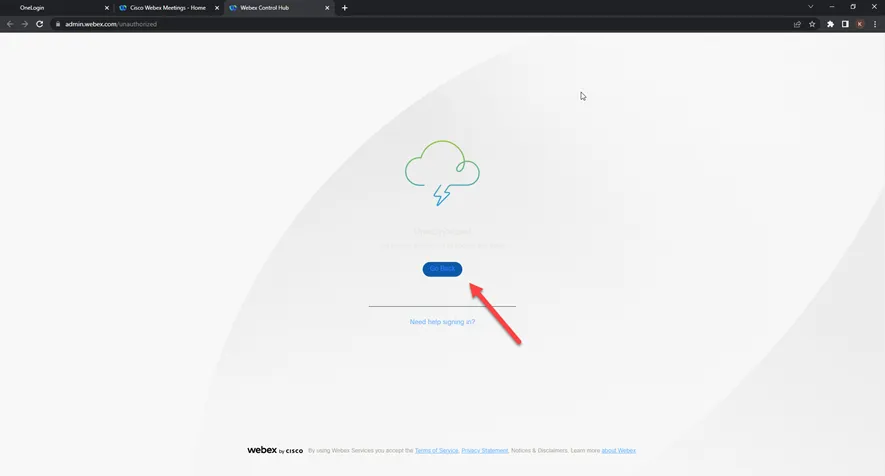
- You might get this screen, click on “Go Back” if you do
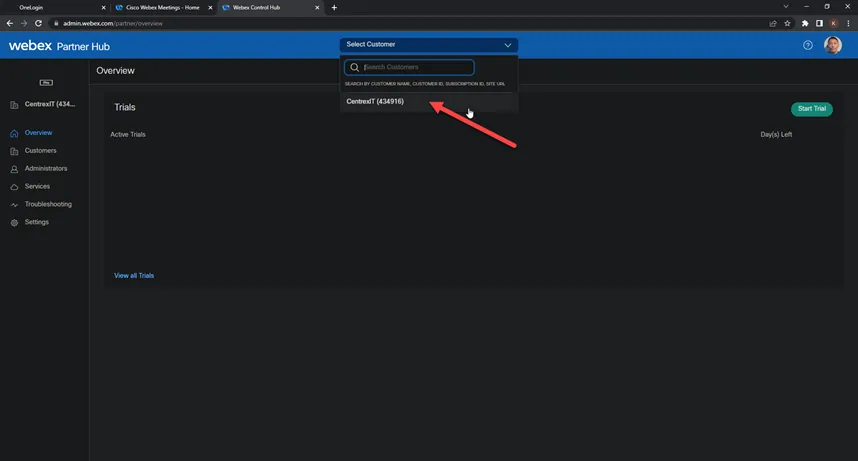
- From the Select Customer section, drop down and select CentrexIT (434916)
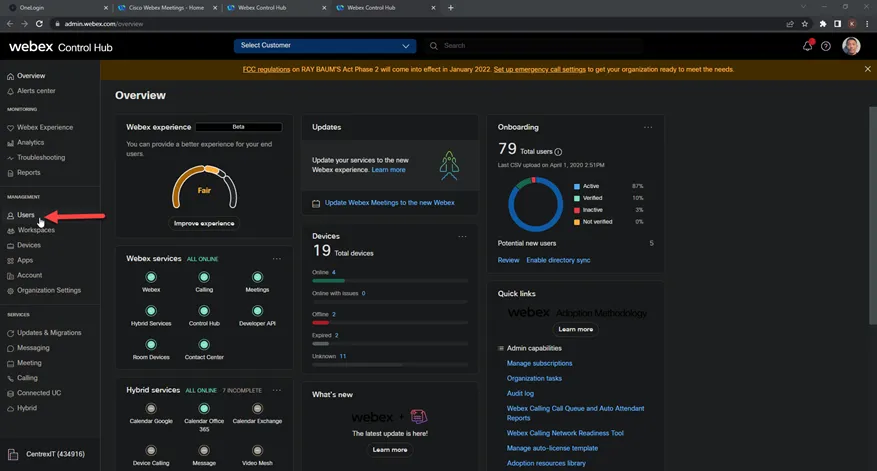
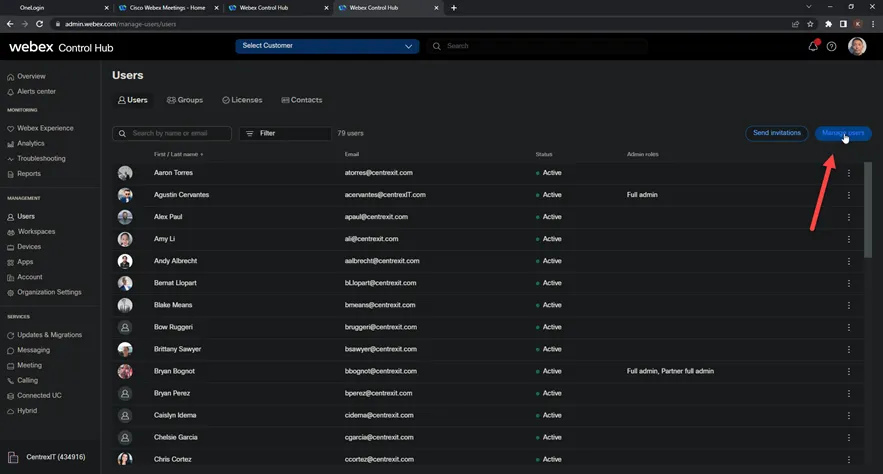
- Select Users
- Click on Manage Users
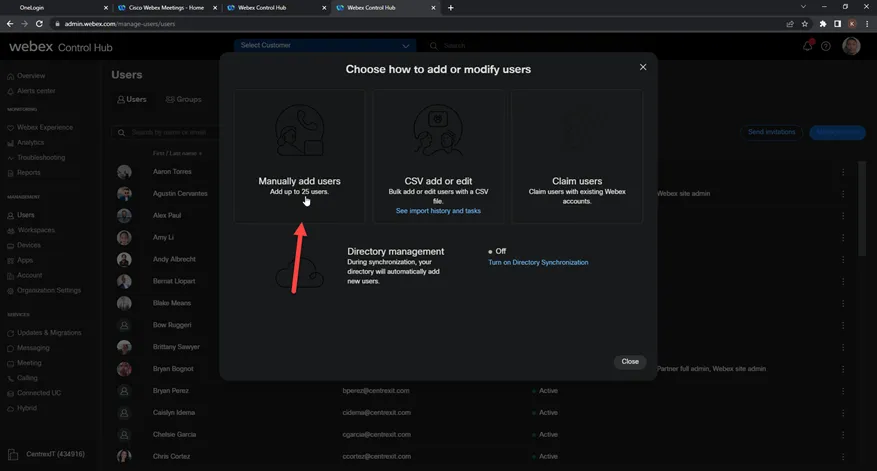
- Select Manually add users
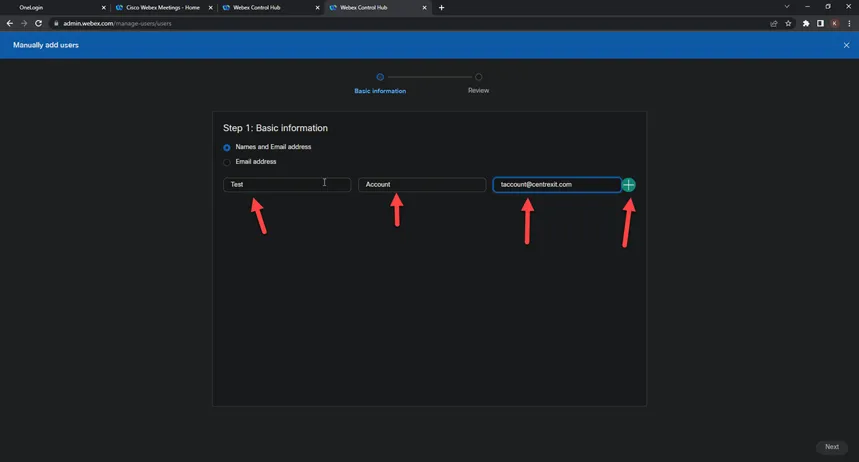
- Put in the new user’s first name, last name and email address. Then click on the “+” sign
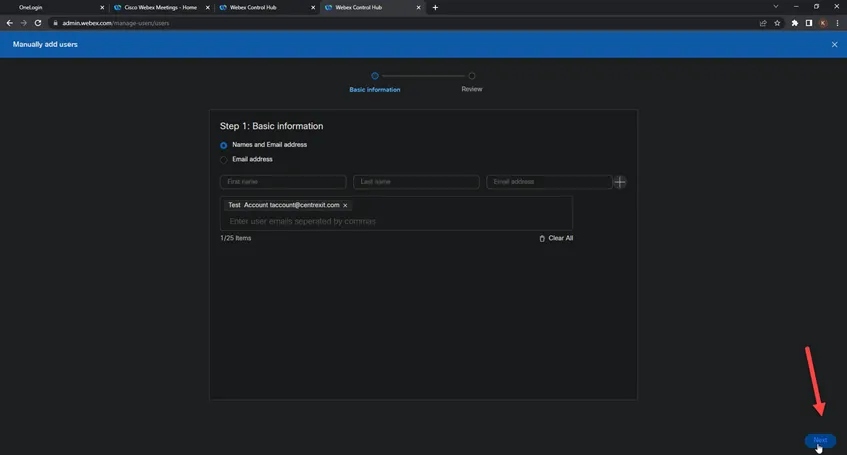
- You should see this. Click on Next
- Click on Add Users
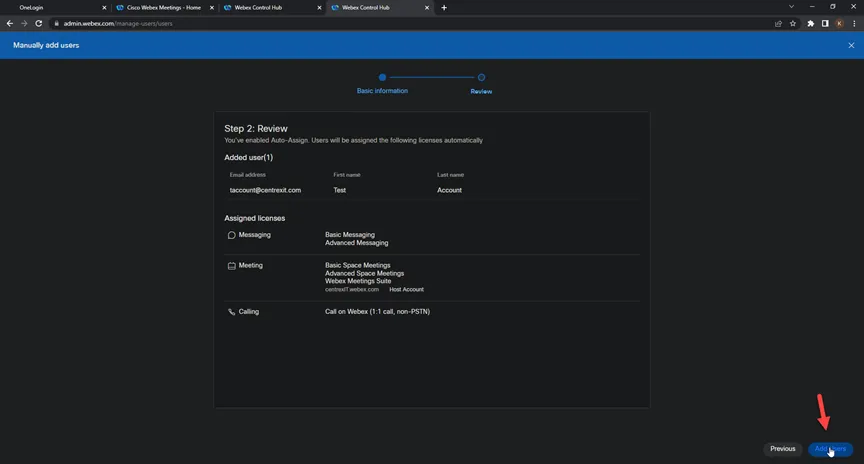
- Click close

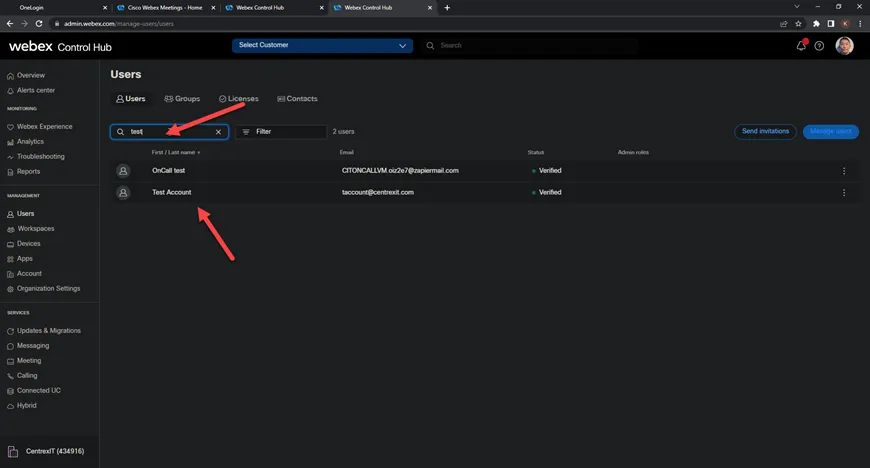
- You should be brought back to the Users screen
- Put in the user’s name and click on the name (to get into the properties)
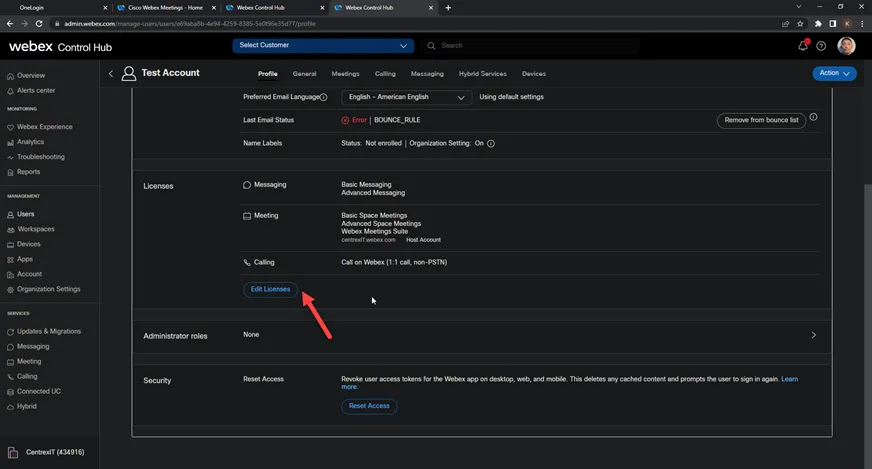
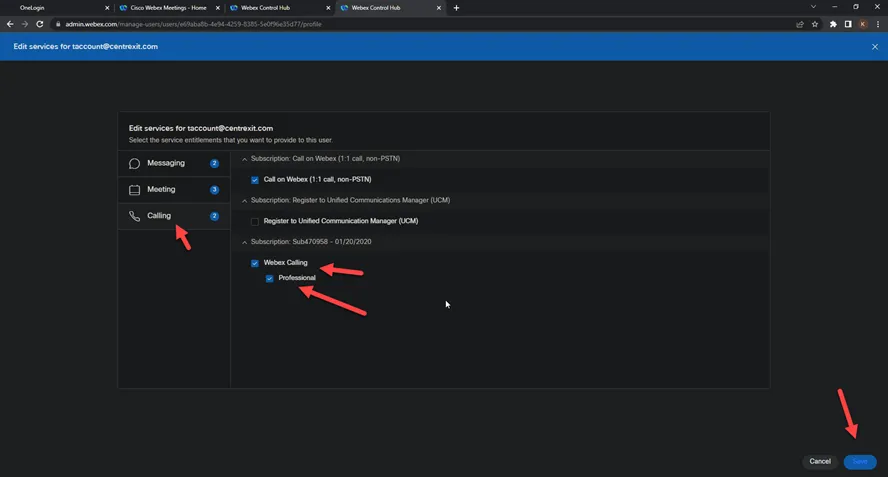
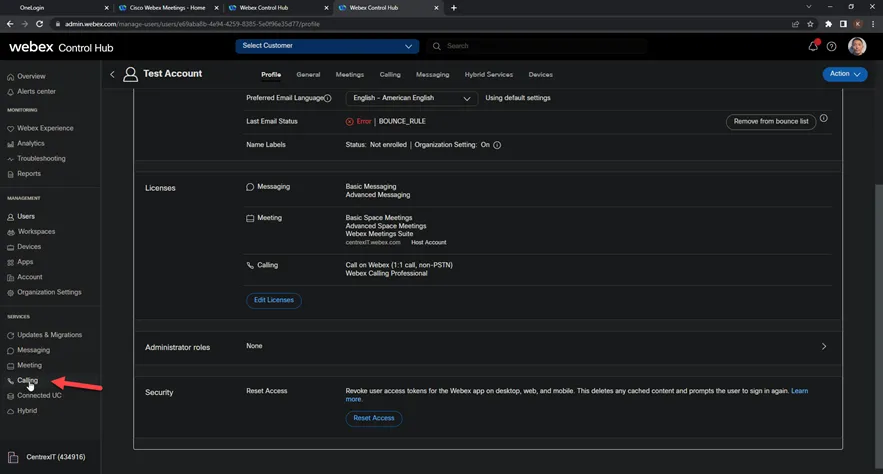
- From here, go to the Licenses section and click on Edit Licenses
- Click on Edit Licenses
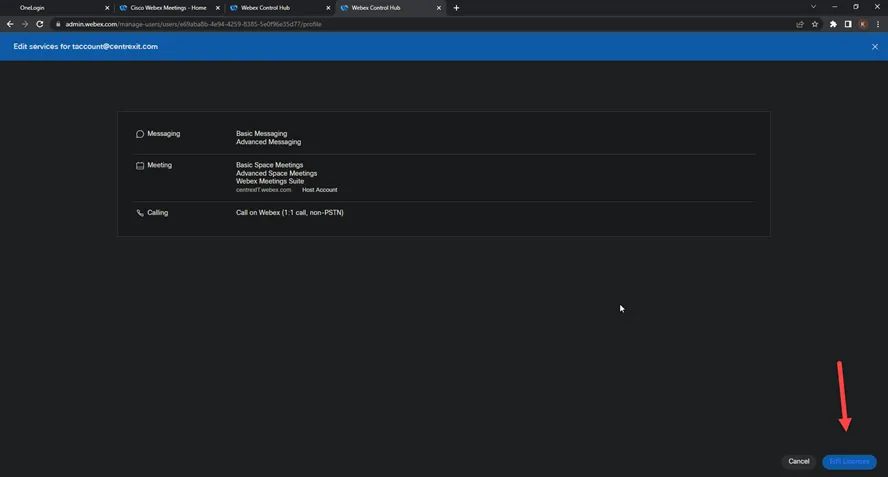
- In the Calling section, select the Webex Calling (Professional should be auto selected). The subscription should be for Sub470958. Then click Save
- Click on the drop down on Phone Number and then select the phone number needed.
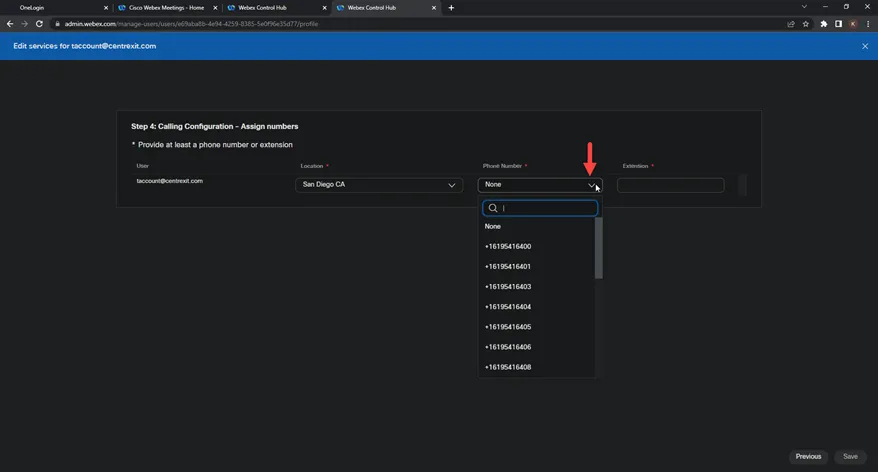
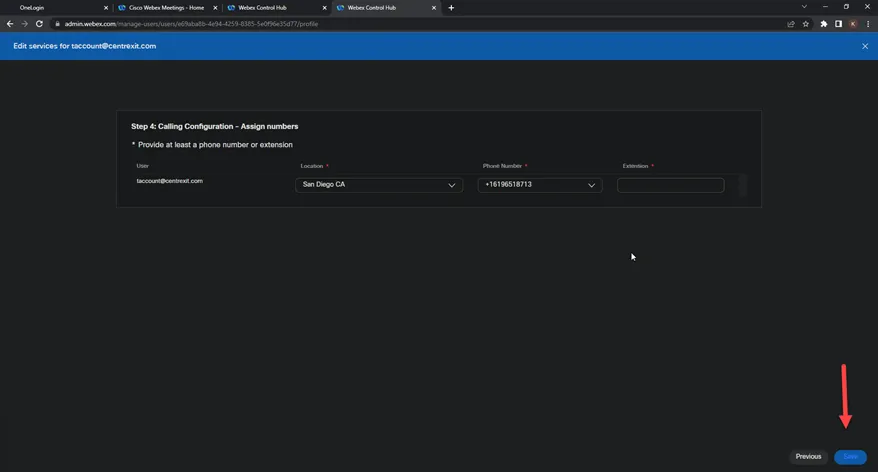
- Once selected, click Save
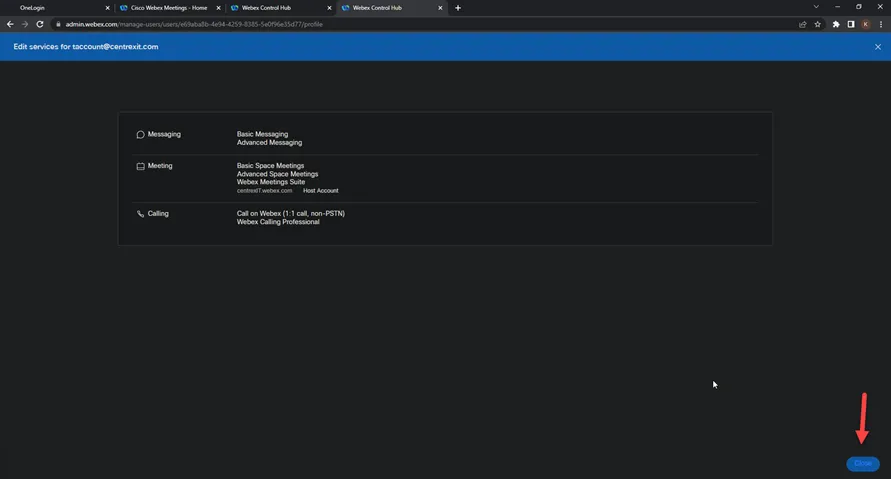
- Click Close
- Back to the Control Hub screen, click on Calling under Services
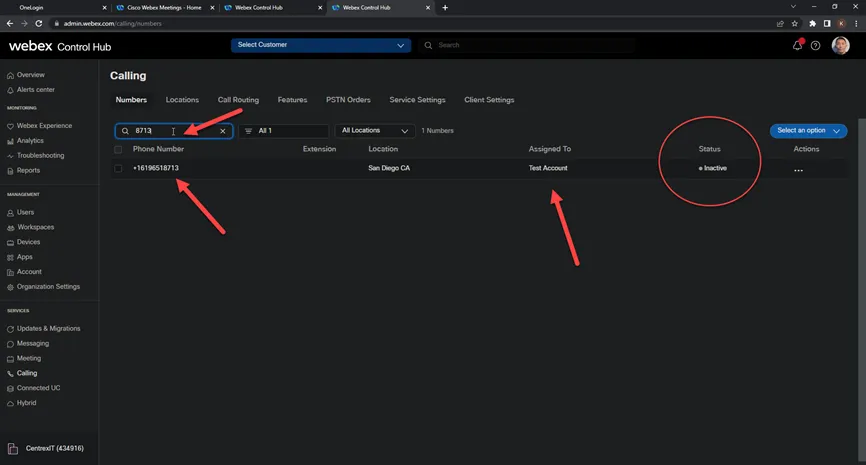
- Search for the newly setup by phone number or name. Check the status and see if it’s “Activated” or “Inactive”
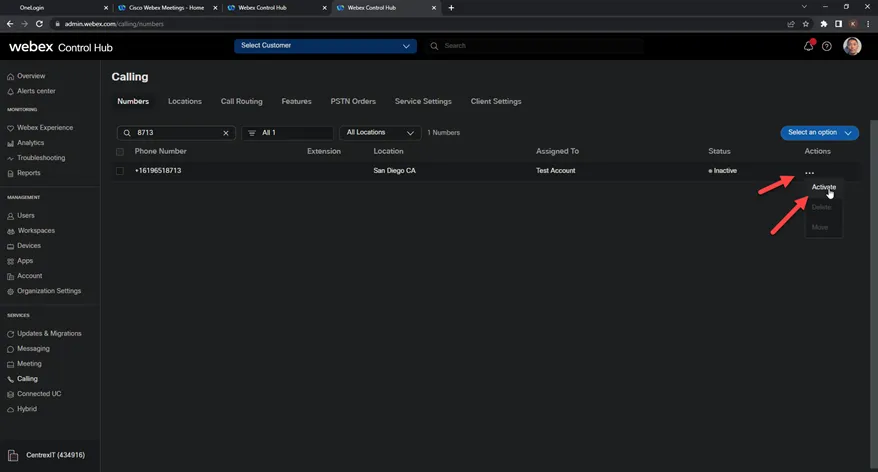
- If it is showing Inactive, click on the Actions section and select Activate
- You should see the status changed
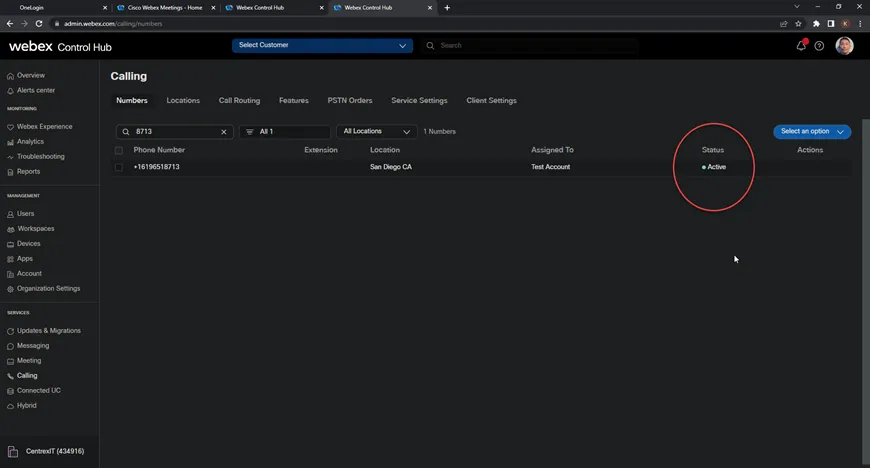
*You have completed Webex Setup*
------------------
*Setup DUO access*
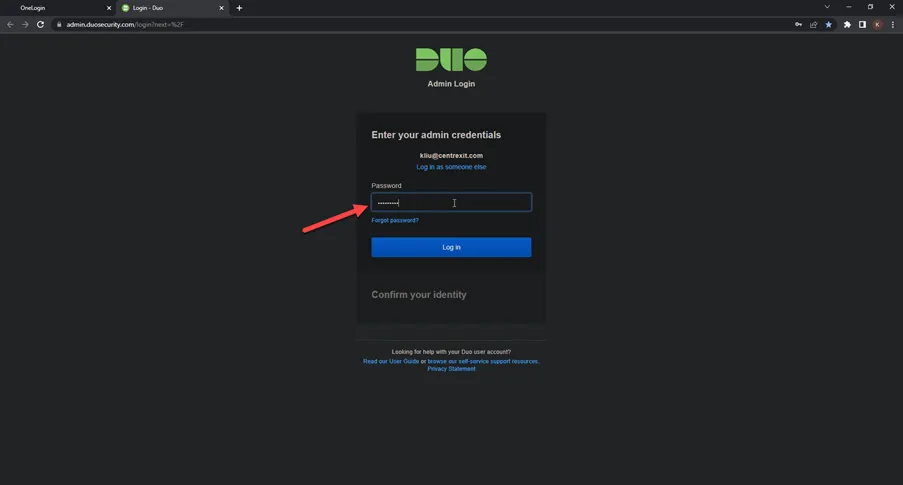
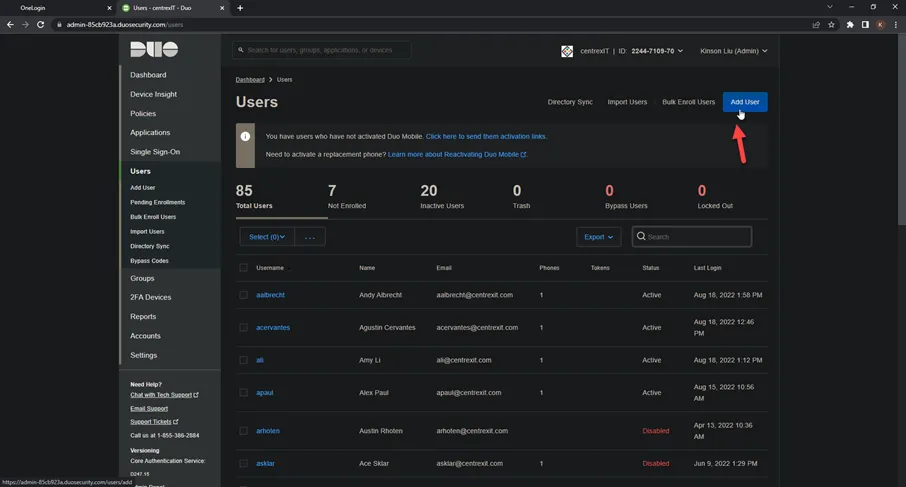
- From OneLogin, click on DUO Administration
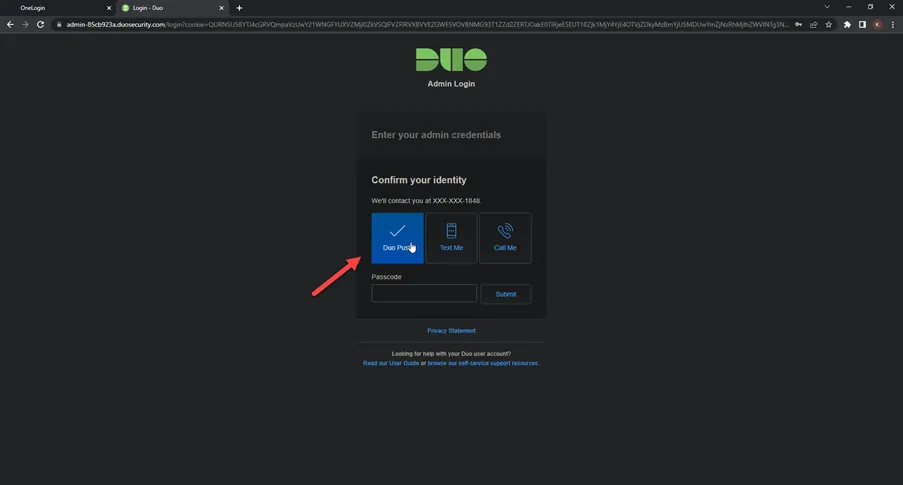
- You will be prompted to log on with your AD account password
- DUO will send you a Push notification for MFA
- From here, select Users
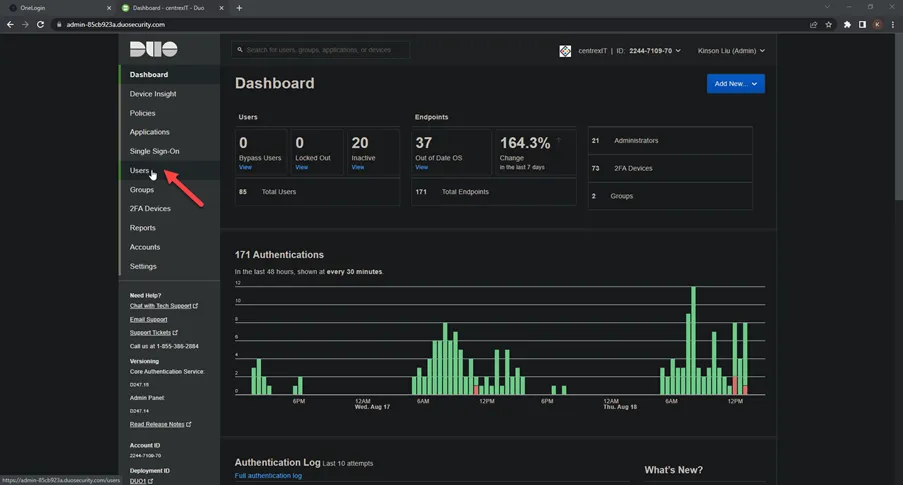
- Click on Add User
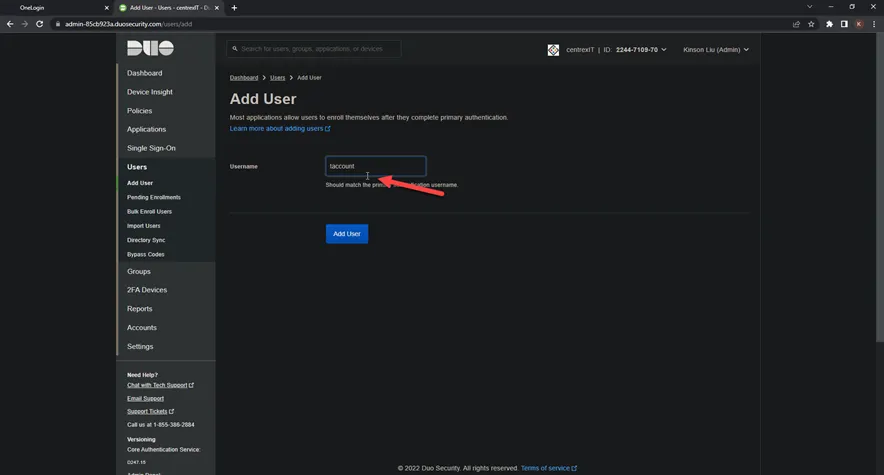
- Put in the Username of the account you are trying to add. Mirroring what the AD account name and then click on Add User
- Fill in the rest with the Full name and email address of the account
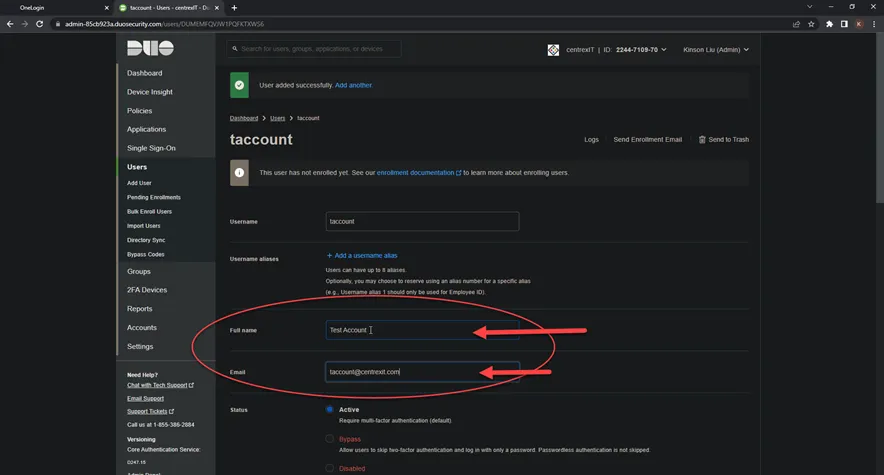
- Scroll down a bit and click on Save Changes

- You will be brought back to this section and showing User modified successfully
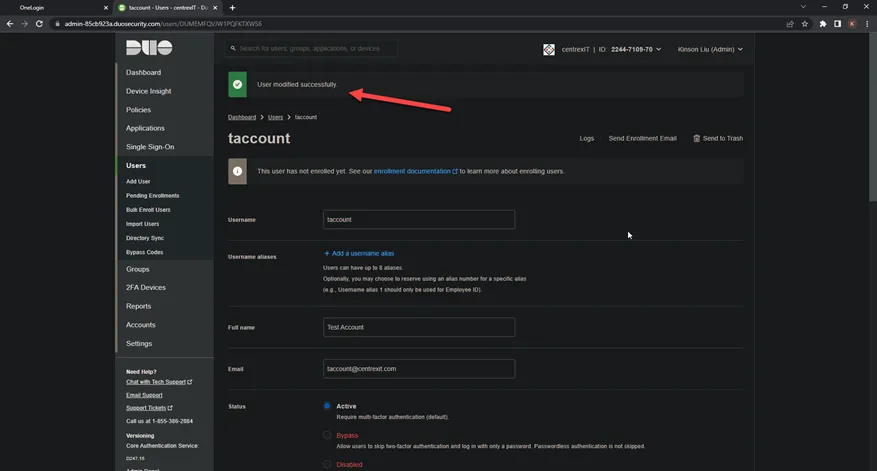
- Scroll down again and click on Add Phone

- Put in the new user’s cell phone number (should be provided in the new user onboard request. If not, please check the supervisor/manager of the new user to get the cell number). Then click Add Phone
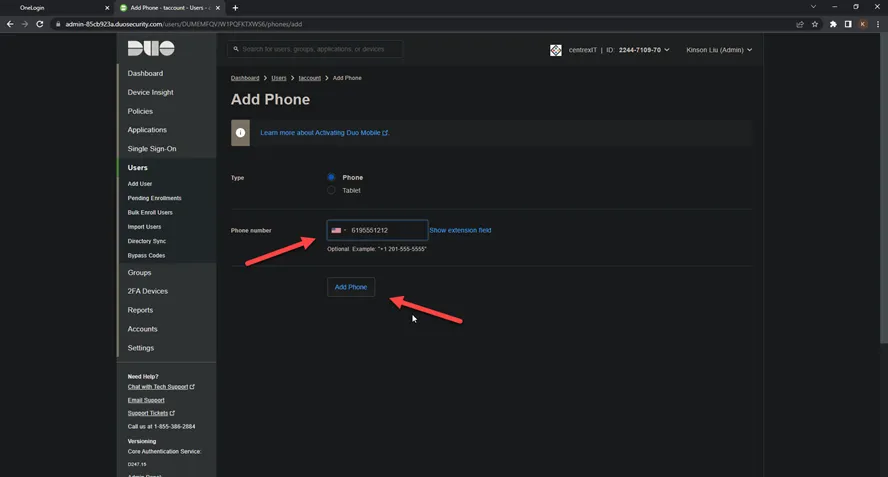
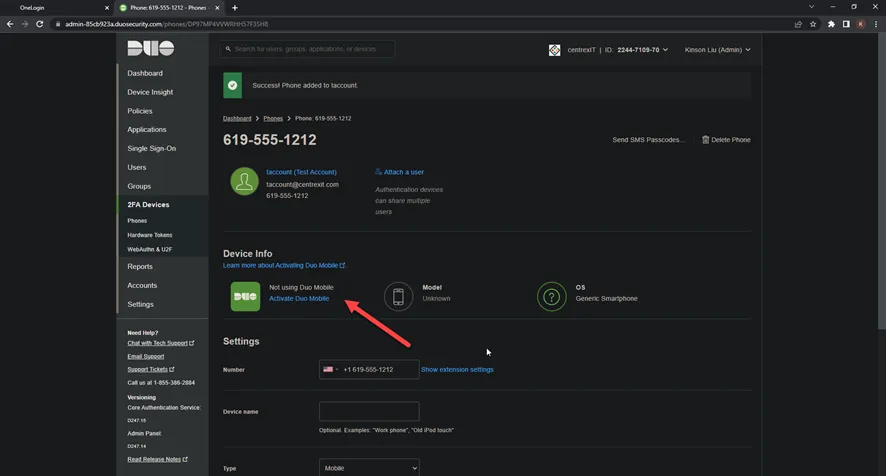
- We should be taken back here. Please DO NOT click on Activate Duo Mobile yet. We will do this on the first day the new user starts
- Scroll down a bit and click on Save Changes again

*You have completed DUO setup*
------------------
*Setup ProofPoint*
- Log onto ProofPoint by going to https://us2.proofpointessentials.com/app/login.php

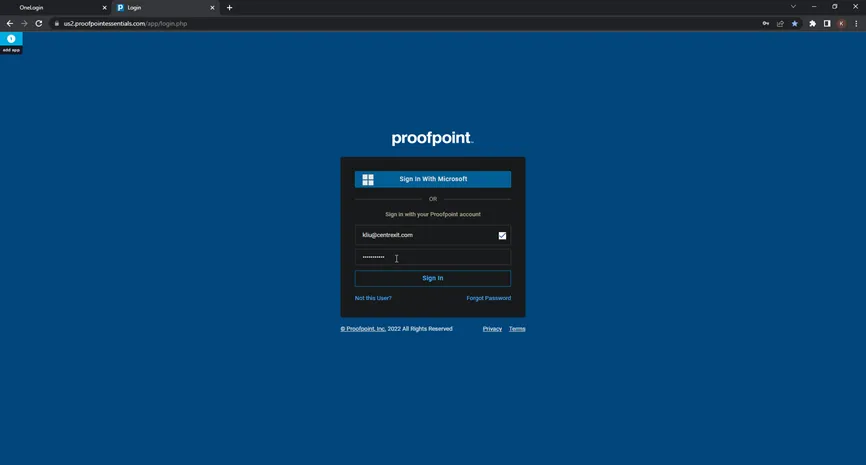
- Go to Administration > User Management > Users and click on Add a User
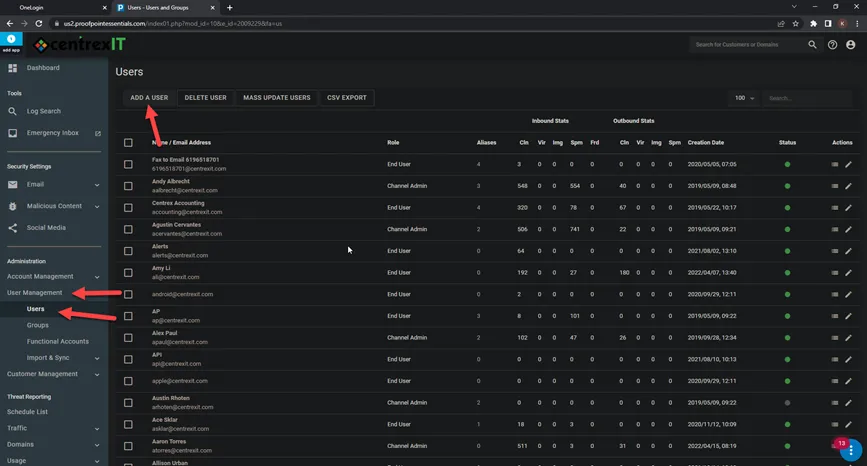
- Put in the first name, last name and the email address. Please make sure it’s username@centrexit.com. Then based on what role they are in, we would select accordingly from the drop down.
- For someone in Project, NOC, Service Desk, please select “Channel Admin”. Others should be OK to leave as End User
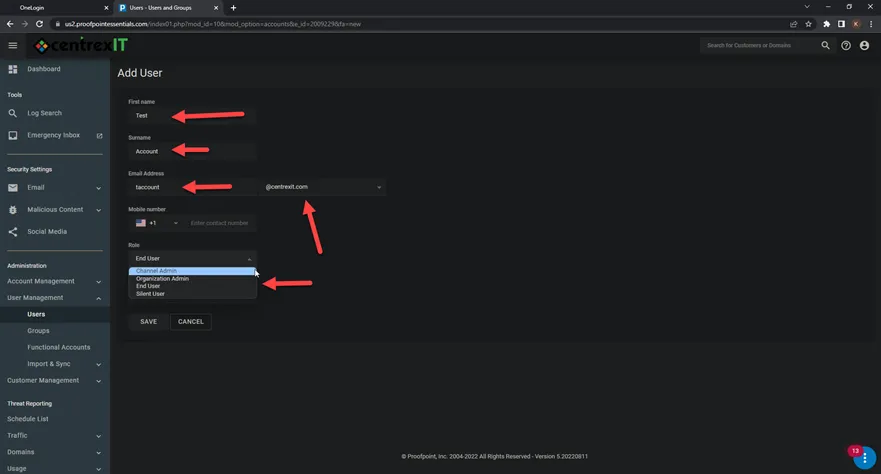
- Click Save
*You have completed ProofPoint Setup*
------------------
*Setup user in NCentral*
- If the end user is in a technical role (Project, NOC, Service Desk), we would need to setup NCentral user account
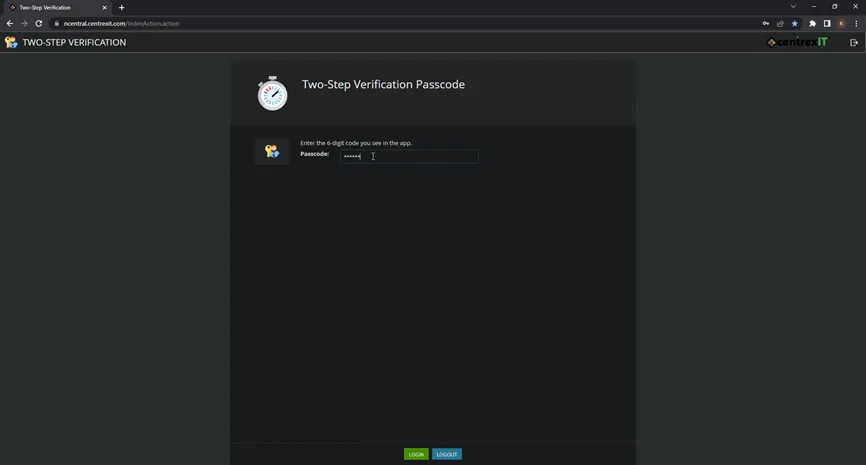
- Log onto NCentral https://ncentral.centrexit.com/login
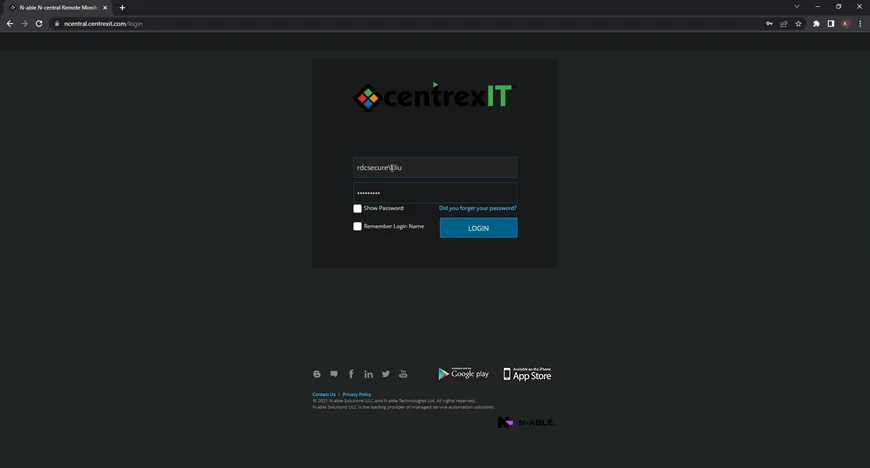
- Provide MFA code from DUO
- Navigate to Administration > User Management > Users
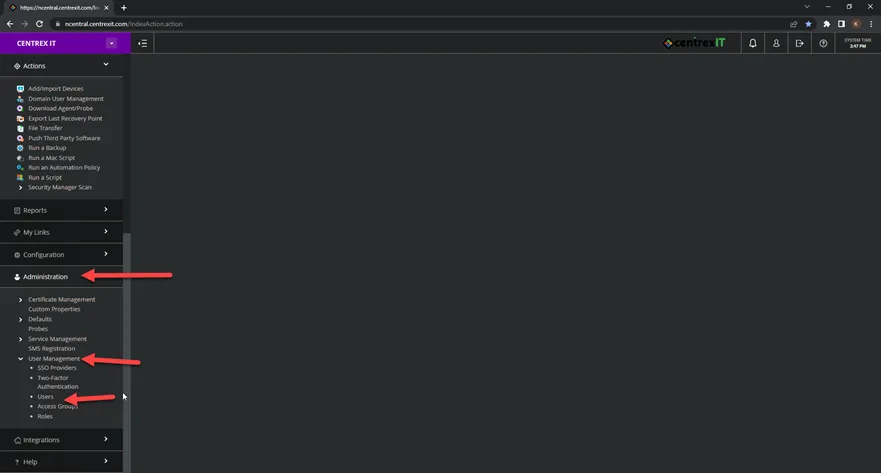
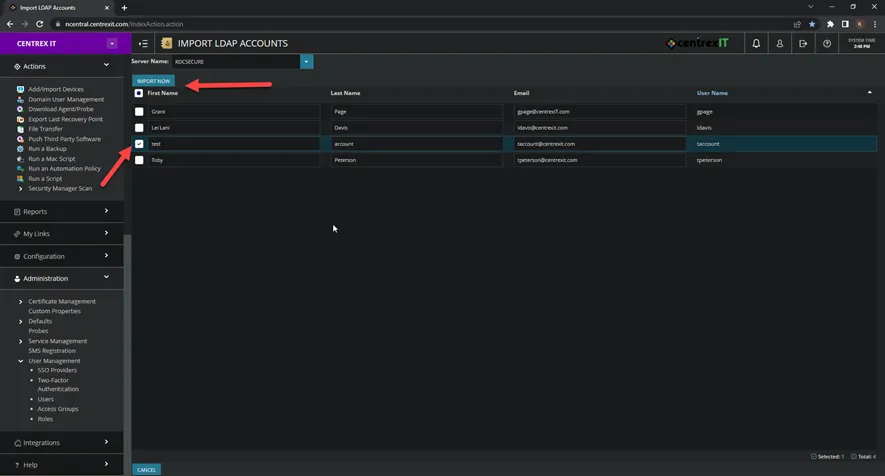
- Under the Create User, drop down and select LDAP User
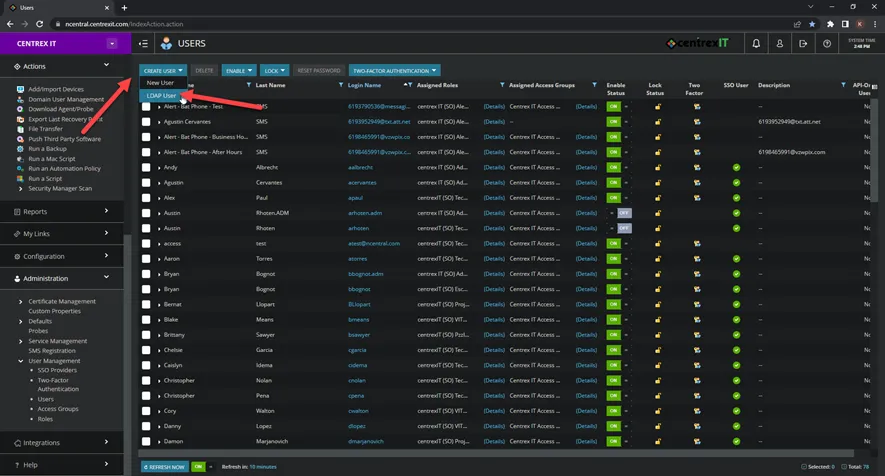
- Check the checkbox for the new user and select Import Now
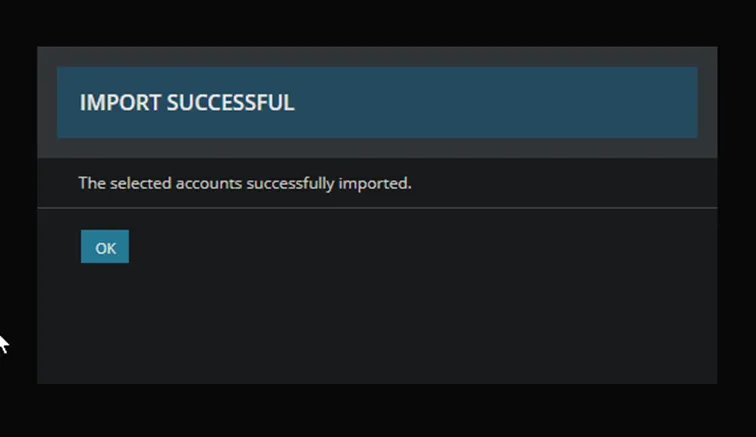
- Should get the Import Successful message. Click OK
- Go back to Users and click on the link for the user’s account
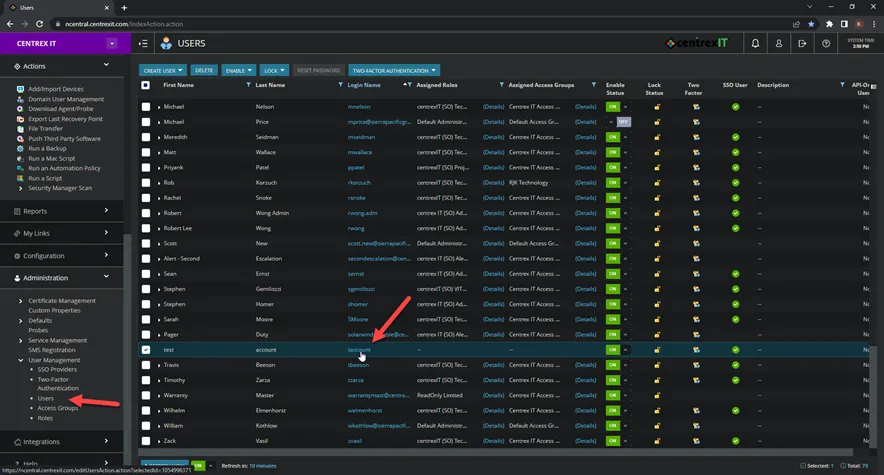
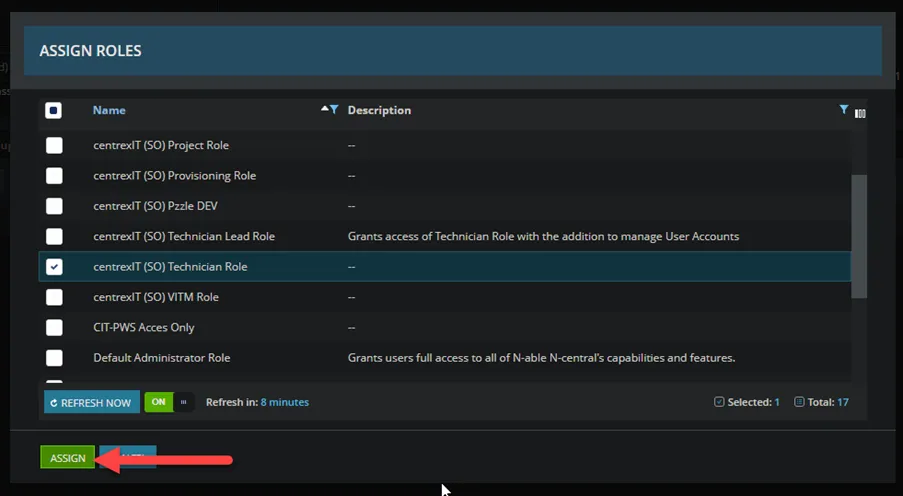
- Under Role, click on Assign Role
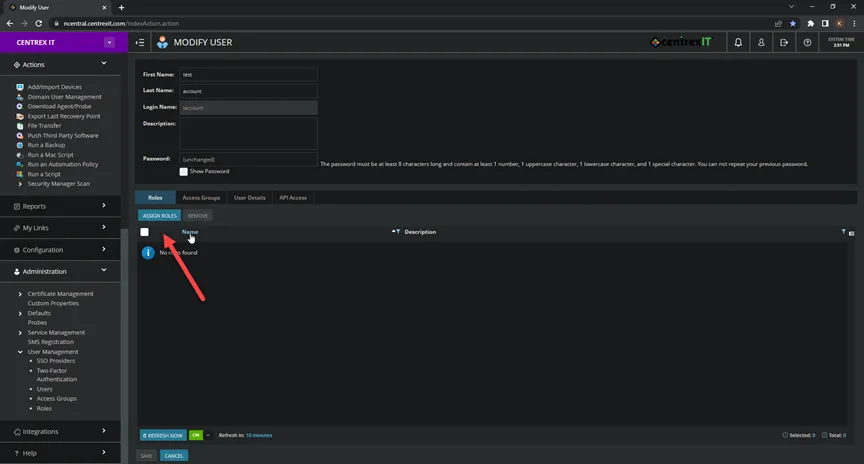
- Select the correct Role for the end user
- For most technician and engineers, it should be centrexIT (SO) Technician Role
- For vITM, it should be centrexIT (SO) VITM Role, etc….
- Once selected, click Assign
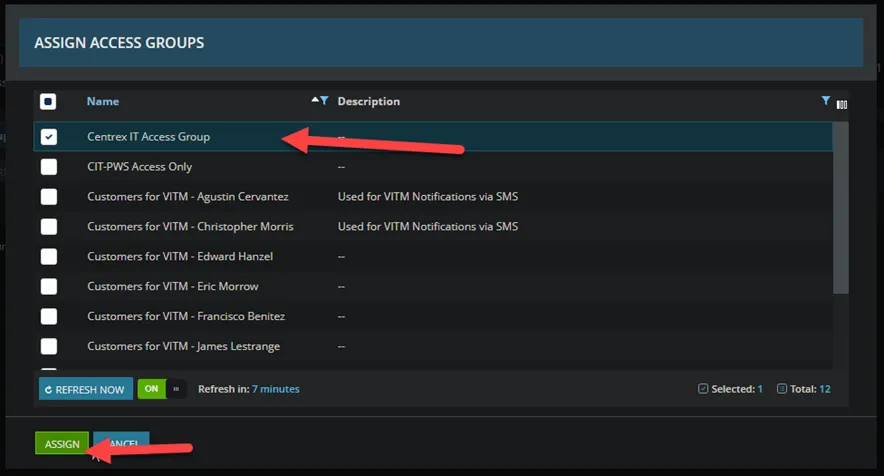
- Then click on Access Groups and the Assign Access Groups

- Select Centrex IT Access Group for the time being and click Assign
- You should be taken back to the Modify User screen, click Save
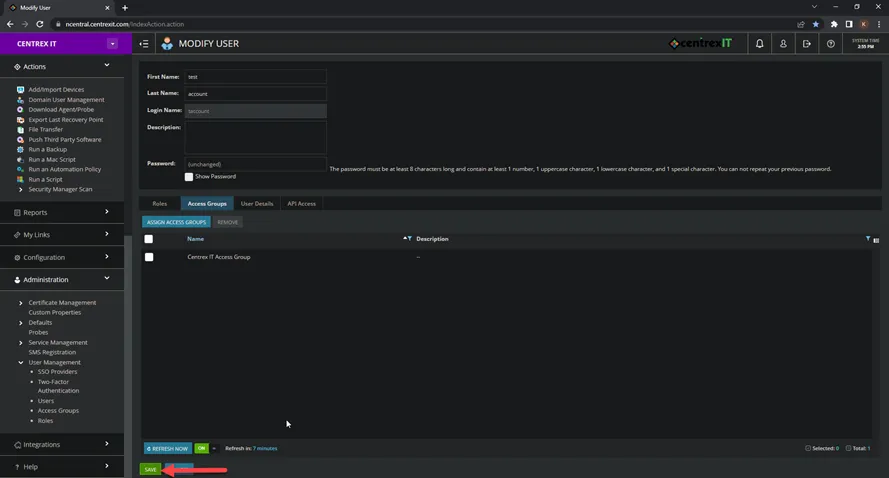
*You have completed NCentral setup for the end user*
------------------
*Setup for CJP* -NEEDS TO BE UPDATED FOR THE NEW VERSION OF MAESERGY
- If the end user is Service Desk member, we will setup for CJP access
- Log onto CJP https://cas.ccone.net/cas/login?service=https%3A%2F%2Fportal.ccone.net%2Fportal%2Fcallback%3Fclient_name%3DportalClient
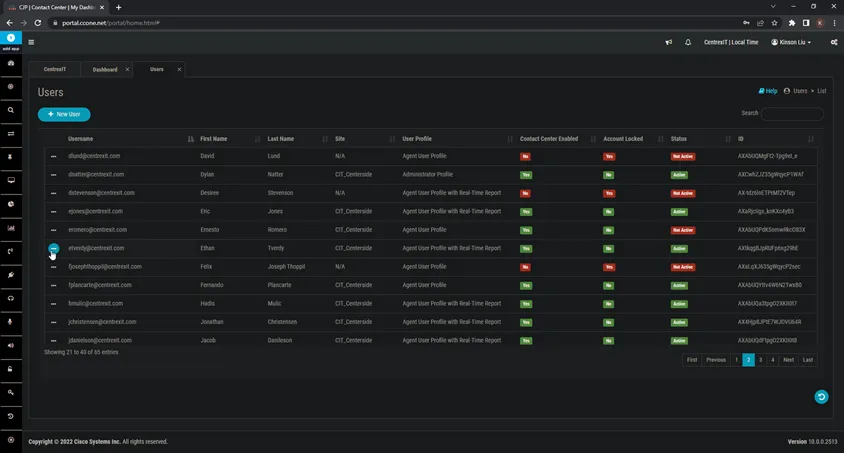
- Go to Users
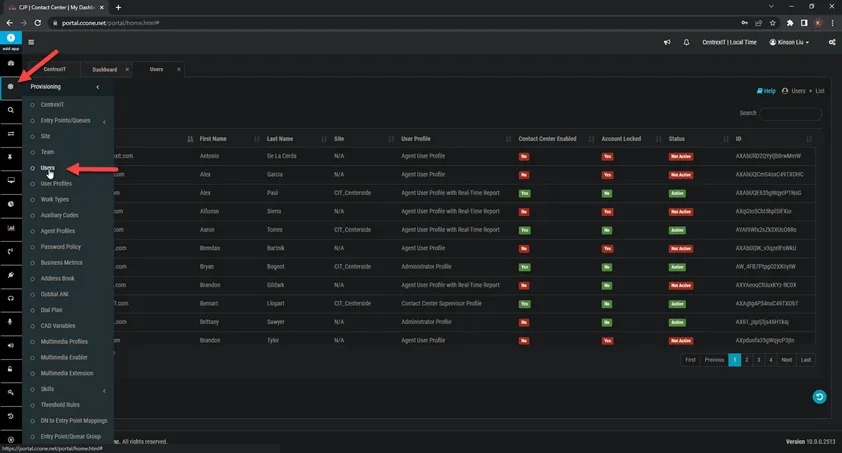
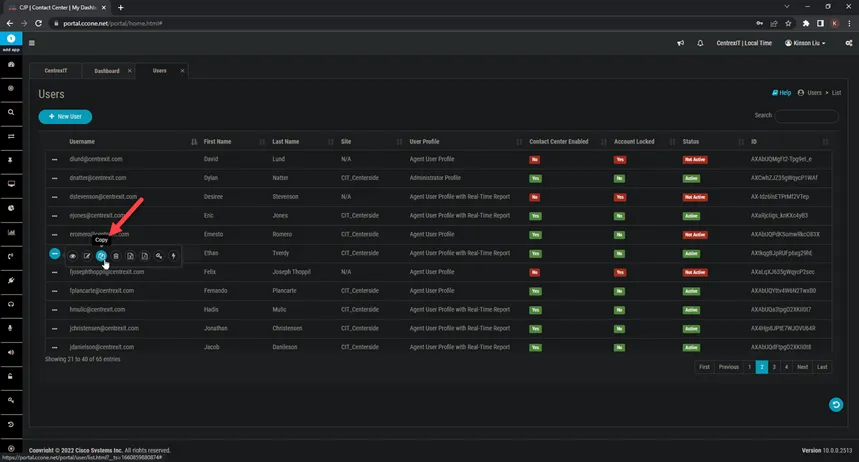
- Pick an existing end user and select copy
- Put in the user’s information
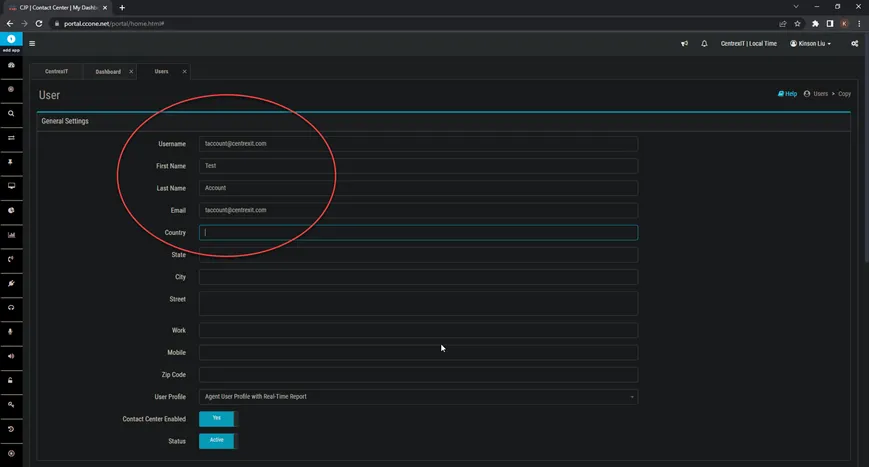
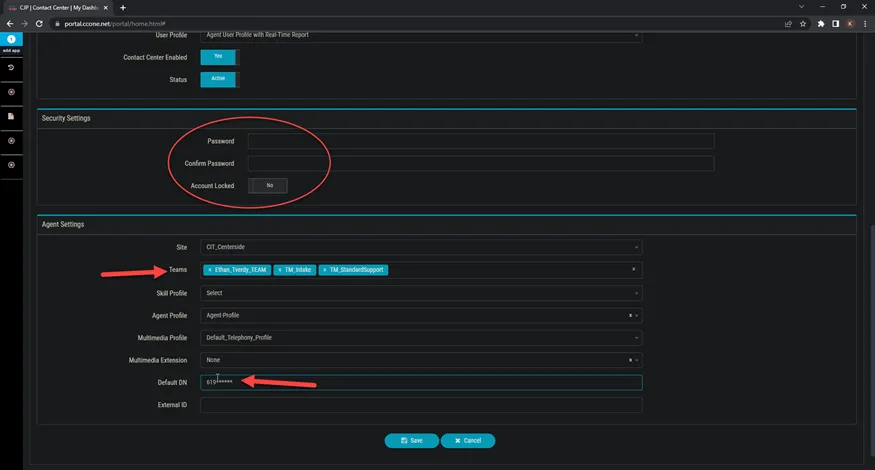
- *Please note the Default DN should be the same number you assigned to the user in Webex
- Click save
*You have completed CJP setup*