The intended purpose of this document is to give a general overview of the process. It is not client specific and may not match up completely with any specific client environment. This article will assist with the renewal of an AnyConnect SSL. This process assumes the certificate has not yet already expired and that Godaddy is your registrar. Disclaimer: CradleGenomics was used as the template for the purpose of taking screenshots.
1. Locate a management PC or a domain controller and sign in. Once logged in, launch ASDM (installed app) and enter the IP and user information in PWstate for the firewall hosting your AnyConnect configuration. If ASDM is not available, use a web browser and browse to the firewall IP and you may be presented with the option to download ASDM.

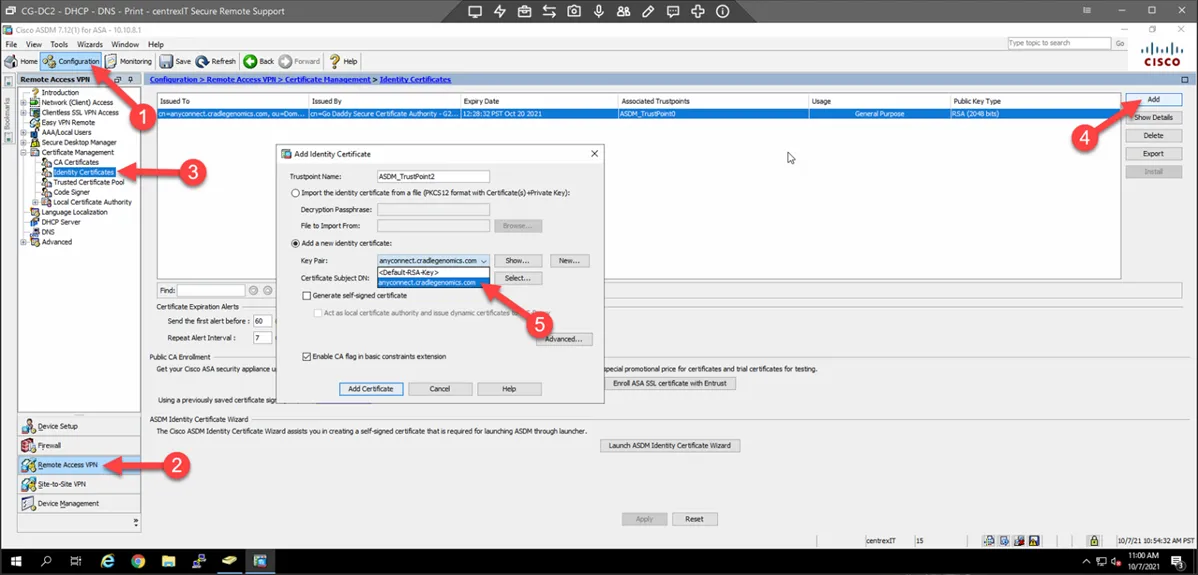
2. Select Configuration – Remote Access VPN - Certificate Management – Identity Certificates – Select the currently active certificate – Select Add – Select “Add a new identity certificate” – Select the Key Pair drop down that is associated with the identity certificate you are renewing and choose your named connection. In this example, it is anyconnect.cradlegenomics.com.
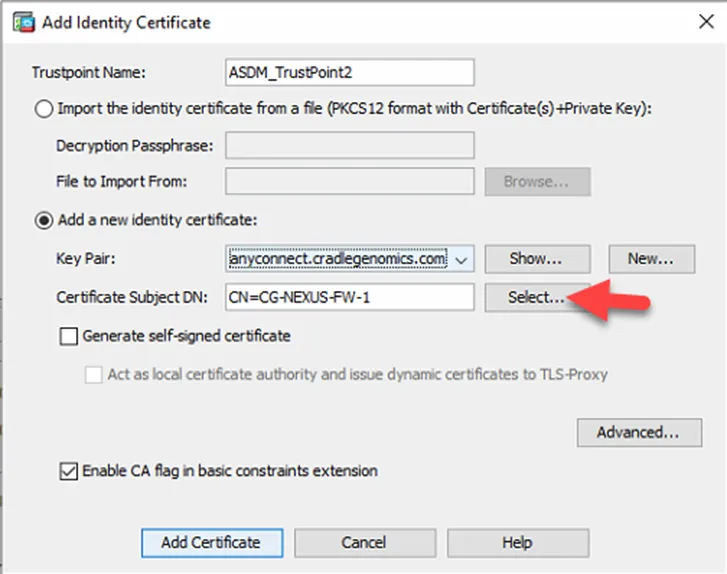
3. Next choose Select…
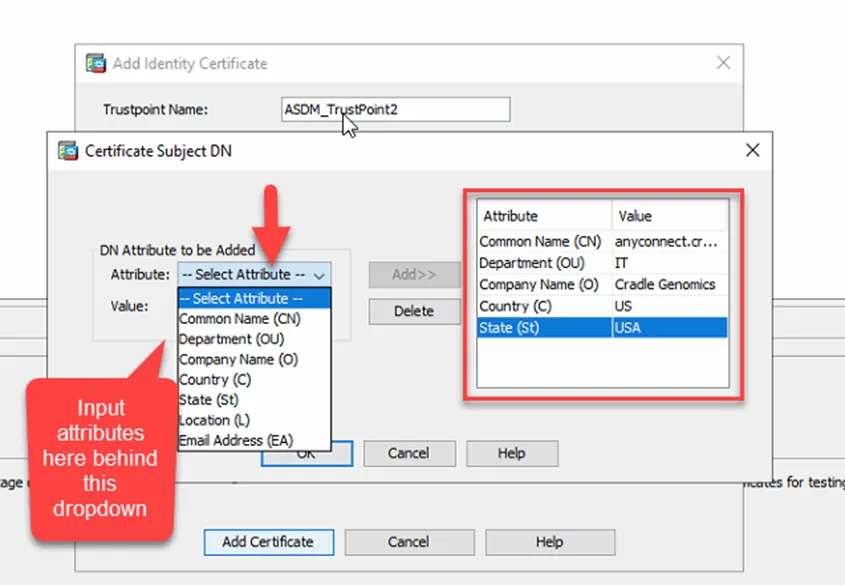
4. In the following box, select these attributes and enter the associated values for the company you are renewing. Then select OK.
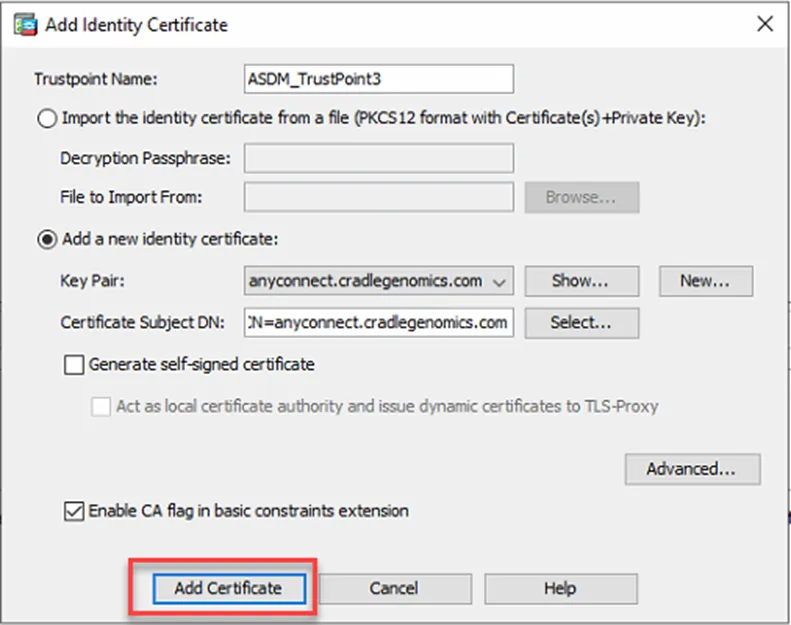
5. Select Add Certificate.
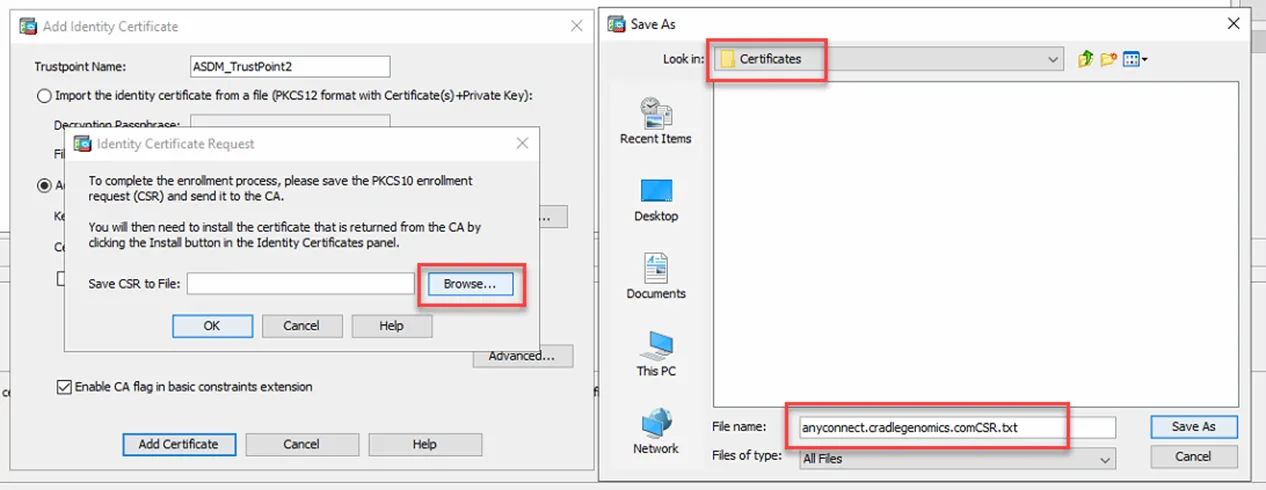
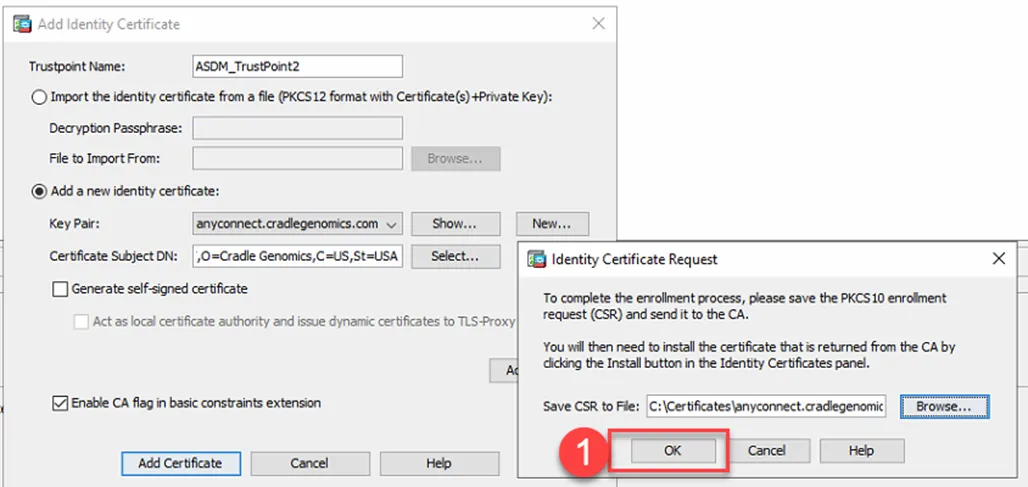
6. Select Browse and save it to C:\Certificates and provide it a name with .txt on the end, then select Save As, followed by OK and then OK again when you see “The CSR was saved Successfully.” If C:\Certificates does not exist, please create it first.
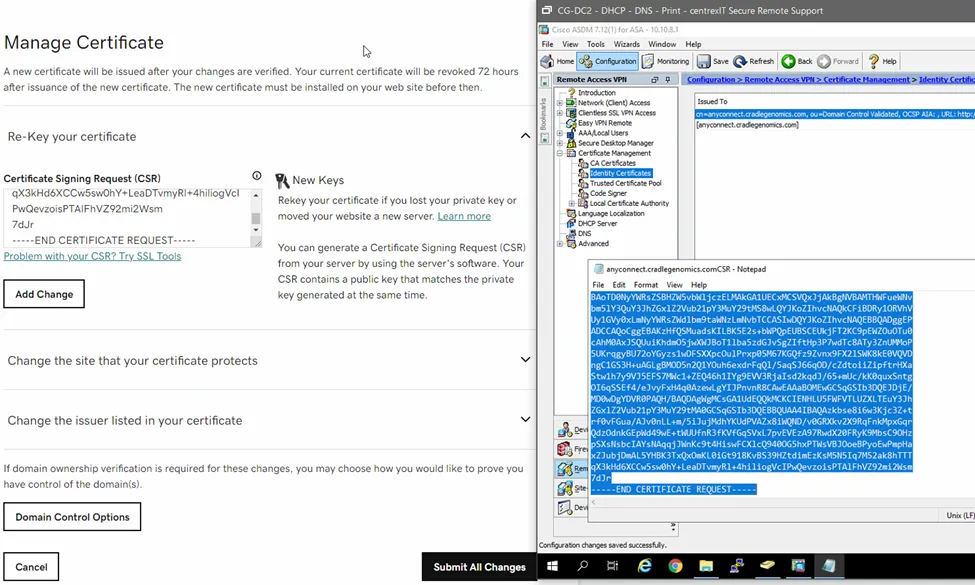
7. Browse to the location where you saved your CSR and open the .txt file and copy the entire contents to your clipboard. Next, sign into OneLogin and choose GoDaddy (or check PWstate for the needed website). From there, select the icon with the nine squares next to My Account and choose SSL Certificates. In the Search Domains box, type in anyconnect.cradlegenomics.com (or whatever the AnyConnect site address is) and select the SSL in the darker grey box. Scroll down to the middle of the page and beneath Manage Certificate, choose Re-Key your certificate. In the box that says Paste your CSR here, paste in the contents of your clipboard from earlier and select Add Change. Now select Submit All Changes.
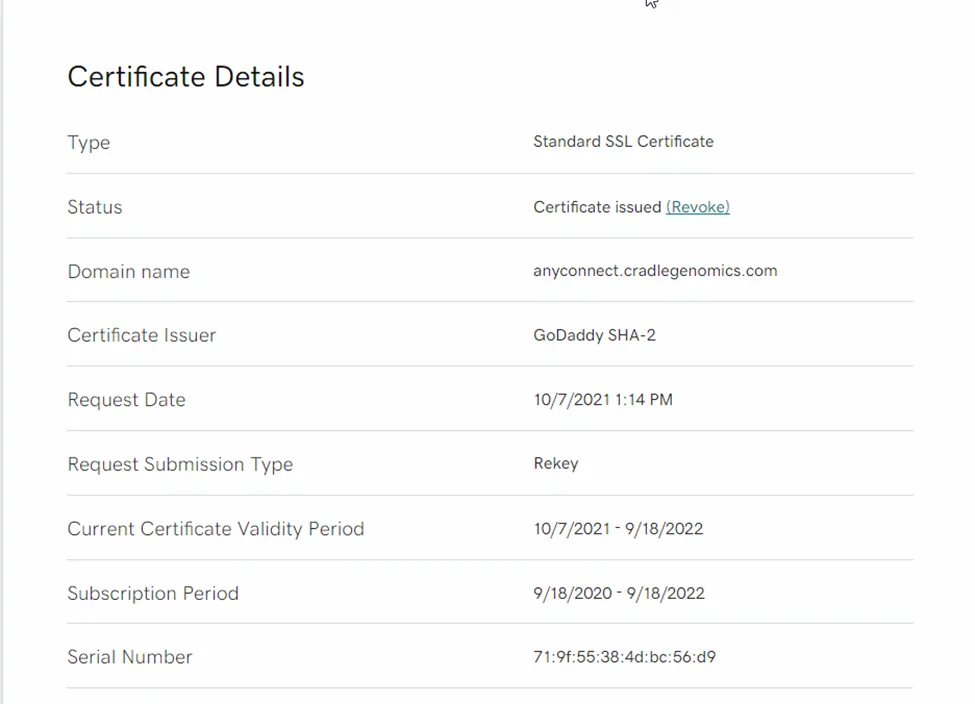
8. Your newly re-keyed certificate will take a couple of minutes before it is available. Keep refreshing the page until you see the status say Certificate Issued. Next, check the Current Certificate Validity Period section and make sure it begins with today’s date and extends out to the expected amount of time—in this case about one year.

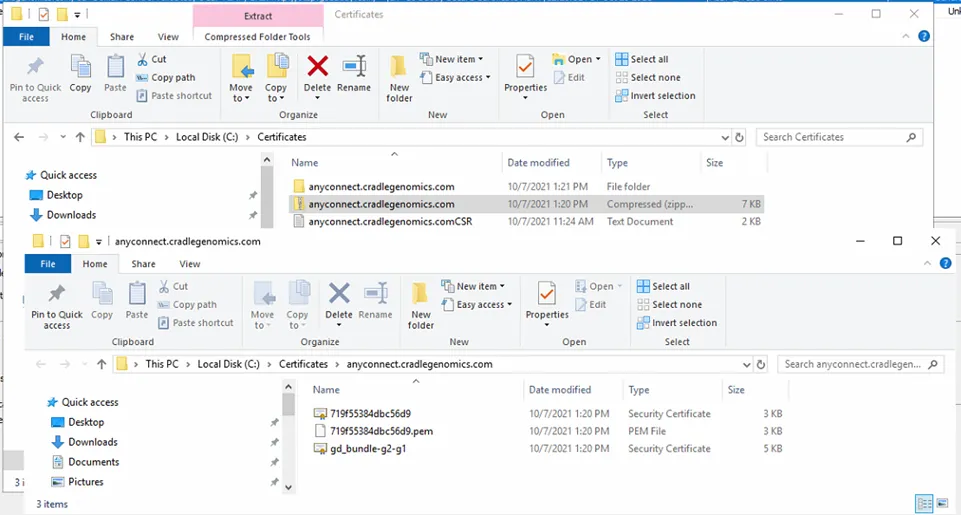
9. Once it is ready, look to the right and find the Download Certificate box. Under the Server Type drop-down, pick Other and download the ZIP file to your local computer. Copy the ZIP file to the C:\Certificates folder on the server you are accessing ASDM from and extract it within the same directory.
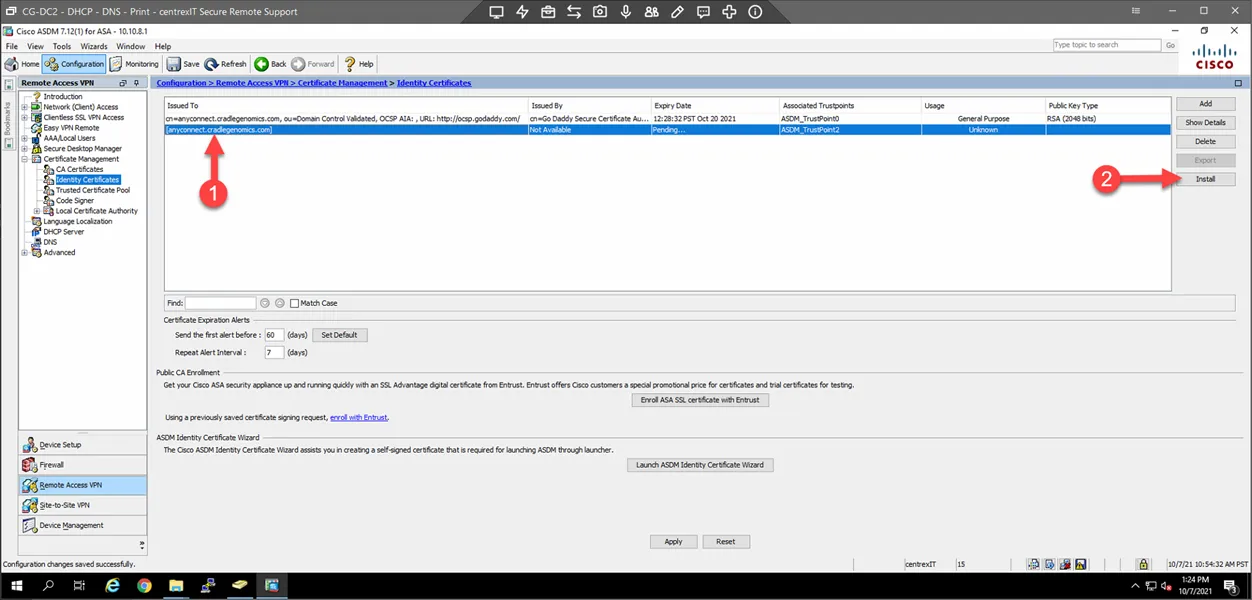
10. Back in ASDM, select the new certificate and then select Install.
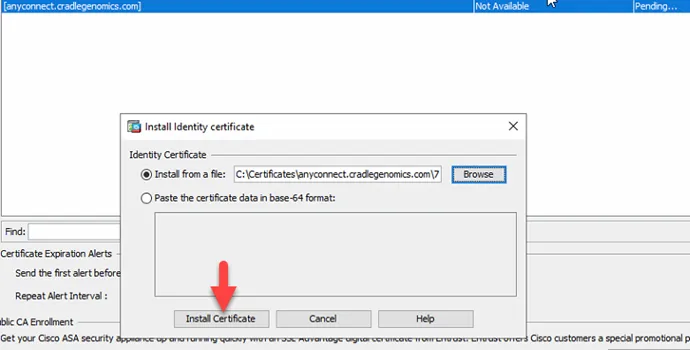
11. Select Browse and search your C:\Certificates folder, then go into the folder you extracted earlier. The certificate you want to select has the numbered name. Next, select Install ID certificate file.
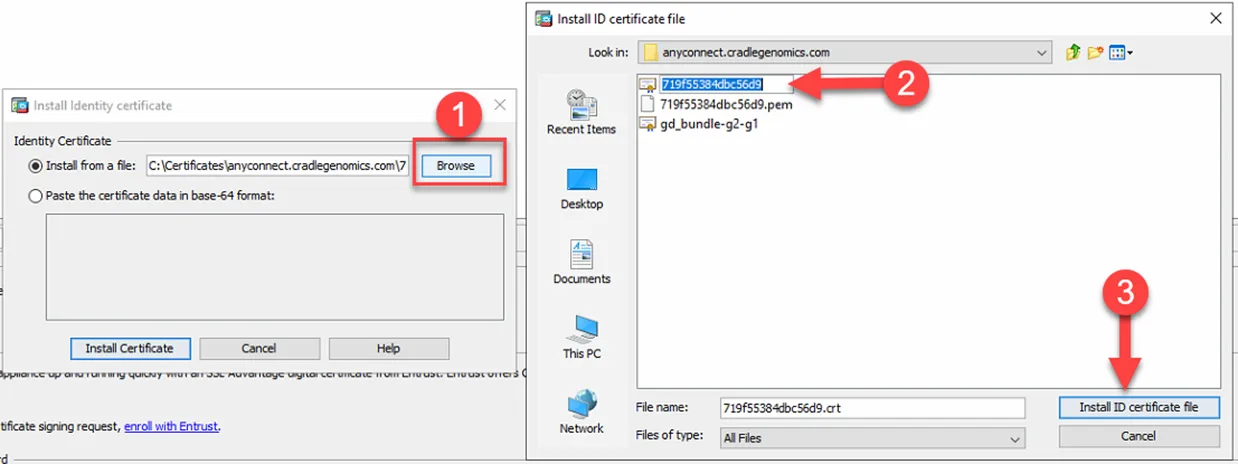
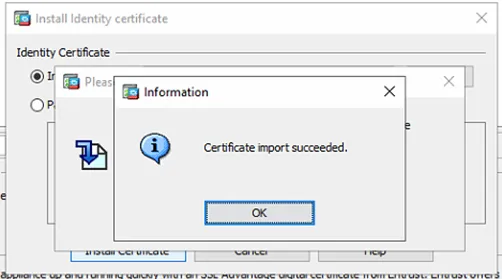
12. You will now see the specified file listed in the Install from a file bar. Select Install Certificate. In a moment, you will then see Certificate Import Succeeded; select OK.
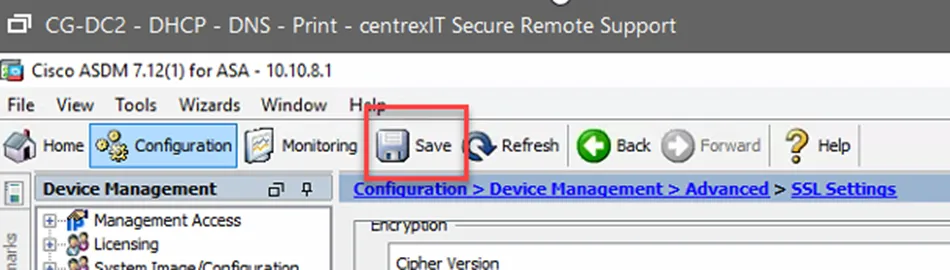
13. Back in ASDM, go to Configuration – Device Management – Advanced – SSL Settings. From here, Under Certificates, scroll down to the outside interface and select Edit.
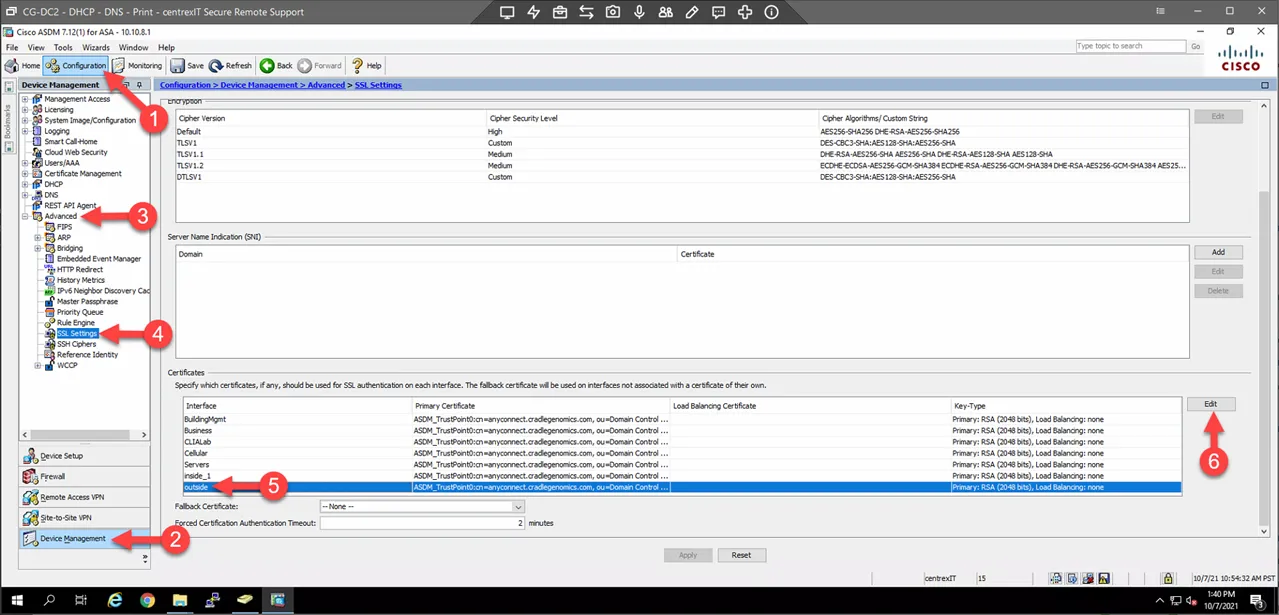
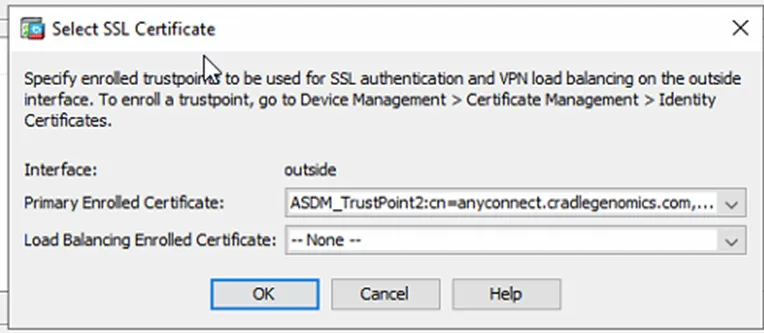
14. Select the Primary Enrolled Certificate drop-down, choose the newly created TrustPoint, and select OK. After this, select Apply (found in the middle bottom of the screen). At the top, select Save to save the new configuration. Do not update the Load Balancing Enrolled Certificate.
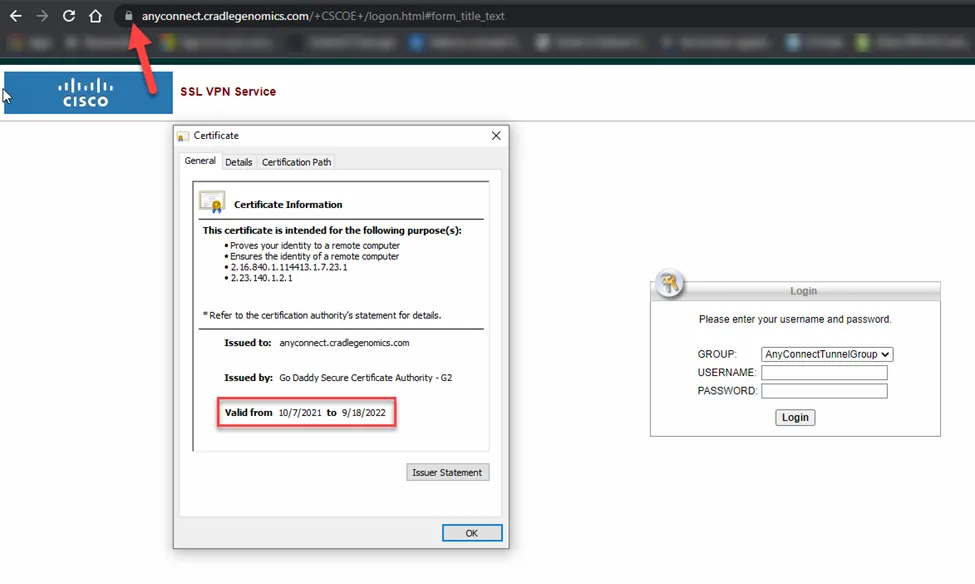
15. Wait a moment and then browse to your specific AnyConnect portal and check your new SSL by clicking the lock icon next to the URL. After this, select Connection is Secure and then Certificate is Valid. In the certificate window, check the Valid from date. If the date matches with what you expect, then it worked. At this point, test the AnyConnect application. If all works fine, then you have successfully updated the SSL for the AnyConnect VPN.
16. Don’t forget to save the new configuration.