Purpose:
Section titled “Purpose:”Setting up MFA for users under KWI hardening
Scope:
Section titled “Scope:”All Avista users with an email account
Responsibility:
Section titled “Responsibility:”Service Desk
Completion Criteria:
Section titled “Completion Criteria:”User can successfuly access email on devices with MFA through their authenticator, text, or call.
Records:
Section titled “Records:”Evidences would be showing the success of the MFA - either by screenshot or verbal sign off from the customer
Steps:
Section titled “Steps:”2.1 Multi-Factor Authentication (MFA) Registration The function to reset your own password (self-service password reset) is available for all users. It is required set up MFA to use self-service password reset. At the begining of use, when they sign in to Microsoft 365, users who do not register Multi-Factor Authentication (MFA) will see the message below. Please set up MFA in reference to [3 Multi-Factor Authentication (MFA) ].
If you already set up MFA, it is not displayed the message below. Please refer to [3.3 Confirm the Authentication ] to check the MFA registration status.
Please note that MFA registration requires a mobile device and the [Microsoft Authenticator] app for mobile devices, so install the [Microsoft Authenticator] app on your mobile device before starting the MFA registration process. Scan the QR code in the table below with your mobile device to be redirected to the download page.
[Microsoft Authenticator] app iPhone: App Store Android:Google Play URL https://apps.apple.com/app/microsoft-authenticator/id983156458 https://play.google.com/store/apps/details?id=com.azure.authenticator&referrer=adjust_reftag%3DcO4uPlwFO6H2z%26utm_source%3DMFA%2BSSPR%2BConverged%2BSetup%26utm_campaign%3Dappstore_android
QR Code
2.2 Change or Reset Password Procedure With the utilize of self-service password reset, the procedures of change or reset password will change. Please read the steps in the chapter [4 Change or Reset Password] described the procedures.
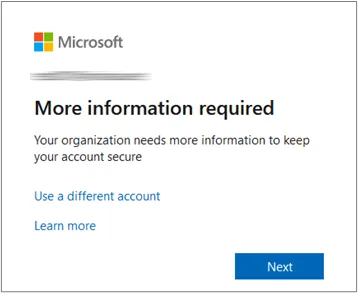
- Multi-Factor Authentication (MFA) Setting There are two ways to set up Multi-Factor Authentication (MFA): Set it up when you sign in [3.1 Setting at Sign in], and Set it up after skipping the setting at sign in and signing in to Microsoft 365 [3.2 Setting in Microsoft 365]. 3.1 Setting at Sign in This chapter describes the steps to configure MFA when [More information required] is displayed when signing in to Microsoft 365. If even one of the MFA authentication methods is registered, the [More information required] screen will not be displayed, so configure MFA by moving to the [3.2 Setting in Microsoft 365].
Setting Procedures
-
After entering your ID and password when signing in to Microsoft 365 on a PC, click [Next] if the [More information required] screen is displayed.
-
On [Keep your account secure] screen, select MFA method to register referring to the next page. If you want to set up MFA after signing in to Microsoft 365, click [Skip setup] at the bottom of the screen. After signing in, set up MFA by referring to [3.2 Setting in Microsoft 365].
Authentication method Enroll for one of the authentication methods in the table below using your mobile device. Once you have decided on the authentication method to use, move on to the setting section you chose the method and proceed the setting. If register an [Authenticator app], it can be used both [Authenticator app - Notification] and [Authenticator app - Code] when password reset. If register either [Phone - Text] or [Phone - Call], it can be used both [Phone - Text] and [Phone - Call] when password reset.
<MFA Authentication Methods> Authenticator app (To install the app is required) Phone Notification Code Text (SMS) Call Enter the number shown on your PC screen into the mobile notification screen to authenticate. Enter the code shown in the app on your PC screen to authenticate. Enter the code sent via SMS on your PC screen to authenticate. When you receive the call, tap [#] to authenticate.
Setting Procedures 3.1.1 [Authenticator app] Settings 3.1.2 [Phone - Text] Settings 3.1.3 [Phone - Call] Settings
Using an authentication app, please install the [Microsoft Authenticator] app on your mobile device. Scan the QR code in the table below with your mobile device to be redirected to the download page.
[Microsoft Authenticator] app iPhone: App Store Android: Google Play URL https://apps.apple.com/app/microsoft-authenticator/id983156458 https://play.google.com/store/apps/details?id=com.azure.authenticator&referrer=adjust_reftag%3DcO4uPlwFO6H2z%26utm_source%3DMFA%2BSSPR%2BConverged%2BSetup%26utm_campaign%3Dappstore_android
QR Code 3.1.1 [Authenticator app] Settings Register the [Authentication app] (Microsoft Authenticator) as an MFA authentication method. After finishing this task, you will be able to use [Authenticator app - Notification] and [Authenticator app - Code] when password reset. If you cancel the registration process, click [Skip setup] at the bottom of the screen. Set up MFA at the next time you sign in, or after signing in, set up MFA by referring to [3.2 Setting in Microsoft 365].
Setting Procedures
-
On the [Start by getting the app] screen, click [Next]. ※ If you have not installed the [Microsoft Authenticator] app, click [Download now] and operate the necessary steps to install the app.
-
On the [Set up your account] screen, click [Next].
-
On the [Scan the QR code] screen, launch [Microsoft Authenticator] on your mobile device. • On iPhone: Tap [+] and [Work or school account] - [Scan a QR code] and launch the camera. • On Android: Tap [+] and [Work or school account] - [Scan a QR code] and launch the camera.
-
Scan the QR code shown on your PC screen with your mobile device. Once your account has been added to Microsoft Authenticator on your mobile device, click [Next] on your PC screen.
-
Confirm the numbers displayed on your PC screen.
-
A notification will be sent to your mobile device. Enter the number you confirmed in the previous step [5] and click [Yes]. ※ Depending on your mobile settings, face authentication, fingerprint authentication, or passcode authentication will be required after clicking [Yes].
-
[Notification approved] is displayed on your PC screen and click [Next].
-
Confirm the [Success!] is displayed and click [Done].
-
On the [Stay signed in?], click etheir [No] or [Yes] and sign in to Microsoft 365.
This completes the setting procedures. 3.1.2 [Phone - Text] Settings Register the [Phone - Text] as an MFA authentication method. After finishing this task, you will be able to use [Phone - Text] and [Phone - Call] when password reset. If you cancel the registration process, click [Skip setup] at the bottom of the screen. Set up MFA at the next time you sign in, or after signing in, set up MFA by referring to [3.2 Setting in Microsoft 365].
Setting Procedures
-
On the [Start by getting the app], click [I want to set up a different method].
-
As a different method, select [Phone] and click [Confirm].
-
Set the following three points and click [Next]. ❶ Select your country code. (In the image below, Japan (+81) is selected as an example.) ❷ Enter the phone number of your mobile device. ❸ Make sure that [Text me a code] is selected.
-
Microsoft will send a code via Text Message to the phone number you registered in the point ❷ of the previous step.
-
Enter the code shown in your mobile device on your PC screen and click [Next].
-
Confirm that [SMS verified.] is displayed and click [Next].
-
On the [Keep your account secure] screen, confirm the [Success!] is displayed and click [Done].
-
On the [Stay signed in?], click etheir [No] or [Yes] and sign in to Microsoft 365.
This completes the setting procedures. 3.1.3 [Phone - Call] Settings Register the [Phone - Call] as an MFA authentication method. After finishing this task, you will be able to use [Phone - Call] and [Phone - Text] when password reset. If you cancel the registration process, click [Skip setup] at the bottom of the screen. Set up MFA at the next time you sign in, or after signing in, set up MFA by referring to [3.2 Setting in Microsoft 365].
Setting Procedures
-
On the [Start by getting the app], click [I want to set up a different method].
-
As a different method, select [Phone] and click [Confirm].
-
Set the following three points and click [Next]. ❶ Select your country code. (In the image below, Japan (+81) is selected as an example.) ❷ Enter the phone number of your mobile device. ❸ Make sure that [Call me] is selected.
-
Microsoft will call you at the phone number you registered in the point ❷ of the previous step, so accept the call, listen to the announcement, and tap [#].
-
Confirm that [Call answered.] is displayed and click [Next].
-
On the [Keep your account secure] screen, confirm that [Success!] is displayed and click [Done].
-
On the [Stay signed in?], click etheir [No] or [Yes] and sign in to Microsoft 365.
This completes the setting procedures.
3.2 Setting in Microsoft 365 This chapter describes the procedures to sign in to Microsoft 365 and configure MFA on [My Account] - [Security info]. If at least one MFA authentication method is registered, you will be asked to authenticate by MFA to open [Security info].
Setting Procedures
-
Sing in to Microsoft 365.
-
After signed in, click the icon in the top right corner of screen and click [View account].
-
On the [My Account] screen, click [Security info]. If at least one MFA authentication method is registered, you will be asked to authenticate by MFA to open [Security info].
-
On the [Security info] screen, register MFA.
-
Enroll for one of the authentication methods in the table below using your mobile device. Once you have decided on the authentication method to use, move on to the setting section you chose the method and proceed the setting. ※ Multiple authentication methods can be set.
<MFA Authentication Methods> Authenticator app (To install the app is required) Phone Notification Code Notification 通話 Enter the number shown on your PC screen into the mobile notification screen to authenticate. Enter the code shown in the app on your PC screen to authenticate. Enter the code sent via SMS on your PC screen to authenticate. When you receive the call, tap [#] to authenticate.
設定手順 3.2.1 [Authenticator app] Settings 3.2.2 [Phone - Text] Settings 3.2.3 [Phone - Call] Settings
Using an authentication app, please install the [Microsoft Authenticator] app on your mobile device. Scan the QR code in the table below with your mobile device to be redirected to the download page.
[Microsoft Authenticator] app iPhone: App Store Android: Google Play URL https://apps.apple.com/app/microsoft-authenticator/id983156458 https://play.google.com/store/apps/details?id=com.azure.authenticator&referrer=adjust_reftag%3DcO4uPlwFO6H2z%26utm_source%3DMFA%2BSSPR%2BConverged%2BSetup%26utm_campaign%3Dappstore_android
QR Code
3.2.1 [Authenticator app] Settings Register the [Authentication app] as an MFA authentication method. To use the authentication app, you will need the [Microsoft Authenticator] app, so it is recommended to install it before this procedure. After finishing this task, you will be able to use [Authenticator app - Notification] and [Authenticator app - Code] when password reset.
Setting Procedures
-
On the [Security info] screen, click [+Add sign-in method].
-
A dialog to add a method will appear, select [Authenticator app] and click [Add].
-
After the authenticator app (Microsoft Authenticator) is installed on your mobile device, click [Next]. ※ If you have not installed the [Microsoft Authenticator] app, click [Download now] to install the app.
-
Click [Next].
-
On the [Scan the QR code] screen, launch [Microsoft Authenticator] on your mobile device. • On iPhone: Tap [+] and [Work or school account] - [Scan a QR code] and launch the camera. • On Android: Tap [+] and [Work or school account] - [Scan a QR code] and launch the camera.
-
Scan the QR code shown on your PC screen with your mobile device. Once your account has been added to [Microsoft Authenticator] on your mobile device, click [Next] on your PC screen.
-
Confirm the numbers displayed on your PC screen.
-
A notification will be sent to your mobile device. Enter the number you confirmed in the previous step [7] and click [Yes]. ※ Depending on your mobile settings, face authentication, fingerprint authentication, or passcode authentication will be required after clicking [Yes].
-
[Notification approved] is displayed on your PC screen and click [Next].
-
Verify that [Microsoft Authenticator] has been added on the [Security info] screen.
This completes the setting procedures. 3.2.2 [Phone - Text] Settings Register the [Phone - Text] as an MFA authentication method. After finishing this task, you will be able to use [Phone - Text] and [Phone - Call] when password reset.
Setting Procedures
-
On the [Security info] screen, click [+Add sign-in method].
-
A dialog to add a method will appear, select [Phone] and click [Add].
-
Set the following three points and click [Next]. ❶ Select your country code. (In the image below, Japan (+81) is selected as an example.) ❷ Enter the phone number of your mobile device. ❸ Make sure that [Text me a code] is selected.
-
Microsoft will send a code via Text Message to the phone number you registered in the point ❷ of the previous step.
-
Enter the code shown in your mobile device on your PC screen and click [Next].
-
Confirm that [SMS verified.] is displayed and click [Next].
-
Verify that [Phone] has been added on the [Security info] screen.
This completes the setting procedures. 3.2.3 [Phone - Call] Settings Register the [Phone - Call] as an MFA authentication method. After finishing this task, you will be able to use [Phone - Call] and [Phone - Text] when password reset. Follow the steps below to also set up [Alternate phone] or [Office phone].
Setting Procedures
-
On the [Security info] screen, click [+Add sign-in method].
-
A dialog to add a method will appear, select [Phone] and click [Add]. ※ For [Alternate phone] and [Office phone], select [Alternate phone] and [Office phone] respectively.
-
Set the following three points and click [Next]. ❶ Select your country code. (In the image below, Japan (+81) is selected as an example.) ❷ Enter the phone number of your mobile device. ❸ Make sure that [Call me] is selected. In case of [Alternate phone]、[Office phone], [Text me a code] is not displayed.
-
Microsoft will call you at the phone number you registered in the point ❷ of the previous step, so accept the call, listen to the announcement, and tap [#].
-
Confirm that [Call answered.] is displayed and click [Done].
-
Verify that [Phone] has been added on the [Security info] screen.
This completes the setting procedures.
Process References:
Section titled “Process References:”- Create a relationship back to related process. Note: Please add KB relationships to core process, process, SOPs or other WIs on the right.