How to update the certificate for a RDGateway
Section titled “How to update the certificate for a RDGateway”The intended purpose of this document is to give a general overview of the process. It is not client specific and may not match up completely with any specific client environment. This article will assist with the renewal of a self-signed certificate in a RDGateway environment that contains a Gateway server. This process assumes the certificate has not yet already expired. Disclaimer, Wedgewood was used as the template for the purpose of taking screenshots.
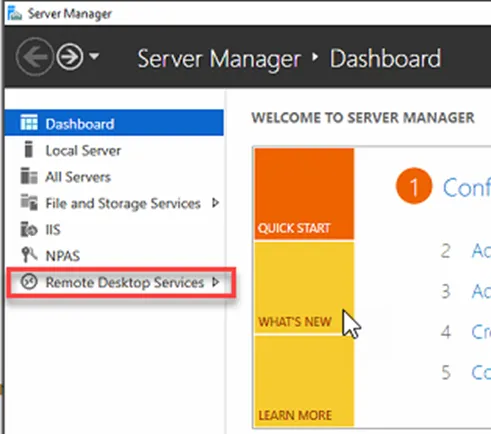
1. Sign into the gateway server and from Server Manager select Remote Desktop Services from the menu on the left-hand side.
2. Select Overview if not already highlighted (left hand side). You will see a section that says DEPLOYMENT OVERVIEW down to the right. Find TASKS, in the drop down select Edit Deployment Properties.

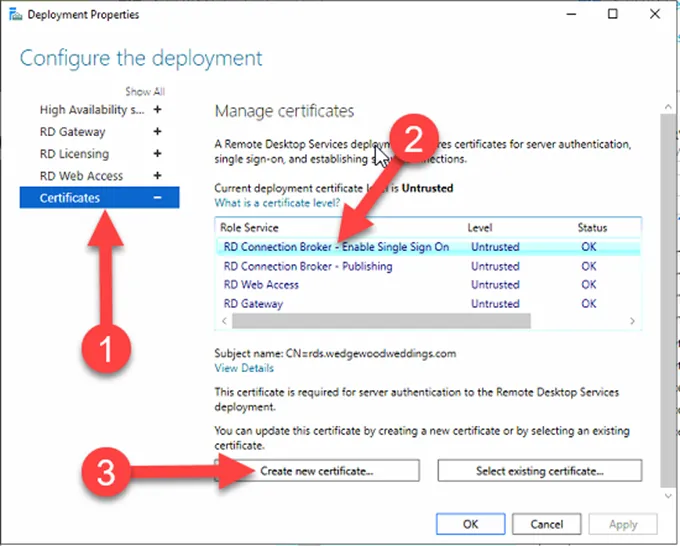
3. From the newly opened window, select Certificates and then the top listed role, RD Connection Broker – Enable Single Sign On and then Create new certificate.
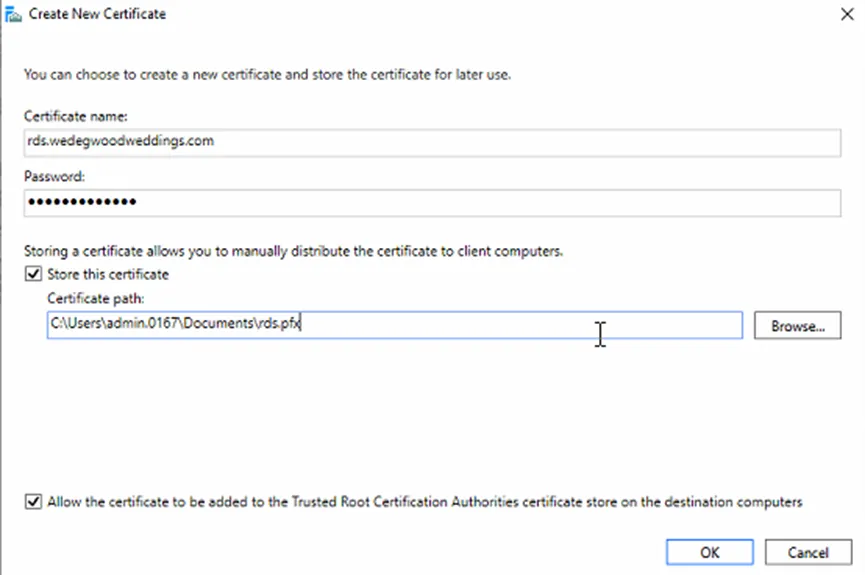
4. For certificate name, enter the same name as the existing certificate, ex. rds.wedgwoodweddings.com. Manually generate a password via PWstate. Select a certificate path for where you wish to save your PFX file and check the bottom box and select OK.
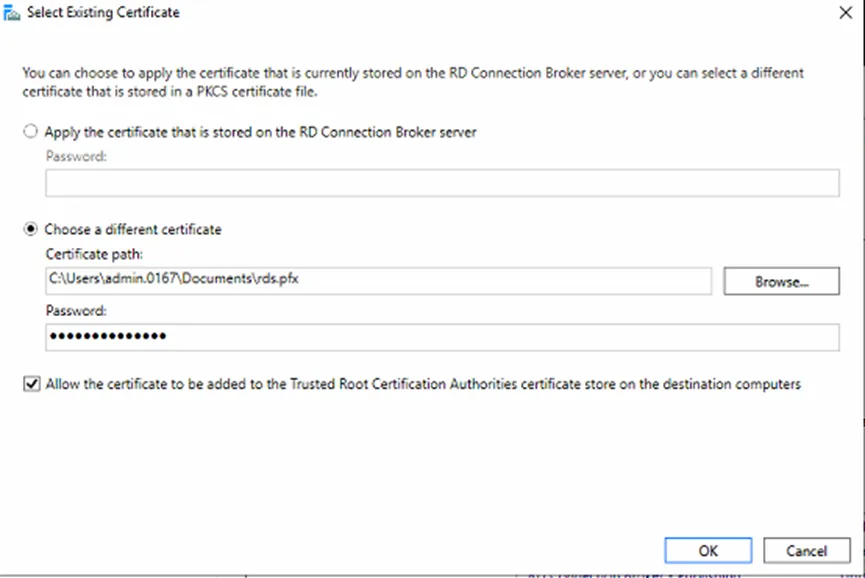
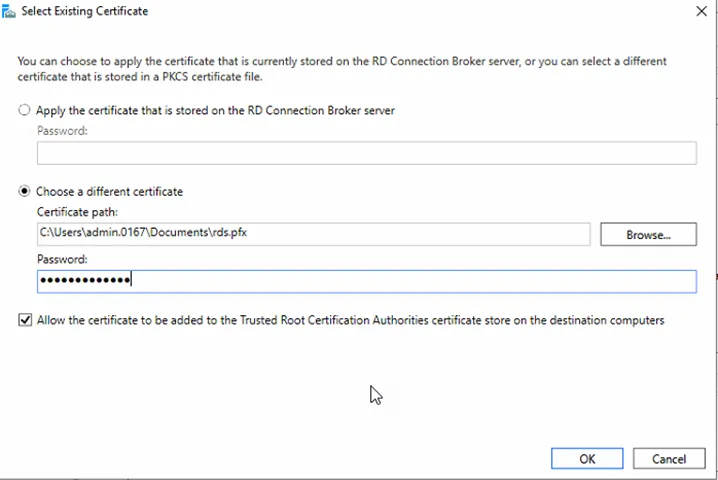
5. Now select, Select existing certificate. This is the same location shown in the third screenshot. Enter the same password you generated in step 4 and select the bottom box and select OK.
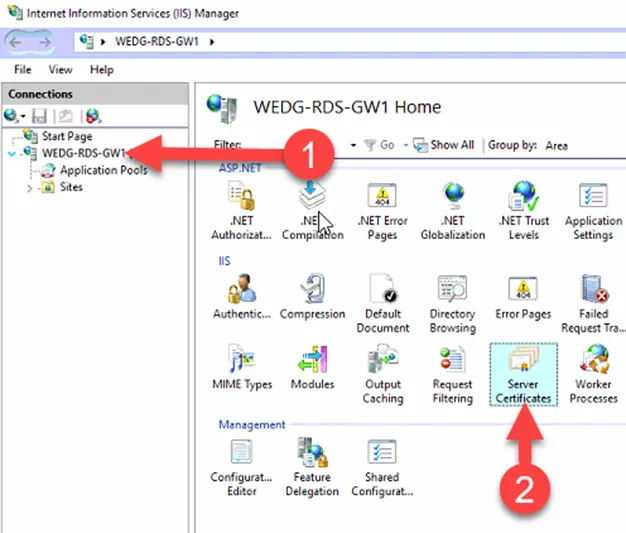
6. To confirm creation. Launch Internet Information Services (IIS) Manager, select the drop down under the server’s name and select Server Certificates.
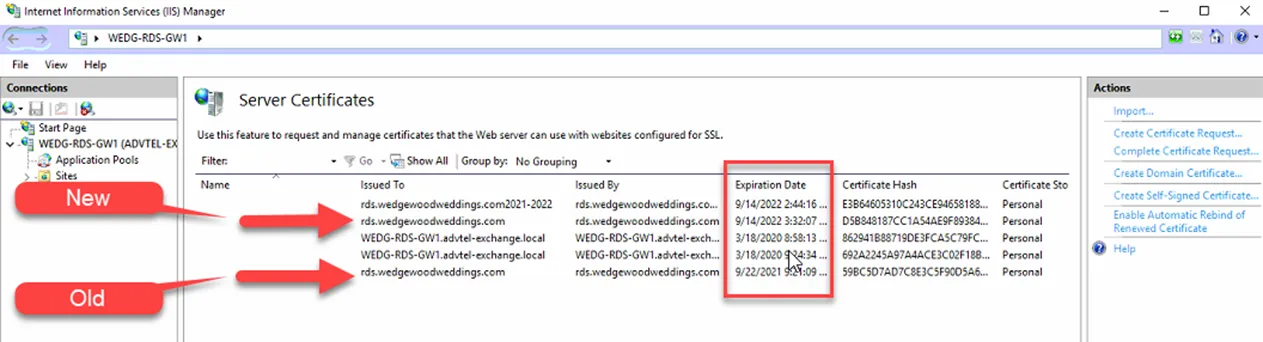
7. Notice your new certificate and old certificate have the same Issued To name. The differentiator is the Certificate Hash, that shows they are indeed different. Also notice the Expiration Date of your new file compared to the old.
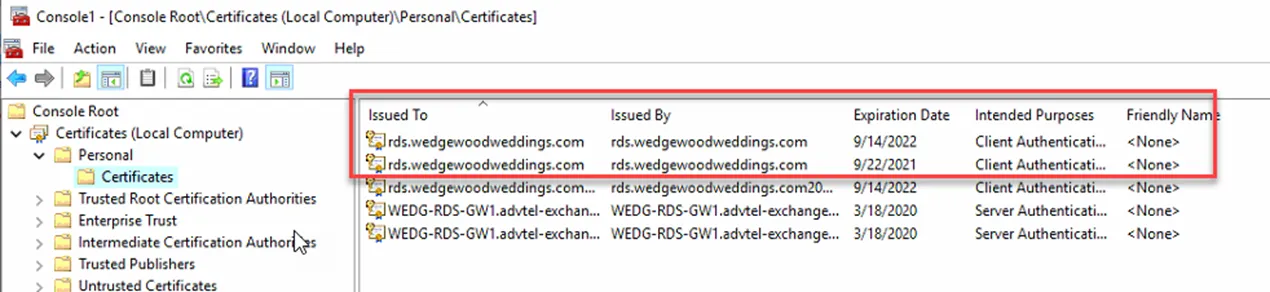
8. You can also reference the Personal Certificate Store. Search MMC, select File, then Add/Remove Console Snap-in… Select Certificates, then Add, Computer Account, Next, Local Computer, Finish, OK. Expand the Certificates tree on the left and then Personal – Certificates. Here you will see the old and the new by comparing the Expiration Date.
9. Go back to the same location shown in screen shot #3. You will now import your new certificate for the roles required for your gateway server. For the necessary roles, first select it, and then choose Select existing certificate on the lower right. Select your newly created self-signed certificate and enter the password you generated earlier, pick the bottom box and choose OK.
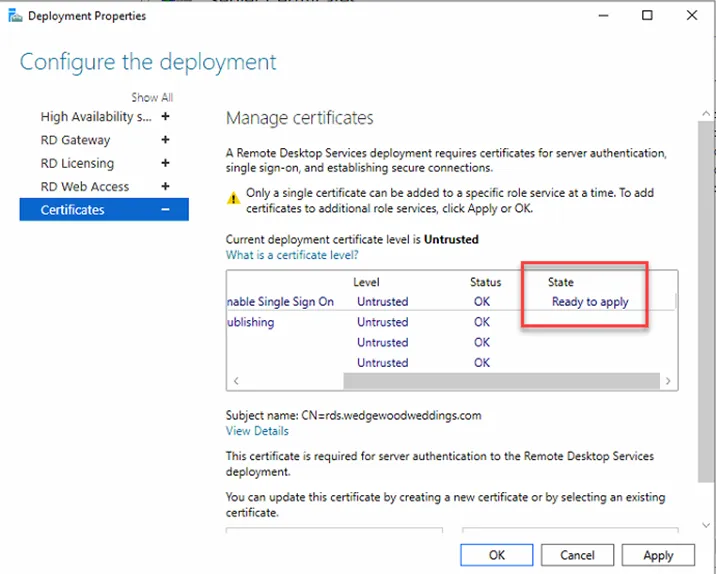
10. Now you will see the State section say Ready to apply. Select Apply on the lower right to apply your new certificate to this role. Reproduce these same steps for all applicable roles. One done choose OK.
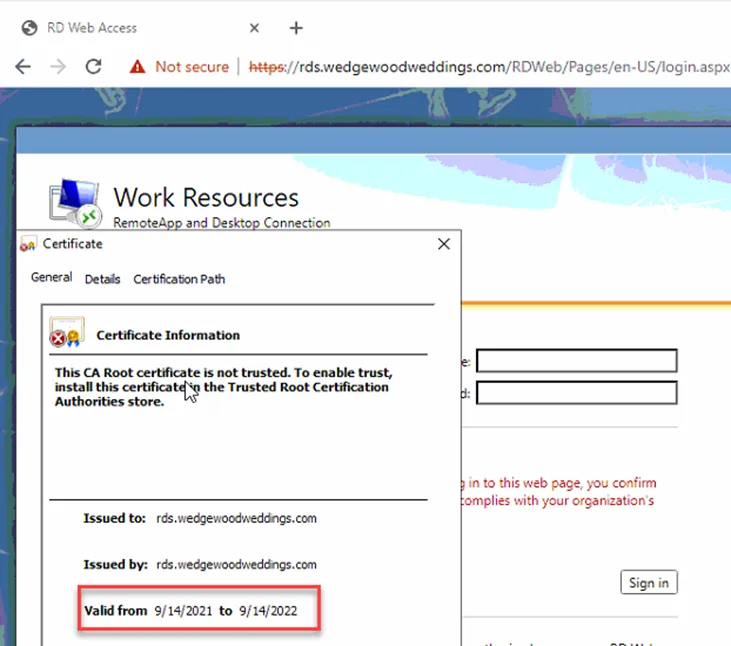
11. Browse to your RDS web URL and check your certificate to see if it applied. Note, in this example the certificate is self-signed, so it is untrusted. This is considered normal for this configuration.
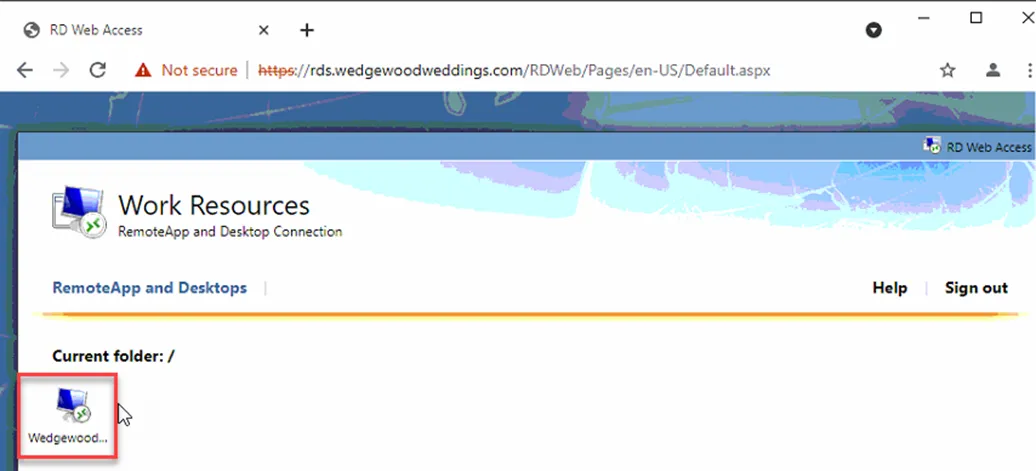
12. Close the Certificate window and sign in with domain admin credentials. You will now see the new RDS icon available for download; select to download.
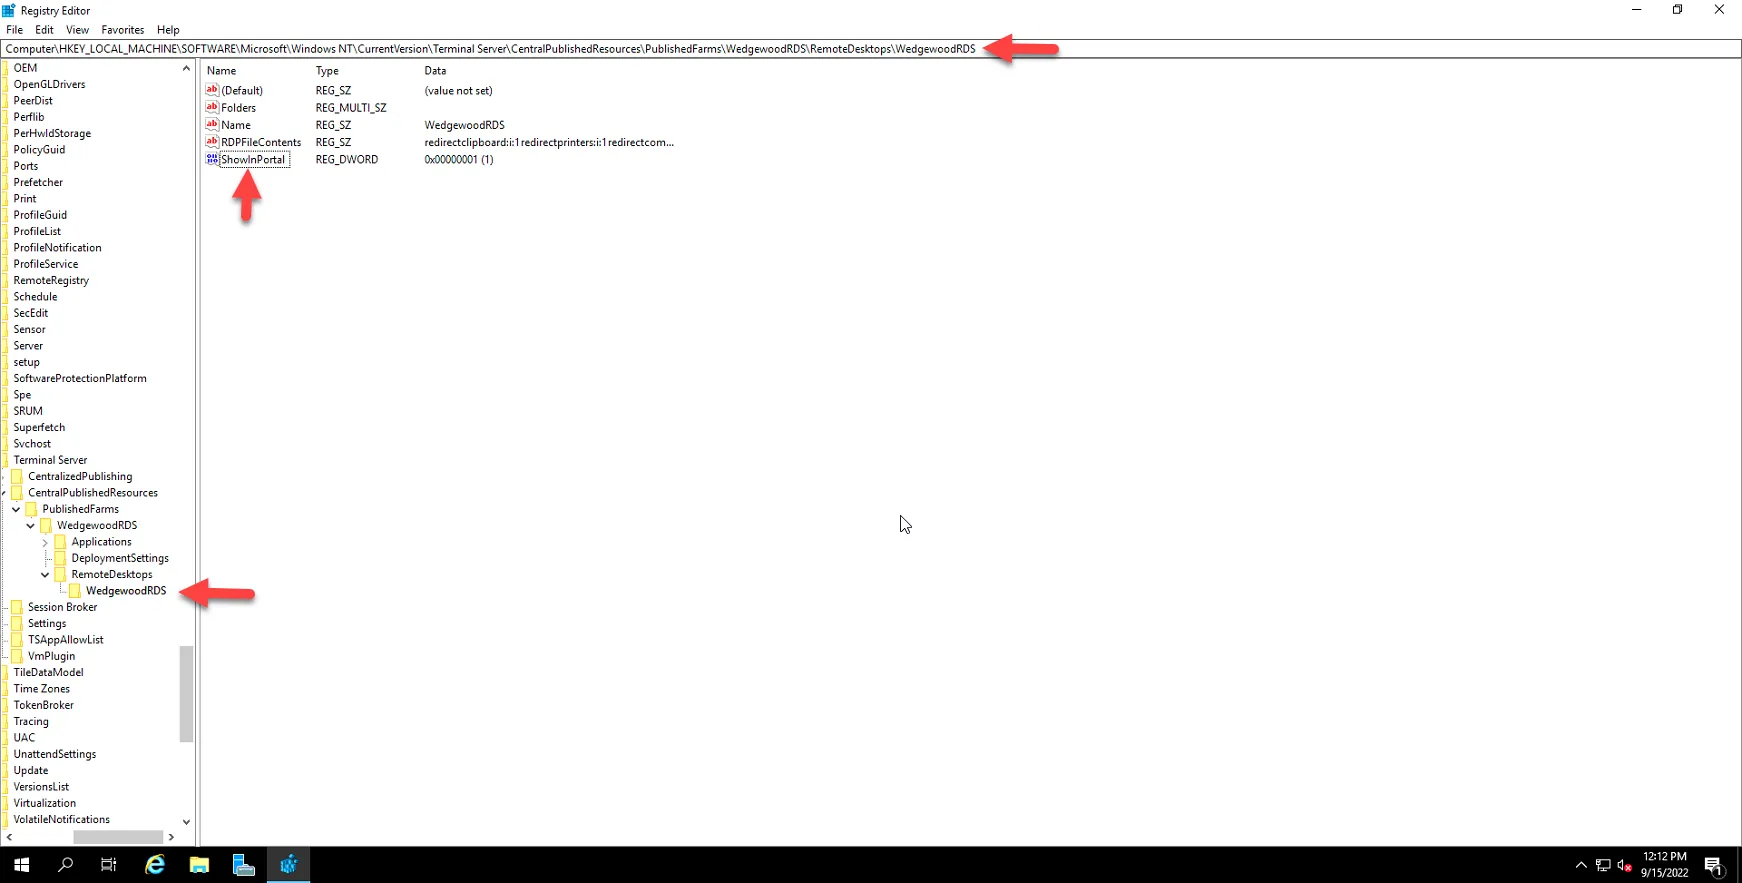
13. If you run into a challenge with not seeing the icon above. Check here and make sure this is set to (1).
14. You can use this downloaded package to deploy and distribute to others. You are done!