1. Locate unassigned Dreamtsoft tickets within the Service coordinator space.
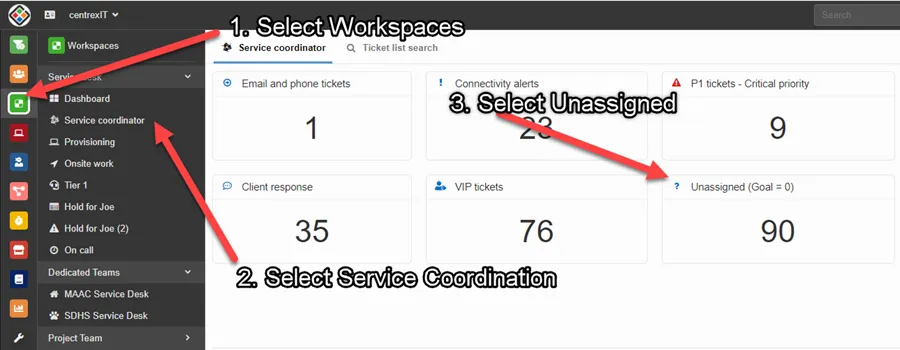
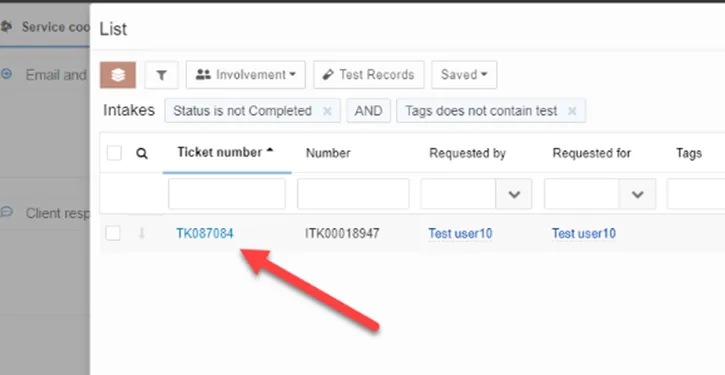
2. Once you have selected “Unassigned (Goal = 0)”, open up the oldest ticket that still requires attention.
3. This is where you will pull your resources (a.k.a. assign a technician) based off the Scope of Work required for the ticket. You will assign it based off availability and Wheelhouse.
C.A.R.E. Team = Average 15min. block availability
Support Team = Average 30min. block availability
Escalation Team = Average 1h. block availability
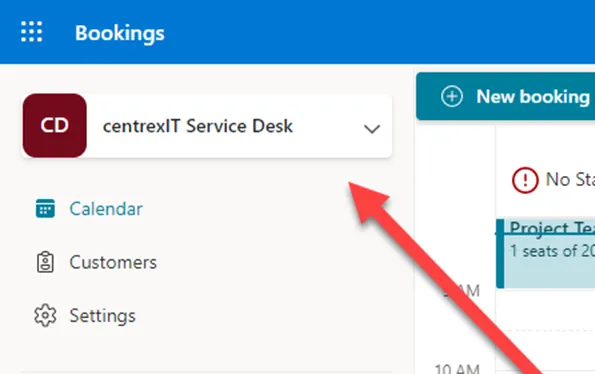
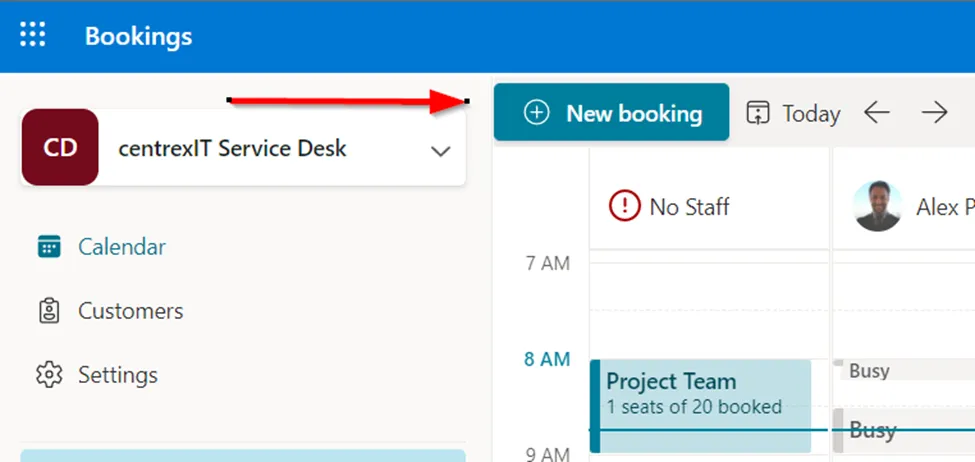
4. Once you have determined which service group is required for the ticket demand, go into Bookings (https://outlook.office.com/bookings/calendar) and verify you are in the correct calendar for either the team or service group.
5. You can adjust your selected view by selecting the users on the left-hand side of the page based on who you would like to compare the schedules of. This will pull information from everyone’s personal calendars and show “busy” or “tentative” if something else is taking place.
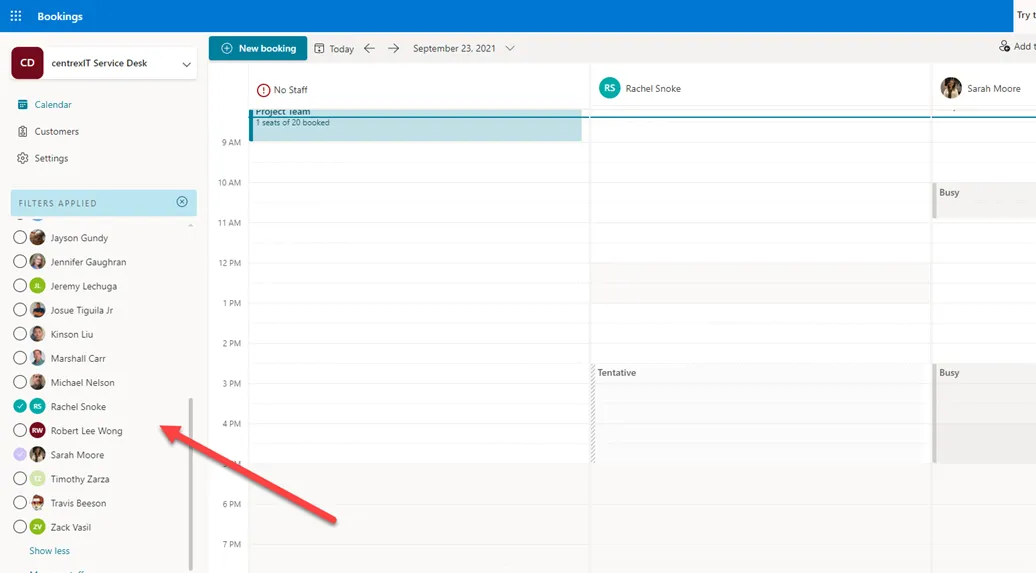
6. Review availabilities, and do not overschedule past their group utilization percentage. If this is a warm hand off to Service Coordination, confirm the client’s best date and timeframe to work on this task, and provide availabilities to them. In addition, try to schedule incidents within the first day, and requests within 3-5 days.
Utilization percentage (per day):
C.A.R.E. Team (Analyst): 50%
Support Team: 75-80%
7. Before booking, verify that you have a callback number, and valid email within the provided ticket. If this was a live answered call, try to return a callback to schedule. If this was an email ticket, respond within the ticket, requesting best date(s) and time period(s) for the client.
8. Once you have confirmed the timeslot and technician you would like to schedule, select “New booking.”
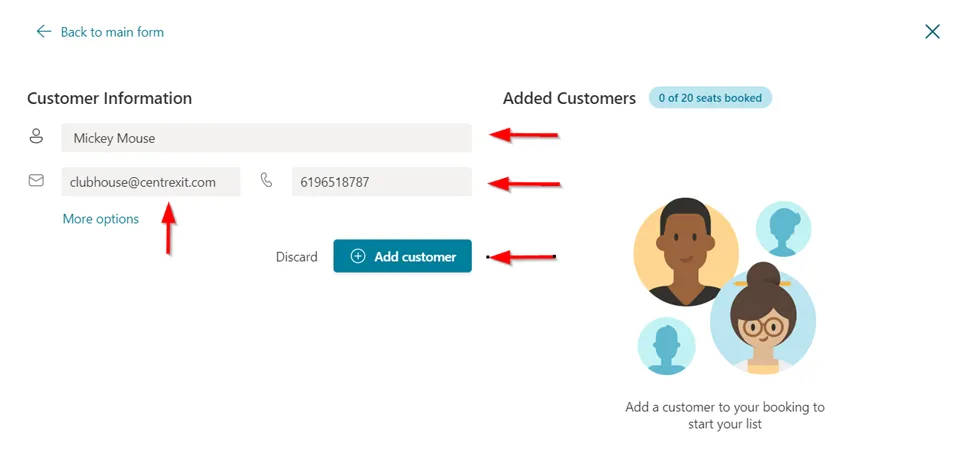
9. Once this pop-up appears, you can adjust the date and timeframe confirmed with the client. From this page, you will add the client/ticket information and schedule the technician. Make sure you include the general ticket synopsis, ticket number, and client information under More options.
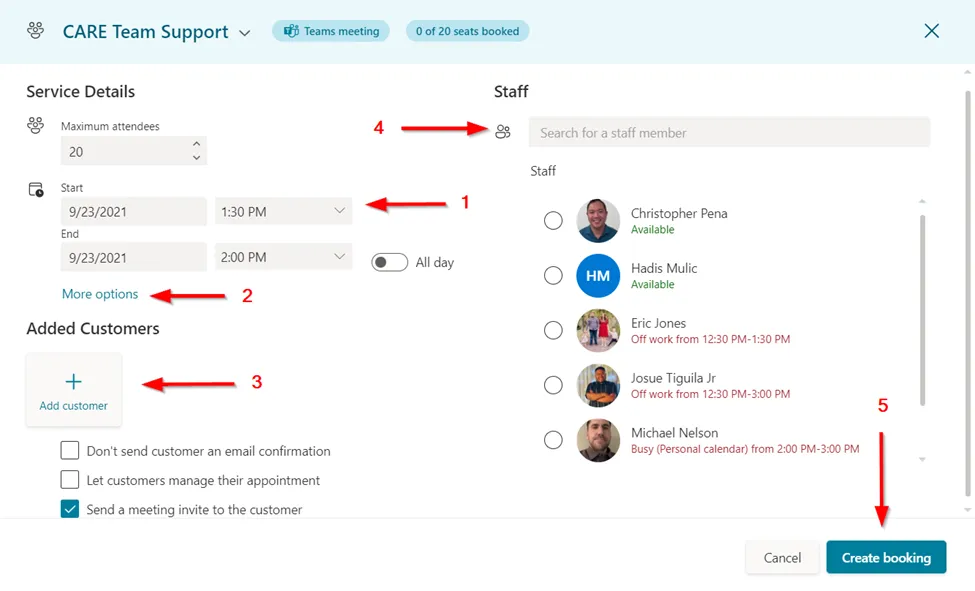
(There are 3 options prior to create booking; out of the 3, only select “Let the customers manage their appointment”. This allows them to confirm or cancel their appointment within a pre-set time frame.)
10. Once you select “Create Booking”, this timeslot will automatically block out on the technician’s calendar, and they will receive a confirmation email that they have been scheduled/assigned. You can always return to the appointment within the booking’s calendar and update if needed. The client will also receive a confirmation email, to which they can personally confirm or cancel if needed.
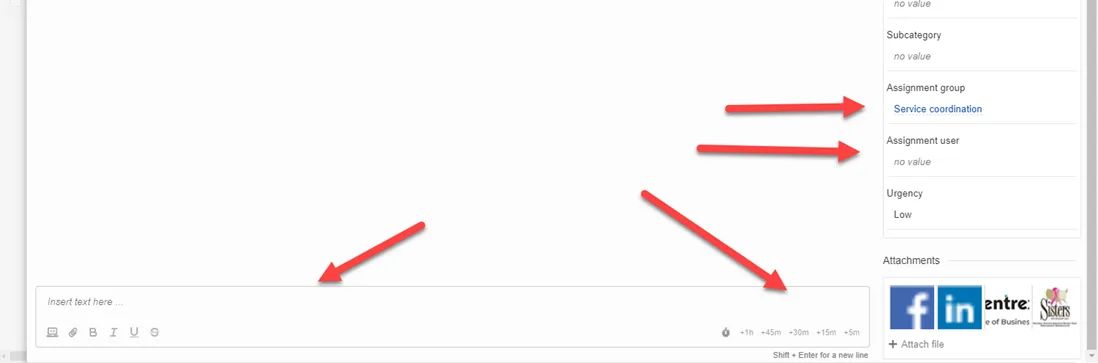
11. Return to the Dreamtsoft ticket and from the page shown below, go ahead and properly assign the scheduled technician and assignment group.
12. Include the scheduled timeslot in your notes and add your time.